주요 콘텐츠로 건너뛰기

Nikon 1 J3 Motherboard Replacement

필요한 것

  1. Nikon 1 J3 Motherboard Replacement, LCD Screen: 1 단계, 이미지 1/2 Nikon 1 J3 Motherboard Replacement, LCD Screen: 1 단계, 이미지 2/2
    • Using a Phillips #000 screwdriver, remove the three bottom screws connected to the back plate on the bottom of the device.

    • Remove the screws under the flaps covering the HDMI and mini USB ports.

  2. Nikon 1 J3 Motherboard Replacement: 2 단계, 이미지 1/1
    • Carefully pry back the back plate.

    • The plastic of the back plate may crack.

  3. Nikon 1 J3 Motherboard Replacement: 3 단계, 이미지 1/1
    • Lift up the screen, and use a Phillips #000 screwdriver to remove the (6) six screws holding down the underlying metal plate.

  4. Nikon 1 J3 Motherboard Replacement: 4 단계, 이미지 1/1
    • Pull back the black switch holding the orange screen ribbon in place, and remove the screen.

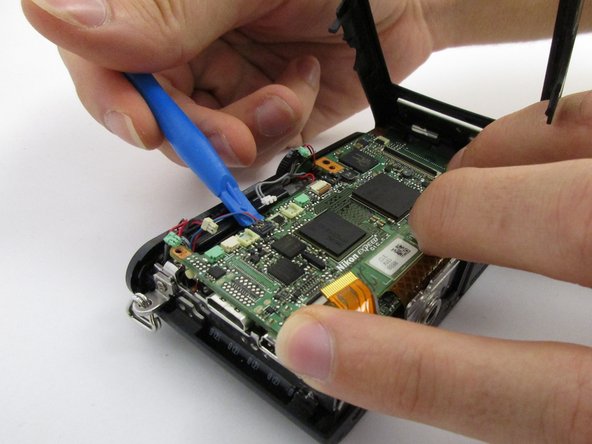
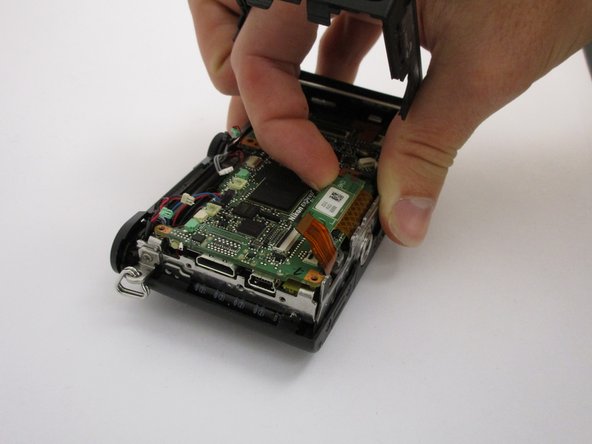
  5. Nikon 1 J3 Motherboard Replacement, Motherboard: 5 단계, 이미지 1/3 Nikon 1 J3 Motherboard Replacement, Motherboard: 5 단계, 이미지 2/3 Nikon 1 J3 Motherboard Replacement, Motherboard: 5 단계, 이미지 3/3
    • Use the plastic opening tool to pry off the connectors shown

    • Using your finger, pry off the connection flap.

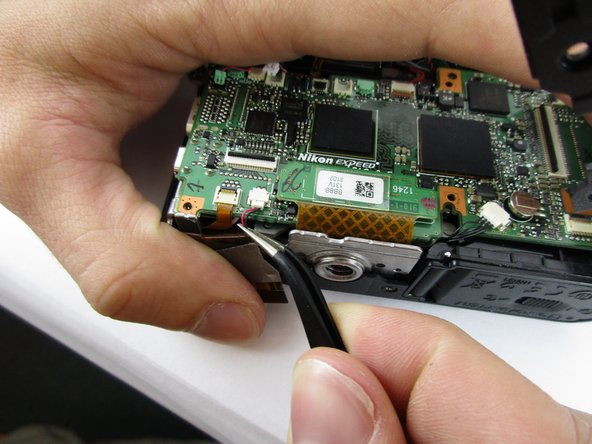
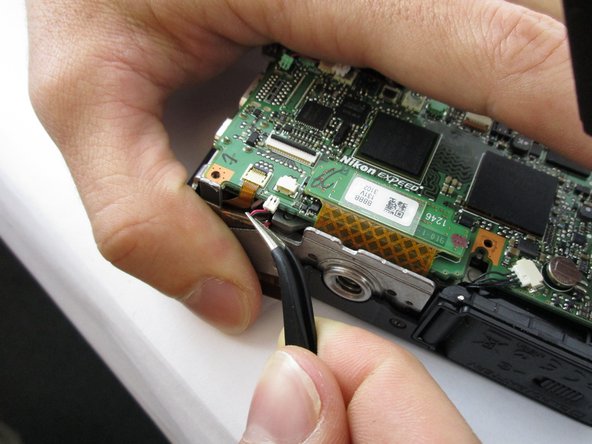
  6. Nikon 1 J3 Motherboard Replacement: 6 단계, 이미지 1/3 Nikon 1 J3 Motherboard Replacement: 6 단계, 이미지 2/3 Nikon 1 J3 Motherboard Replacement: 6 단계, 이미지 3/3
    이 단계에 사용된 도구:
    Tweezers
    $4.99
    구매
    • Using tweezers, pull out the shown connectors

  7. Nikon 1 J3 Motherboard Replacement: 7 단계, 이미지 1/1
    • Pull back the black switches holding the connecting ribbons in place, and pull out the ribbons.

    • Remove the motherboard.

결론

To reassemble your device, follow these instructions in reverse order.

다른 한 분이 해당 안내서를 완성하였습니다.

Austin Lackey

회원 가입일: 09/26/17

479 평판

안내서 4개 작성하였습니다

USF Tampa, Team S11-G4, Passmore Fall 2017 USF Tampa, Team S11-G4, Passmore Fall 2017 회원

USFT-PASSMORE-F17S11G4

3 회원들

안내서 4개 작성하였습니다

댓글 0개

댓글 쓰기

조회 통계:

24 시간 전: 2

7일 전: 7

30일 전: 17

전체 시간: 995