이 버전에는 잘못된 편집 사항이 있을 수 있습니다. 최신 확인된 스냅샷으로 전환하십시오.
필요한 것
-
이 단계는 번역되지 않았습니다. 번역을 도와주십시오
-
Locate the six screws on the outside of the camera (2 3.3 mm on the bottom, 2 5.25 mm on the left, and 2 5.25 mm on the right).
-
Using a Phillips 00 screwdriver, remove all of the six screws.
-
-
이 단계는 번역되지 않았습니다. 번역을 도와주십시오
-
Look closely at the connection between the ribbon cable and the motherboard. Locate the two grey tabs on either side of the connecting bracket.
-
Slide the grey tabs toward the bottom of camera. Gently disconnect the ribbon cable from the motherboard.
-
After disconnecting the data ribbon, you can now separate the back case from the front case.
-
-
이 단계는 번역되지 않았습니다. 번역을 도와주십시오
-
With the lens facing down and the bottom of the camera facing away from you, lift up the right edge of the LCD screen (left side of the screen will be glued down).
-
Insert plastic tool under the screen and gently pry up the left side of the screen until the glue seal is broken.
-
-
-
이 단계는 번역되지 않았습니다. 번역을 도와주십시오
-
Locate the orange ribbon cable and two wires (red and white) attached to the motherboard.
-
Lift up on the black clamp and pull out data cable.
-
The screen should now be completely free from the camera.
-
-
이 단계는 번역되지 않았습니다. 번역을 도와주십시오
-
Locate and remove the four 4.25 mm screws on the motherboard using a Phillips 00 screw driver.
-
-
이 단계는 번역되지 않았습니다. 번역을 도와주십시오
-
Remove the ribbon cable on the top right of the motherboard. To remove the cable, slide the two grey tabs, located on both sides, towards the top of the camera and gently pull the cable out.
-
-
이 단계는 번역되지 않았습니다. 번역을 도와주십시오
-
Turning the camera to the left and tilting it up, look at the left end of the motherboard to locate the grey bracket.
-
Twist the grey bracket counter clockwise to remove it from the silver LCD bracket.
-
-
이 단계는 번역되지 않았습니다. 번역을 도와주십시오
-
Using a Phillips 00 screwdriver, remove the 4.25 mm screw on bottom left edge of the LCD bracket.
-
Lift off the LCD bracket and slip the grey bracket through the LCD bracket. The LCD bracket should now be completely removed.
-
-
이 단계는 번역되지 않았습니다. 번역을 도와주십시오
-
Desolder the wire (both black and red) from the motherboard.
-
Remove the orange ribbon cable. This is done by sliding each side of the lock bar toward the center of the camera. Gently pull on the ribbon cable to remove.
-
-
이 단계는 번역되지 않았습니다. 번역을 도와주십시오
-
Gently peel back the black tape on the bottom, middle of the motherboard. Underneath you will find a screw.
-
Remove the 4.25 mm screw with a Phillips 00 screwdriver.
-
-
이 단계는 번역되지 않았습니다. 번역을 도와주십시오
-
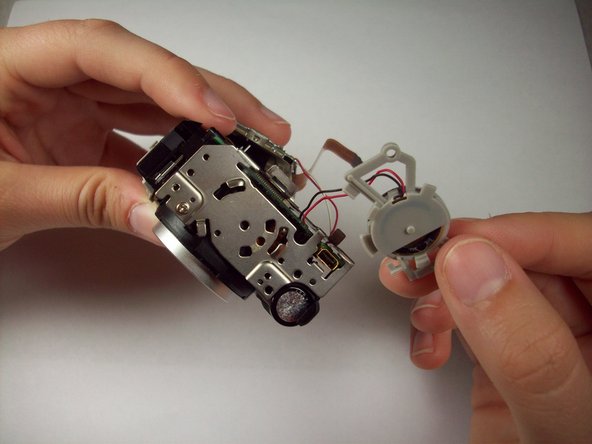
Gently pull the motherboard away from the lens.
-
Flip the camera over.
-
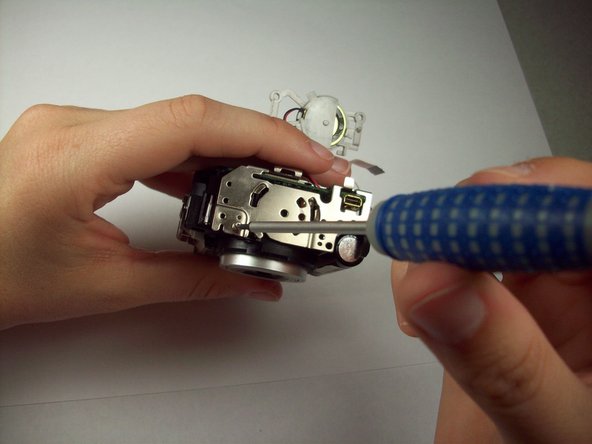
Connecting the motherboard to the front case are seven wires.
-
Desolder the seven wires.
-


팀

Cal Poly, Team 9-43, Regan Spring 2012 Cal Poly, Team 9-43, Regan Spring 2012 회원
CPSU-REGAN-S12S9G43
5 회원들
안내서 12개 작성하였습니다