주요 콘텐츠로 건너뛰기

Nikon Coolpix P100 Display Screen Replacement

필요한 것

  1. Nikon Coolpix P100 Display Screen Replacement, Display Screen: 1 단계, 이미지 1/3 Nikon Coolpix P100 Display Screen Replacement, Display Screen: 1 단계, 이미지 2/3 Nikon Coolpix P100 Display Screen Replacement, Display Screen: 1 단계, 이미지 3/3
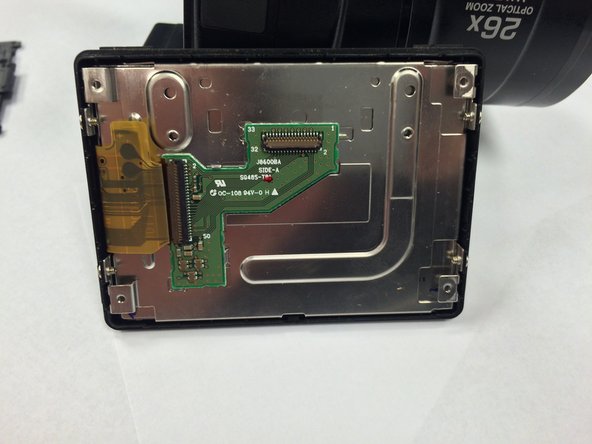
    • Flip the camera upside down so that the side with the serial number is face up.

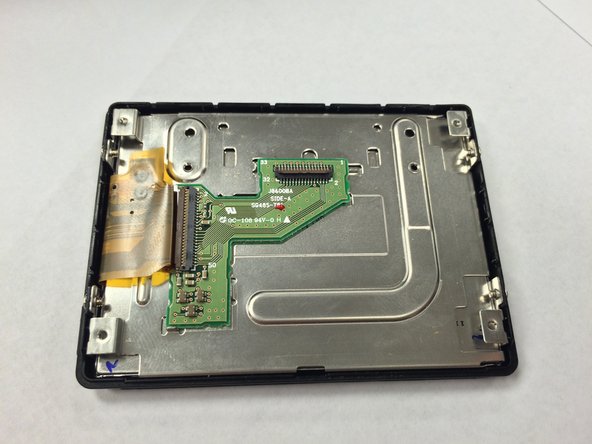
    • Pull back the display panel. Orient the panel so that you are able to view the back of it.

  2. Nikon Coolpix P100 Display Screen Replacement: 2 단계, 이미지 1/2 Nikon Coolpix P100 Display Screen Replacement: 2 단계, 이미지 2/2
    • Remove the two screws closest to the piece connecting the panel to the camera with a Phillips #1 screwdriver.

  3. Nikon Coolpix P100 Display Screen Replacement: 3 단계, 이미지 1/1
    • Remove the cover that was unscrewed in the last step.

  4. Nikon Coolpix P100 Display Screen Replacement: 4 단계, 이미지 1/1
    • Remove the remaining four screws on the outermost corners of the panel using a Phillips #1 screwdriver.

  5. Nikon Coolpix P100 Display Screen Replacement: 5 단계, 이미지 1/3 Nikon Coolpix P100 Display Screen Replacement: 5 단계, 이미지 2/3 Nikon Coolpix P100 Display Screen Replacement: 5 단계, 이미지 3/3
    • Use a plastic opening tool to pry open the back panel of the display screen.

  6. Nikon Coolpix P100 Display Screen Replacement: 6 단계, 이미지 1/3 Nikon Coolpix P100 Display Screen Replacement: 6 단계, 이미지 2/3 Nikon Coolpix P100 Display Screen Replacement: 6 단계, 이미지 3/3
    • Carefully unhook the ribbon that attaches the panel to the camera.

    • Remove the top black panel cover.

  7. Nikon Coolpix P100 Display Screen Replacement: 7 단계, 이미지 1/1
    • Remove the two screws on the panel that are closest to the ribbon cable using a Phillips #1 screwdriver.

  8. Nikon Coolpix P100 Display Screen Replacement: 8 단계, 이미지 1/1
    • Remove the other two screws on the opposite side of the panel using a Phillips #1 screwdriver.

  9. Nikon Coolpix P100 Display Screen Replacement: 9 단계, 이미지 1/2 Nikon Coolpix P100 Display Screen Replacement: 9 단계, 이미지 2/2
    • Separate the metal portion of the screen from the plastic portion.

  10. Nikon Coolpix P100 Display Screen Replacement: 10 단계, 이미지 1/2 Nikon Coolpix P100 Display Screen Replacement: 10 단계, 이미지 2/2
    • Carefully remove the ribbon connector cable from the metal portion of the display.

    • Remove the display from the rest of the device.

결론

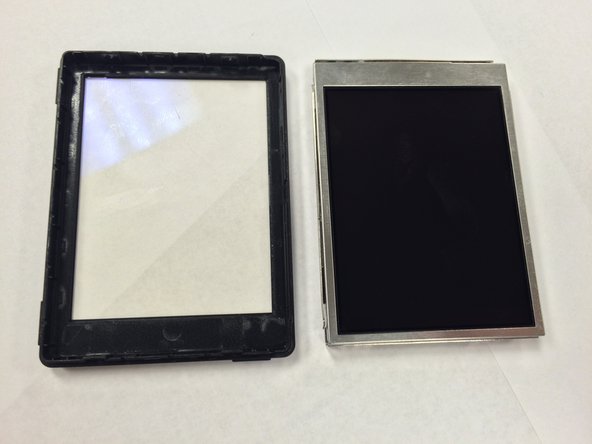
To reassemble your device, follow these instructions in reverse order.

다른 5명이 해당 안내서를 완성하였습니다.

Rikki Brown

회원 가입일: 01/09/15

267 평판

안내서 2개 작성하였습니다

USF Tampa, Team 1-1, Tanski Winter 2015 USF Tampa, Team 1-1, Tanski Winter 2015 회원

USFT-TANSKI-W15S1G1

3 회원들

안내서 8개 작성하였습니다

댓글 3개

This guide help me to change my screen on Nikon P100 with out to much trouble, however I found step 7 unnecessary.

David Fyock - 답글

Hello, I've a problem during the re-mount of the display. Someone can help me? Thanks in advance! Mark

cwmark56 - 답글

I can't reconnect the connector on the step 10. Can you help me?

cwmark56 - 답글

댓글 쓰기

조회 통계:

24 시간 전: 1

7일 전: 11

30일 전: 32

전체 시간: 2,708