주요 콘텐츠로 건너뛰기

Nikon Coolpix S30 LCD Screen Replacement

필요한 것

  1. Nikon Coolpix S30 LCD Screen Replacement, Batteries: 1 단계, 이미지 1/2 Nikon Coolpix S30 LCD Screen Replacement, Batteries: 1 단계, 이미지 2/2
    • Slide the battery cover to the right.

    • The hinge is on the left side of the cover which will allow the cover to stay attached.

  2. Nikon Coolpix S30 LCD Screen Replacement: 2 단계, 이미지 1/2 Nikon Coolpix S30 LCD Screen Replacement: 2 단계, 이미지 2/2
    • Slide the second cover (yellow) to the right (similar to the outer cover). This will allow the batteries to be exposed.

  3. Nikon Coolpix S30 LCD Screen Replacement: 3 단계, 이미지 1/1
    • Remove the batteries by gently tipping the camera.

  4. Nikon Coolpix S30 LCD Screen Replacement, LCD Screen: 4 단계, 이미지 1/1
    • FIRST: remove the batteries.

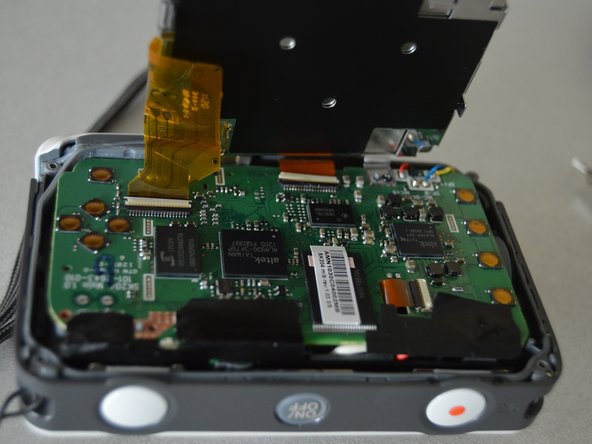
    • Unscrew the four screws around the corners of the camera. This can be done using the iFixit kit's T5 (star tip screwdriver)

  5. Nikon Coolpix S30 LCD Screen Replacement: 5 단계, 이미지 1/1
    • Unscrew the screw on the left (silver) first. It can be removed with the same tip (T5)

    • Change screwdriver tip to iFixit kit's PH000. This removes the screw on the right (black) It is a small Phillips head.

  6. Nikon Coolpix S30 LCD Screen Replacement: 6 단계, 이미지 1/1
    • Gently separate the back panel from the rest of the camera.

  7. Nikon Coolpix S30 LCD Screen Replacement: 7 단계, 이미지 1/1
    • Remove screw connecting the top right of the screen to the mother board.

  8. Nikon Coolpix S30 LCD Screen Replacement: 8 단계, 이미지 1/1
    • Spin the camera around and gently pull the screen towards you. This will allow easy access to components on the motherboard.

  9. Nikon Coolpix S30 LCD Screen Replacement: 9 단계, 이미지 1/2 Nikon Coolpix S30 LCD Screen Replacement: 9 단계, 이미지 2/2
    • Remove connected strip by flipping up the small off-white plastic strip with tweezers.

    • Gently pull out the strip from the motherboard.

  10. Nikon Coolpix S30 LCD Screen Replacement: 10 단계, 이미지 1/2 Nikon Coolpix S30 LCD Screen Replacement: 10 단계, 이미지 2/2
    • Remove screw that is now in the top right corner. This will detach the screen entirely.

결론

To reassemble your device, follow these instructions in reverse order.

다른 한 분이 해당 안내서를 완성하였습니다.

Cassie Hamm

회원 가입일: 01/21/15

207 평판

안내서 2개 작성하였습니다

Penn State, Team 2-4, Kaschak Winter 2015 Penn State, Team 2-4, Kaschak Winter 2015 회원

PSU-KASCHAK-W15S2G4

4 회원들

안내서 5개 작성하였습니다

댓글 0개

댓글 쓰기

조회 통계:

24 시간 전: 0

7일 전: 0

30일 전: 4

전체 시간: 863