주요 콘텐츠로 건너뛰기

Nikon Coolpix S3500 Rear Buttons Replacement

필요한 것

  1. Nikon Coolpix S3500 Rear Buttons  Replacement, Back Panel Disassembly: 1 단계, 이미지 1/2 Nikon Coolpix S3500 Rear Buttons  Replacement, Back Panel Disassembly: 1 단계, 이미지 2/2
    • With the battery door facing upward, take your PH000 screwdriver and remove the 4 mm screws from the bottom of the device.

  2. Nikon Coolpix S3500 Rear Buttons  Replacement: 2 단계, 이미지 1/2 Nikon Coolpix S3500 Rear Buttons  Replacement: 2 단계, 이미지 2/2
    • After removing the screws, rotate the device to where the micro USB port is facing up.

    • Now, take your PH000 screwdriver and remove the two 4 mm screws from the device.

  3. Nikon Coolpix S3500 Rear Buttons  Replacement: 3 단계, 이미지 1/2 Nikon Coolpix S3500 Rear Buttons  Replacement: 3 단계, 이미지 2/2
    • Rotate the device 180 degrees so that the opposite side of the device is now facing upwards.

    • Now, take your PH000 screwdriver and remove the two 4 mm screws from the device.

  4. Nikon Coolpix S3500 Rear Buttons  Replacement: 4 단계, 이미지 1/2 Nikon Coolpix S3500 Rear Buttons  Replacement: 4 단계, 이미지 2/2
    • After all of the screws are removed, rotate the device so that the bottom of the device is now facing upward.

    • With your index finger, press down and slide open the memory card/battery door.

  5. Nikon Coolpix S3500 Rear Buttons  Replacement: 5 단계, 이미지 1/3 Nikon Coolpix S3500 Rear Buttons  Replacement: 5 단계, 이미지 2/3 Nikon Coolpix S3500 Rear Buttons  Replacement: 5 단계, 이미지 3/3
    • Now take the plastic opening tool, and place it in the seam of the device.

    • Now, work the tool around the seam of the device until you can safely pry open the device.

  6. Nikon Coolpix S3500 Rear Buttons  Replacement: 6 단계, 이미지 1/2 Nikon Coolpix S3500 Rear Buttons  Replacement: 6 단계, 이미지 2/2
    • Be careful when removing the back piece of your device.

    • Using your free hand, finish prying off the back piece of the device.

  7. Nikon Coolpix S3500 Rear Buttons  Replacement, Rear Buttons: 7 단계, 이미지 1/1
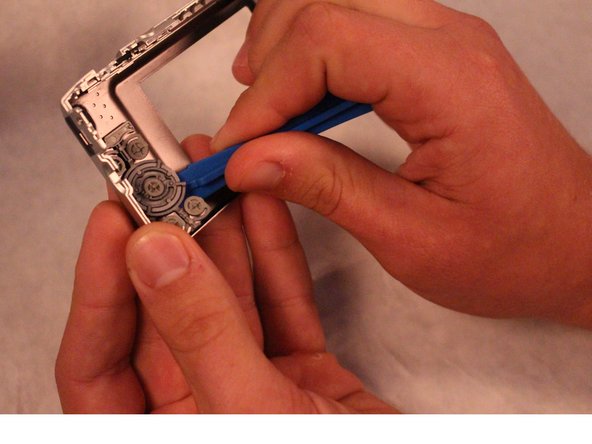
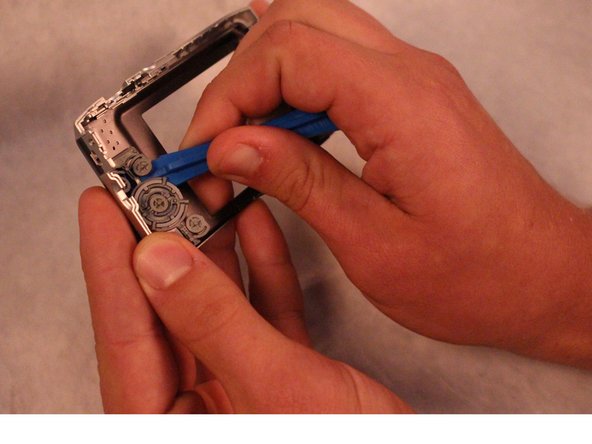
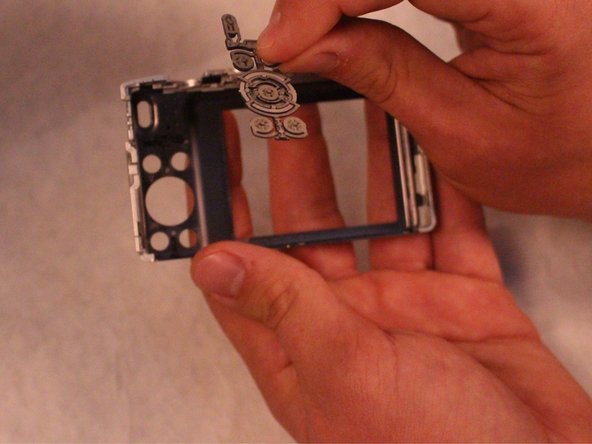
    • Take the rear panel of the device in the palm of your hand with the buttons facing downward.

  8. Nikon Coolpix S3500 Rear Buttons  Replacement: 8 단계, 이미지 1/3 Nikon Coolpix S3500 Rear Buttons  Replacement: 8 단계, 이미지 2/3 Nikon Coolpix S3500 Rear Buttons  Replacement: 8 단계, 이미지 3/3
    • On the back side of the device's rear panel, you will see the plastic brackets that hold the rear function buttons in place.

    • With your other hand, take the pry tool and start working your way around the edge of the buttons

  9. Nikon Coolpix S3500 Rear Buttons  Replacement: 9 단계, 이미지 1/2 Nikon Coolpix S3500 Rear Buttons  Replacement: 9 단계, 이미지 2/2
    • Now, take the hand that was previously holding the pry tool, and finish pulling off the rear function buttons.

결론

To reassemble your device, follow these instructions in reverse order.

Jordan Rosemeyer

회원 가입일: 10/13/15

491 평판

안내서 4개 작성하였습니다

Sam Houston State, Team 2-1, Blackburne Fall 2015 Sam Houston State, Team 2-1, Blackburne Fall 2015 회원

SHSU-BLACKBURNE-F15S2G1

3 회원들

안내서 7개 작성하였습니다

댓글 0개

댓글 쓰기

조회 통계:

24 시간 전: 0

7일 전: 0

30일 전: 3

전체 시간: 410