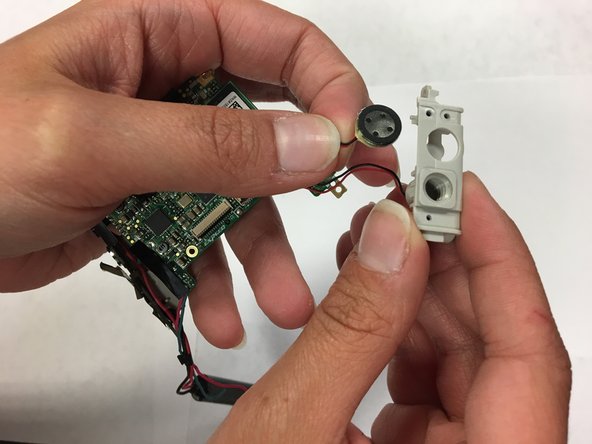
주요 콘텐츠로 건너뛰기

Nikon Coolpix S4000 Speaker Replacement

필요한 것

  1. Nikon Coolpix S4000 Speaker Replacement, Battery: 1 단계, 이미지 1/1
    • Slide the battery door open with a finger or thumb and release it so the door opens.

  2. Nikon Coolpix S4000 Speaker Replacement: 2 단계, 이미지 1/1
    • Push the orange tab back and the battery will pop out.

  3. Nikon Coolpix S4000 Speaker Replacement, Casing: 3 단계, 이미지 1/3 Nikon Coolpix S4000 Speaker Replacement, Casing: 3 단계, 이미지 2/3 Nikon Coolpix S4000 Speaker Replacement, Casing: 3 단계, 이미지 3/3
    • Remove four 2mm Phillips #000 screws.

    • Remove two black 3mm Phillips #000 screws.

    • Remove one 4mm Phillips #000 screws.

    • Remove two silver 3mm Phillips #000 screws.

  4. Nikon Coolpix S4000 Speaker Replacement: 4 단계, 이미지 1/2 Nikon Coolpix S4000 Speaker Replacement: 4 단계, 이미지 2/2
    • Use your fingers, or a spudger, to lift up one end of the casing and then pry the two pieces apart.

  5. Nikon Coolpix S4000 Speaker Replacement: 5 단계, 이미지 1/3 Nikon Coolpix S4000 Speaker Replacement: 5 단계, 이미지 2/3 Nikon Coolpix S4000 Speaker Replacement: 5 단계, 이미지 3/3
    • Turn the camera over.

    • Use your fingers, or spudger, to lift one end of the back casing and pry it apart from back of the camera.

  6. Nikon Coolpix S4000 Speaker Replacement, Lens Casing: 6 단계, 이미지 1/1
    • Remove the single 3mm Phillips #000 screw from the back of the camera.

  7. Nikon Coolpix S4000 Speaker Replacement: 7 단계, 이미지 1/2 Nikon Coolpix S4000 Speaker Replacement: 7 단계, 이미지 2/2
    • Turn the camera over and pry the lens casing off by slipping your fingers, or spudger, under the lip of the casing.

    • Desolder the two wires connecting the casing to the motherboard.

    • Work carefully so that you do not break the soldered wires.

  8. Nikon Coolpix S4000 Speaker Replacement, Screen: 8 단계, 이미지 1/1
    • Remove the single 2mm Phillips #000 screw.

  9. Nikon Coolpix S4000 Speaker Replacement: 9 단계, 이미지 1/3 Nikon Coolpix S4000 Speaker Replacement: 9 단계, 이미지 2/3 Nikon Coolpix S4000 Speaker Replacement: 9 단계, 이미지 3/3
    • Use the flat end of a spudger to lift up the black tabs on the ZIF connectors.

    • Pull the ribbon cables out of the ZIF connectors.

  10. Nikon Coolpix S4000 Speaker Replacement: 10 단계, 이미지 1/2 Nikon Coolpix S4000 Speaker Replacement: 10 단계, 이미지 2/2
    • Grabbing the top left corner of the screen, pull it up until the screen comes completely off.

  11. Nikon Coolpix S4000 Speaker Replacement, Lens: 11 단계, 이미지 1/2 Nikon Coolpix S4000 Speaker Replacement, Lens: 11 단계, 이미지 2/2
    • Remove the two 3mm Phillips #000 screws.

  12. Nikon Coolpix S4000 Speaker Replacement: 12 단계, 이미지 1/2 Nikon Coolpix S4000 Speaker Replacement: 12 단계, 이미지 2/2
    • Turn the camera over and remove a single 4mm Phillips #000 screw.

    • There may be black tape covering the screw.

  13. Nikon Coolpix S4000 Speaker Replacement: 13 단계, 이미지 1/2 Nikon Coolpix S4000 Speaker Replacement: 13 단계, 이미지 2/2
    • Use the flat end of a spudger to flip up the black tabs on the ZIF connectors.

    • Pull the ribbon cables out of the ZIF connectors.

  14. Nikon Coolpix S4000 Speaker Replacement: 14 단계, 이미지 1/2 Nikon Coolpix S4000 Speaker Replacement: 14 단계, 이미지 2/2
    • Use the flat end of a spudger to pry the lens locking tabs open while pulling the lens away from the camera body.

    • The tabs are brittle so use gently force.

  15. Nikon Coolpix S4000 Speaker Replacement: 15 단계, 이미지 1/1
    • Use the flat end of a spudger to lift up the black tab on the ZIF connector.

    • Pull the orange ribbon cable out of the ZIF connector.

    • Separate the lens from the motherboard.

  16. Nikon Coolpix S4000 Speaker Replacement, Speaker: 16 단계, 이미지 1/2 Nikon Coolpix S4000 Speaker Replacement, Speaker: 16 단계, 이미지 2/2
    • Slide the speaker out from the bottom of the speaker piece.

결론

To reassemble your device, follow these instructions in reverse order.

Matina Newsom

회원 가입일: 02/21/18

779 평판

안내서 8개 작성하였습니다

댓글 0개

댓글 쓰기

조회 통계:

24 시간 전: 1

7일 전: 5

30일 전: 5

전체 시간: 117