주요 콘텐츠로 건너뛰기

Nikon Coolpix S6800 Midframe Replacement

필요한 것

  1. Nikon Coolpix S6800 Midframe Replacement, Midframe: 1 단계, 이미지 1/1
    • Turn the camera upside down and locate the two, black screws.

    • Using the Philips #00 Screwdriver, remove each screw.

  2. Nikon Coolpix S6800 Midframe Replacement: 2 단계, 이미지 1/1
    • Rotate the camera to the left side and remove the two, black, #00 Philips screws.

  3. Nikon Coolpix S6800 Midframe Replacement: 3 단계, 이미지 1/1
    • Rotate the camera to the right side and remove the two, black, #00 Philips screws.

    • The last screw that you remove will catch as the cover is trying to pop off. Try to keep the cover in place to allow for the screw to just fall out. Once you remove the screws, be careful not to lose the screws for reassembly.

  4. Nikon Coolpix S6800 Midframe Replacement: 4 단계, 이미지 1/1
    • Carefully remove the back plate from the body of the camera.

    • All of the external screws are black with rounded heads.

  5. Nikon Coolpix S6800 Midframe Replacement: 5 단계, 이미지 1/1
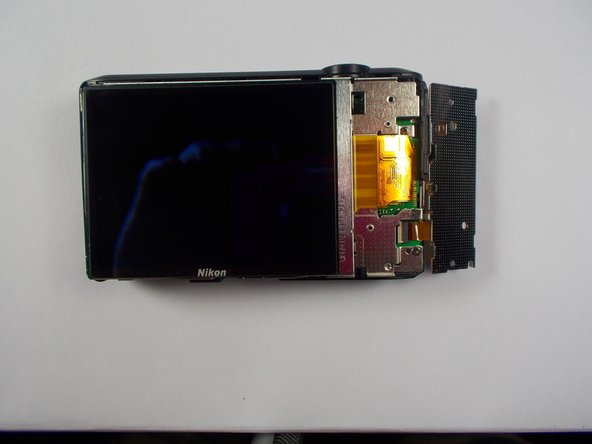
    • Using the Philips #00 Screwdriver, remove the two screws that are holding the keypad.

  6. Nikon Coolpix S6800 Midframe Replacement: 6 단계, 이미지 1/2 Nikon Coolpix S6800 Midframe Replacement: 6 단계, 이미지 2/2
    • Flip the keypad away from the camera

    • Be careful with the electric ribbon. Do not crease it or tug on it. Gently flip it away from the camera.

  7. Nikon Coolpix S6800 Midframe Replacement: 7 단계, 이미지 1/2 Nikon Coolpix S6800 Midframe Replacement: 7 단계, 이미지 2/2
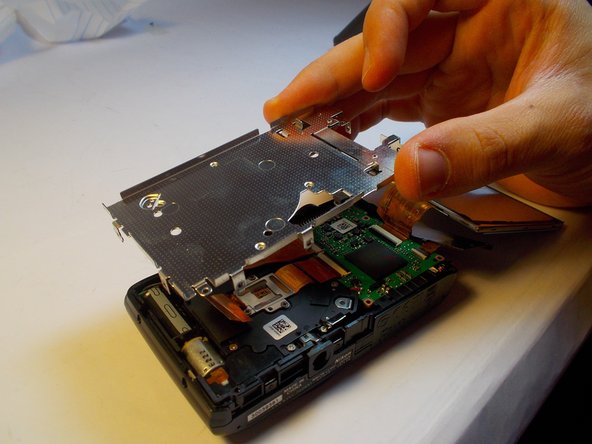
    • Gently pull the display away from the camera body.

    • Fold the display away from the camera

    • Be careful with the electric ribbon. Do not crease it or tug on it. Gently flip it away from the camera.

    • Be careful with the display. Do not press on it or drop it.

  8. Nikon Coolpix S6800 Midframe Replacement: 8 단계, 이미지 1/2 Nikon Coolpix S6800 Midframe Replacement: 8 단계, 이미지 2/2
    • Remove the visible midframe screws.

    • There is a screw beneath the foam square that must be removed as well.

    • The screw holding the silver wrist-strap loop on the side of the camera must also be removed.

    • Gently lift the midframe up and out of the device.

    • Be careful moving the midframe away from the ribbons don't force it, gently slide the plate away from the ribbons.

결론

To reassemble your device, follow these instructions in reverse order.

다른 2명이 해당 안내서를 완성하였습니다.

sam ford

회원 가입일: 03/30/15

518 평판

안내서 4개 작성하였습니다

UMass Dartmouth, Team 1-2, Shastany Spring 2015 UMass Dartmouth, Team 1-2, Shastany Spring 2015 회원

UMASSD-SHASTANY-S15S1G2

4 회원들

안내서 8개 작성하였습니다

댓글 0개

댓글 쓰기

조회 통계:

24 시간 전: 1

7일 전: 1

30일 전: 1

전체 시간: 731