주요 콘텐츠로 건너뛰기

Nintendo DS Lite Trigger Buttons Replacement

필요한 것

  1. Nintendo DS Lite Trigger Buttons Replacement, Battery: 1 단계, 이미지 1/2 Nintendo DS Lite Trigger Buttons Replacement, Battery: 1 단계, 이미지 2/2
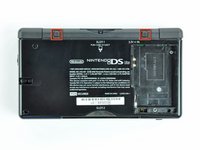
    • Unscrew the Phillips screw securing the battery cover to the lower case.

    • The screw remains captive to the battery cover.

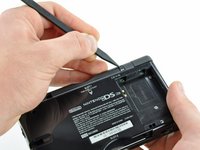
    • Pry the battery cover upward with a spudger or fingernail, and lift out of the lower case.

  2. Nintendo DS Lite Trigger Buttons Replacement: 2 단계, 이미지 1/1
    • Wedge the edge of a spudger in between the side of the battery and the lower case housing and pry upward to dislodge the battery.

    • Remove the battery from the DS Lite.

  3. Nintendo DS Lite Trigger Buttons Replacement, Lower Case: 3 단계, 이미지 1/2 Nintendo DS Lite Trigger Buttons Replacement, Lower Case: 3 단계, 이미지 2/2
    • Use the tip of a spudger to pry both rubber feet off the DS Lite.

  4. Nintendo DS Lite Trigger Buttons Replacement: 4 단계, 이미지 1/1
    • Remove the following screws securing the lower case to the body of the DS Lite:

    • Two 4.3 mm gold Phillips screws

    • One 3.9 mm black Tri-Wing screw

    • One 3.3 mm silver Phillips screw

    • Three 5.5 mm silver Tri-Wing screws

  5. Nintendo DS Lite Trigger Buttons Replacement: 5 단계, 이미지 1/3 Nintendo DS Lite Trigger Buttons Replacement: 5 단계, 이미지 2/3 Nintendo DS Lite Trigger Buttons Replacement: 5 단계, 이미지 3/3
    • Remove the cover from the Game Pak slot before continuing.

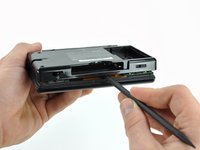
    • Insert the edge of a spudger in between the lower and upper case near the top right corner of the DS Lite.

    • Carefully run the spudger along the right edge of the DS Lite, creating an opening in the process.

    • Continue running the spudger along the backside of the DS Lite until the majority of the lower case has been separated from the upper case.

  6. Nintendo DS Lite Trigger Buttons Replacement: 6 단계, 이미지 1/1
    • Lift the lower case away from the rest of the DS Lite.

    • Pull carefully. Some units are sealed with adhesive, and pulling too hard can damage the power switch.

    • When re-assembling, make sure that power switch and volume sliders are properly aligned with the switches on the motherboard.

  7. Nintendo DS Lite Trigger Buttons Replacement, Trigger Buttons: 7 단계, 이미지 1/2 Nintendo DS Lite Trigger Buttons Replacement, Trigger Buttons: 7 단계, 이미지 2/2
    • Lift both trigger buttons out of the DS Lite.

    • The trigger buttons are held in very loosely by small metal pegs and springs. Don't lose track of these pieces.

    • The second picture shows the correct configuration of the trigger assembly for reassembly purposes.

결론

To reassemble your device, follow these instructions in reverse order.

다른 34명이 해당 안내서를 완성하였습니다.

Matthew Newsom

회원 가입일: 01/05/10

39,496 평판

안내서 67개 작성하였습니다

댓글 6개

no no no no no

seng - 답글

Thank you this helped a lot I can finnaly play Zelda and Mario Cart now

MattTheGamer 49 - 답글

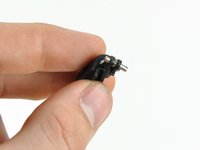
Hi! I am attempting a trigger repair, but it seems the console was opened and worked on before I got my hands on it, and the switch for the trigger snapped off the board. I taped it to the board to test, and it still works. Is my best bet soldering the switch back to the motherboard? Or could I get away with superglue? (I've never soldered before, and this looks delicate)

Tamara Girodie - 답글

I would definitely solder it, usually, these triggers are the ones that get the most stress and dirt around them so superglue might not last that much. If you have a problem with the trigger still. You might want to check the video I uploaded, it is in Spanish, though. https://youtu.be/7GRzZh9ZdNM

spinomagnus -

I dont get how removing them is supposed to fix it. it says you need no parts. someone explain

ur mom - 답글

댓글 쓰기

조회 통계:

24 시간 전: 8

7일 전: 63

30일 전: 384

전체 시간: 51,714