이 안내서에는 최근 변경 사항이 더 있습니다. 최신 비검증 버전으로 전환하십시오.
소개
The purpose of this guide is to explain how to replace the upper LCD screen in a Nintendo DS. All tools needed to fix the screen can be referenced or bought in the tool section below. Care should be taken when removing and moving the ribbon cables to make sure not to tear, break, or damage them. Care should also be taken when the screen is removed from the case to make sure not to tear, break, or damage the black and red wires connecting the two circuit boards. Damage to either of these components might not be able to be fixed and will not be covered in this guide. To prevent damage to these components, the proper tool must be used.
필요한 것
-
-
Remove the cartridge from the console.
-
Use a Phillips #00 Screwdriver to remove the screw securing the battery door to the rear case.
-
Remove the battery door.
-
-
-
Using a Phillips #00 screwdriver, remove the four screws on the circuit board.
-
-
-
-
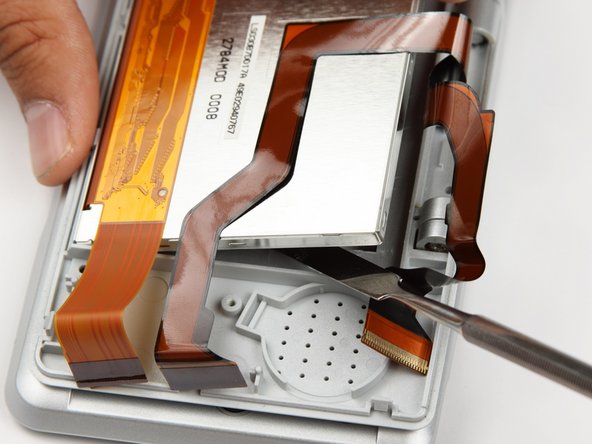
Use a flathead screw driver or dental tool to remove rubber covers on screen.
-
Then using a #00 screw driver remove the screws beneath.
-


To reassemble your device, follow these instructions in reverse order.
To reassemble your device, follow these instructions in reverse order.
다른 40명이 해당 안내서를 완성하였습니다.
팀

Cal Poly, Team 18-3, Maness Fall 2009 Cal Poly, Team 18-3, Maness Fall 2009 회원
CPSU-MANESS-F09S18G3
4 회원들
안내서 28개 작성하였습니다
댓글 11개
Unlike the DS Lite and later models, there is no reason to take apart the bottom portion of the original DS in order to remove the top screen. The first ten steps of this guide could be skipped.
PohTayToez - 답글
Thanks great advice
Can a ds lite screen be used to repair a ds??
Nope, Nintendo engineered the Lite as a refinement of the original. Therefore almost every component is different! Likely to become cheaper to manufacture.
Can a ds lite screen be used to repair a ds one?? Lots of ds lite screens about......