이 안내서에는 최근 변경 사항이 더 있습니다. 최신 비검증 버전으로 전환하십시오.
소개
Get your dual-screen functionality back with a new upper display.
필요한 것
-
-
Remove the two Phillips screws securing the battery cover to the back of the handheld console.
-
Lift the battery cover off the back of the DSi XL.
-
-
-
Remove the four rubber screw covers on the lower case by prying them up with a push pin.
-
-
-
-
With the console still upside-down, open the DSi XL slightly.
-
Push the lower display away from the upper case.
-
Remove the lower display from the DSi XL.
-
-
-
Turn the DSi XL over and open the display.
-
Use a pushpin to remove the four plastic screw covers on the front bezel.
-
-
-
Remove the Phillips screw holding the metal securing bracket in place.
-
Lift the metal bracket off the camera.
-
-
-
Lift the Wi-Fi antenna off the front display bezel.
-
De-route the Wi-Fi antenna cable from its grooves at the bottom of the front display bezel.
-
-
-
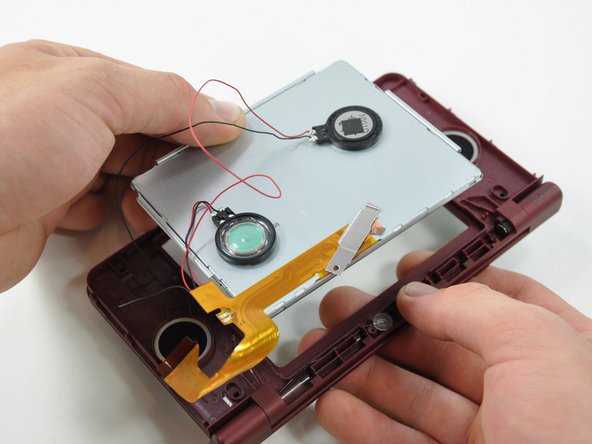
Lift both of the speakers from their seats on the front display bezel.
-
-
-
To separate the upper LCD and speakers, desolder the contacts on the orange ribbon cable.
-
For detailed instructions on how to solder this type of connection, see our guide for repairing soldered connections.
-
Upper LCD remains
-


To reassemble your device, follow these instructions in reverse order.
To reassemble your device, follow these instructions in reverse order.
다른 2명이 해당 안내서를 완성하였습니다.
