이 버전에는 잘못된 편집 사항이 있을 수 있습니다. 최신 확인된 스냅샷으로 전환하십시오.
필요한 것
-
이 단계는 번역되지 않았습니다. 번역을 도와주십시오
-
Remove the six 13.25mm Phillips screws on the bottom of the game console with a #2.5 flathead screwdriver.
-
Flip the game console right side up and take off the top by pulling it up and away from the rest of the device with your hands.
-
-
이 단계는 번역되지 않았습니다. 번역을 도와주십시오
-
Remove the seven 13.25mm Phillips screws from the metal cover with a Phillips head #2 screwdriver.
-
Remove the metal cover by pulling it up and away from the rest of the console with your hands.
-
-
-
이 단계는 번역되지 않았습니다. 번역을 도와주십시오
-
Remove the two silver 17.45mm Phillips screws from the cartridge tray using a Phillips head #2 screwdriver.
-
Remove the two bronze 13.25mm Phillips screws from the cartridge tray using a Phillips head #2 screwdriver.
-
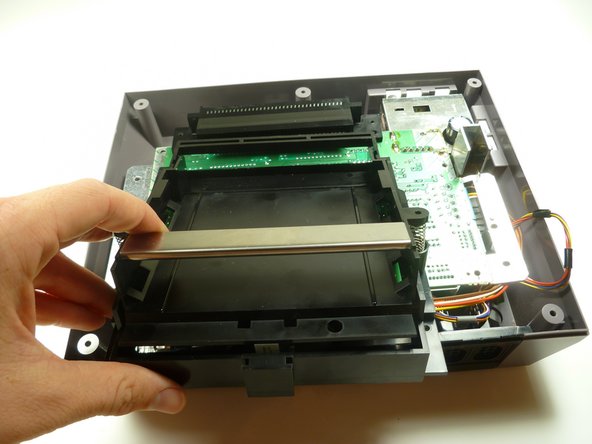
Slide the cartridge tray toward you, away from the 72-PIN connector, and off the motherboard assembly.
-
-
이 단계는 번역되지 않았습니다. 번역을 도와주십시오
-
Note: Underneath the cartridge tray is a black trapezoid-shaped tab/lip (see marker). When properly assembled this tab/lip goes below the motherboard and shielding as seen here.
-


다른 8명이 해당 안내서를 완성하였습니다.
팀

Cal Poly, Team 14-40, Forte Fall 2010 Cal Poly, Team 14-40, Forte Fall 2010 회원
CPSU-FORTE-F10S14G40
4 회원들
안내서 20개 작성하였습니다