주요 콘텐츠로 건너뛰기

이 안내서에는 최근 변경 사항이 더 있습니다. 최신 비검증 버전으로 전환하십시오.

Nintendo Entertainment System Motherboard Replacement

필요한 것

  1. Nintendo Entertainment System Motherboard Replacement, Game Cartridge Tray: 1 단계, 이미지 1/2 Nintendo Entertainment System Motherboard Replacement, Game Cartridge Tray: 1 단계, 이미지 2/2
    • Remove the six 13.25mm Phillips screws on the bottom of the game console with a #2.5 flathead screwdriver.

    • The screws are recessed about 40 mm.

    • Flip the game console right side up and take off the top by pulling it up and away from the rest of the device with your hands.

  2. Nintendo Entertainment System Motherboard Replacement: 2 단계, 이미지 1/2 Nintendo Entertainment System Motherboard Replacement: 2 단계, 이미지 2/2
    • Remove the seven 13.25mm Phillips screws from the metal cover with a Phillips head #2 screwdriver.

    • Remove the metal cover by pulling it up and away from the rest of the console with your hands.

  3. Nintendo Entertainment System Motherboard Replacement: 3 단계, 이미지 1/3 Nintendo Entertainment System Motherboard Replacement: 3 단계, 이미지 2/3 Nintendo Entertainment System Motherboard Replacement: 3 단계, 이미지 3/3
    • Remove the two silver 17.45mm Phillips screws from the cartridge tray using a Phillips head #2 screwdriver.

    • Remove the two bronze 13.25mm Phillips screws from the cartridge tray using a Phillips head #2 screwdriver.

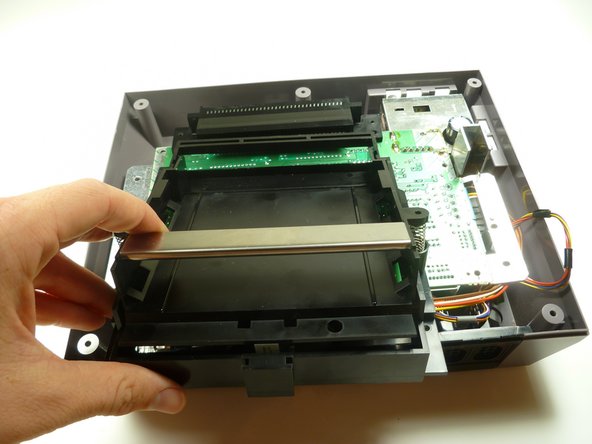
    • Slide the cartridge tray toward you, away from the 72-PIN connector, and off the motherboard assembly.

  4. Nintendo Entertainment System Motherboard Replacement: 4 단계, 이미지 1/2 Nintendo Entertainment System Motherboard Replacement: 4 단계, 이미지 2/2
    • Note: Underneath the cartridge tray is a black trapezoid-shaped tab/lip (see marker). When properly assembled this tab/lip goes below the motherboard and shielding as seen here.

    • During reassembly, make sure you orient this tab underneath the motherboard in addition to orienting the tray on top. Failure to do so will bow the cartridge tray and place stress on the component, causing the cartridge spring mechanism to bind.

  5. Nintendo Entertainment System Motherboard Replacement, Motherboard: 5 단계, 이미지 1/3 Nintendo Entertainment System Motherboard Replacement, Motherboard: 5 단계, 이미지 2/3 Nintendo Entertainment System Motherboard Replacement, Motherboard: 5 단계, 이미지 3/3
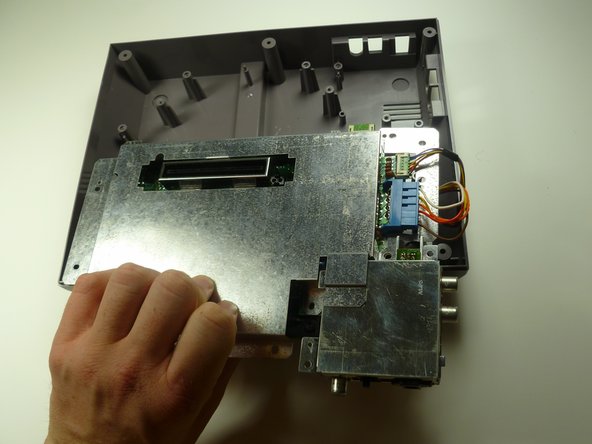
    • Remove the three 13.25mm Phillips screws that secure the motherboard to the lower case with a Phillips head #2 screwdriver.

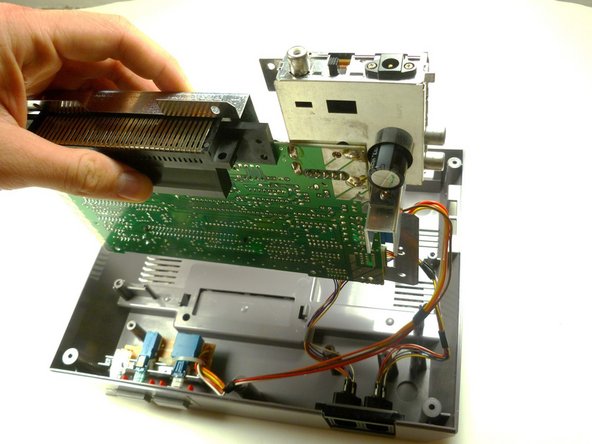
    • Pull the motherboard assembly straight up and out of the plastic case with your hands.

    • Turn the motherboard assembly over so the metal cover is facing you.

  6. Nintendo Entertainment System Motherboard Replacement: 6 단계, 이미지 1/1
    • Disconnect the wire harnesses from the motherboard assembly:

    • Player 1

    • Player 2

    • Power

    • Make sure you remember where player 1 and player 2 cables are plugged in; do not mix them up. A good technique would be to write each title on a piece of tape and wrap them around the appropriate wire.

  7. Nintendo Entertainment System Motherboard Replacement: 7 단계, 이미지 1/3 Nintendo Entertainment System Motherboard Replacement: 7 단계, 이미지 2/3 Nintendo Entertainment System Motherboard Replacement: 7 단계, 이미지 3/3
    • Lift off the EMI shield (metal cover) from the motherboard assembly.

    • Turn over the motherboard assembly so the 72-PIN connector is on the top of the motherboard assembly.

결론

To reassemble your device, follow these instructions in reverse order.

다른 27명이 해당 안내서를 완성하였습니다.

nicholasweiser

회원 가입일: 09/22/10

2,634 평판

안내서 6개 작성하였습니다

Cal Poly, Team 14-40, Forte Fall 2010 Cal Poly, Team 14-40, Forte Fall 2010 회원

CPSU-FORTE-F10S14G40

4 회원들

안내서 20개 작성하였습니다

댓글 8개

What do I do if my console doesn't work at all I put a game in and the power light flashes on and off and or the screen stays on purple

Albert lopez - 답글

Clean the 72-pin connector and cartridge pins

Fritz Geib -

What do I do if my console doesn't work at all the power light flashes on and off or it'll stay on but the screen shows purple what could be the

Albert lopez - 답글

you need to change the cartridge connector (the one to the mainboard)

Brede Basualdo -

Hello can you tell me why my nes turns on but I don’t get any sound or picture of the tv.

Jay - 답글

댓글 쓰기

조회 통계:

24 시간 전: 5

7일 전: 29

30일 전: 155

전체 시간: 44,202