주요 콘텐츠로 건너뛰기

Nintendo Game Boy Advance SP Motherboard Replacement

필요한 것

  1. Nintendo Game Boy Advance SP Motherboard Replacement, Battery: 1 단계, 이미지 1/1
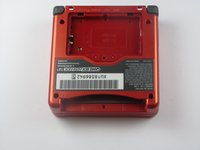
    • Use a standard Phillips #00 screwdriver to loosen the 4 mm screw that keeps the battery cover attached to the device.

  2. Nintendo Game Boy Advance SP Motherboard Replacement: 2 단계, 이미지 1/1
    • Lift the battery cover up and remove it from the device.

    • The screw will remain attached to the battery cover because of Nintendo's design.

  3. Nintendo Game Boy Advance SP Motherboard Replacement: 3 단계, 이미지 1/1
    • Use your fingers or a plastic opening tool to remove the battery from the device.

    • Caution: Please exercise caution when handling the battery. If it appears to be swelling or damaged at all it is considered a fire hazard.

  4. Nintendo Game Boy Advance SP Motherboard Replacement, Back Cover: 4 단계, 이미지 1/2 Nintendo Game Boy Advance SP Motherboard Replacement, Back Cover: 4 단계, 이미지 2/2
    • Remove four 6.5 mm screws from the corners of the back cover using a tri-point Y00 screwdriver.

    • Remove two 4.6mm screws from the top-center and bottom-center of the device using a tri-point Y00 screwdriver.

  5. Nintendo Game Boy Advance SP Motherboard Replacement: 5 단계, 이미지 1/1
    • Lift the back cover off of the device.

    • Potential for device damage: These inner components are vulnerable to static electricity. Exercise caution when handling these next steps to prevent damaging the device.

    • Look out for the power switch that can fall out when taking the back cover off.

  6. Nintendo Game Boy Advance SP Motherboard Replacement, Motherboard: 6 단계, 이미지 1/1
    • Using a Phillips #00 screwdriver, remove the three Phillips #00 4 mm long screws that hold the motherboard to the button panel.

  7. Nintendo Game Boy Advance SP Motherboard Replacement: 7 단계, 이미지 1/1
    • Be careful not to tear the ribbon cable that's connected to the screen. If you tear it, games will not appear on the device's screen!

    • Flip the motherboard up and rest it on the other half of the device, so that the back of the buttons are visible as seen in the picture.

결론

To reassemble your device, follow these instructions in reverse order.

다른 26명이 해당 안내서를 완성하였습니다.

DJ Pantone

회원 가입일: 01/11/13

1,924 평판

안내서 5개 작성하였습니다

Cal Poly, Team 17-22, Forte Winter 2013 Cal Poly, Team 17-22, Forte Winter 2013 회원

CPSU-FORTE-W13S17G22

4 회원들

안내서 39개 작성하였습니다

댓글 4개

I just bought one at a garage sale. Everything works fine, but the screen does not display properly. when you turn the unit on, all you get is vertical lines on the screen. They are random each time you turn it on. Is the ribbon ripped? If so, can you get a new one??? If so - where?

Brian - 답글

picked up Gameboy advanced sp 101 model when you go to charge it the light comes on but then shuts off so I thought maybe its either the battery or a fuse on the motherboard how can I change that or fix it

jourdanjoseph - 답글

I think this would be a good idea, one day i will have a new GBA SP LCD screen and then, disassemble it and replace the screen

Santi12008 - 답글

I dropped it once , now half of the games do not run, what should I do?

Sarthak sibou - 답글

댓글 쓰기

조회 통계:

24 시간 전: 10

7일 전: 86

30일 전: 370

전체 시간: 39,829