이 버전에는 잘못된 편집 사항이 있을 수 있습니다. 최신 확인된 스냅샷으로 전환하십시오.
필요한 것
-
이 단계는 번역되지 않았습니다. 번역을 도와주십시오
-
Turn over the Gamecube so that the bottom side is facing up.
-
Use the 4.5 mm Gamebit screwdriver to remove all four screws.
-
-
이 단계는 번역되지 않았습니다. 번역을 도와주십시오
-
With the bottom side of the GameCube facing upward and the screws removed, carefully pull the outer shell of the unit away from the top half.
-
Move the GameCube so that the inside is facing upwards.
-
-
이 단계는 번역되지 않았습니다. 번역을 도와주십시오
-
Gently press down on the clips located on either side of the back panel.
-
Carefully remove the back panel from the GameCube.
-
-
이 단계는 번역되지 않았습니다. 번역을 도와주십시오
-
Use a Phillips #2 screwdriver to remove the two screws on the back of the control port.
-
Carefully separate the gray outer casing of the control port and the circuit board.
-
-
이 단계는 번역되지 않았습니다. 번역을 도와주십시오
-
The left side of the unit contains the cooling fan and its housing.
-
Carefully remove the two screws attaching the cooling fan housing to the unit.
-
-
-
이 단계는 번역되지 않았습니다. 번역을 도와주십시오
-
Remove the four Phillips #1 screws retaining the ground springs.
-
Carefully remove the ground springs from the main unit.
-
-
이 단계는 번역되지 않았습니다. 번역을 도와주십시오
-
The optical drive is secured to a metal plate.
-
Using a Phillips #2 screwdriver, unscrew the twelve screws that are around the outer edge of the optical drive.
-
-
이 단계는 번역되지 않았습니다. 번역을 도와주십시오
-
Carefully separate the optical drive assembly from the rest of the GameCube unit.
-
The optical drive assembly is secured to the motherboard underneath by a slot; some force may be required to carefully free the assembly.
-
The metal plate and the actual optical drive will remain attached.
-
-
이 단계는 번역되지 않았습니다. 번역을 도와주십시오
-
At this point, your optical drive assembly should be separated from your GameCube.
-
Flip the optical drive assembly upside down.
-
Remove the six screws with a Phillips #1 screwdriver.
-
Gently lift and remove the metal plate.
-
-
이 단계는 번역되지 않았습니다. 번역을 도와주십시오
-
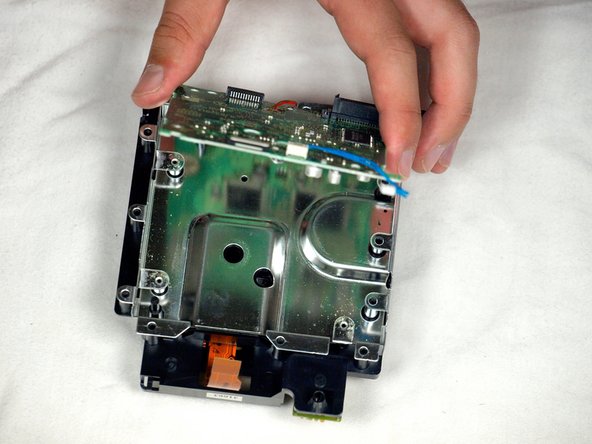
Remove the blue wire by gently pulling.
-
Disconnect the brown cable. This is done by gently pulling the black tab away from the white plastic. This will loosen the tension on the brown cable, allowing it to slide away from the tab gently.
-
Remove the four Phillips #1 screws connecting the circuit board to the optical drive assembly.
-
The fourth screw is located behind the screwdriver in the third picture.
-
-
이 단계는 번역되지 않았습니다. 번역을 도와주십시오
-
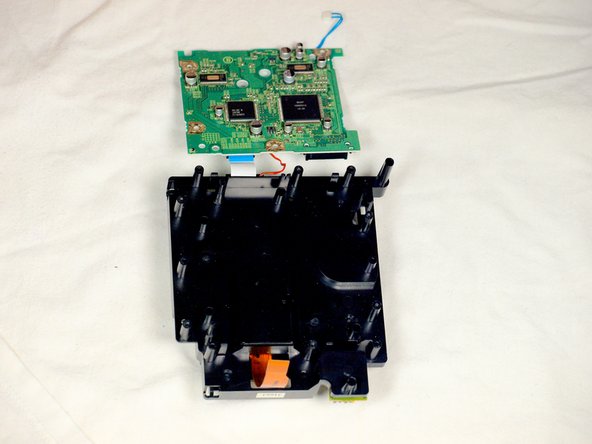
Release the small clip holding the board down.
-
Gently remove the circuit board (the large green square) as shown in the three pictures.
-
Red Wire
-
White ribbon Cable
-
-
이 단계는 번역되지 않았습니다. 번역을 도와주십시오
-
Use a flathead screwdriver to carefully release the four plastic clips holding the drive assembly together.
-
Carefully use a screwdriver as leverage to unscrew and release the last clip.
-
-
이 단계는 번역되지 않았습니다. 번역을 도와주십시오
-
Gently lift the metal plate off the drive assembly.
-
Then, flip the two halves of the drive assembly upside down.
-
-
이 단계는 번역되지 않았습니다. 번역을 도와주십시오
-
Use a flathead screwdriver to release the two clips located on the back half of the drive assembly.
-
The final clip doesn't need to be released; the top half of the drive assembly will slide away from the lower half.
-
Finish removing the top half of the drive assembly from the base.
-
-
이 단계는 번역되지 않았습니다. 번역을 도와주십시오
-
Once the top half of the drive assembly is detached, turn it upside down.
-
Using a Phillips #1 screwdriver, carefully remove the three final screws near the lens assembly bars.
-
Extract the final three screws and remove the lens assembly.
-


다른 20명이 해당 안내서를 완성하였습니다.

팀

Cal Poly, Team 6-2, Maness Fall 2009 Cal Poly, Team 6-2, Maness Fall 2009 회원
CPSU-MANESS-F09S6G2
4 회원들
안내서 45개 작성하였습니다
댓글 5개
What type of optical drive could I use to replace the one in said GameCube once I've broken it down?
Did you ever find out, Bob?
I found OEM parts (removed from other Game Cubes) available on Ebay. Just ordered the part for about $16.
erin clark - 답글
Good walkthrough. My 8 year old completed this repair with minimal help from me. Thanks!
erin clark - 답글
As a tech writer I just wanted to say our step by step instructions are spot on. Great Job