소개
This guide will teach you step-by-step instructions to
replace the joystick of a Joy-con. In this guide, the Joy-con(R) will be shown but the process is almost the same as the left one. Make sure that you have turned off your console to ensure there are no accidental connections
필요한 것
-
-
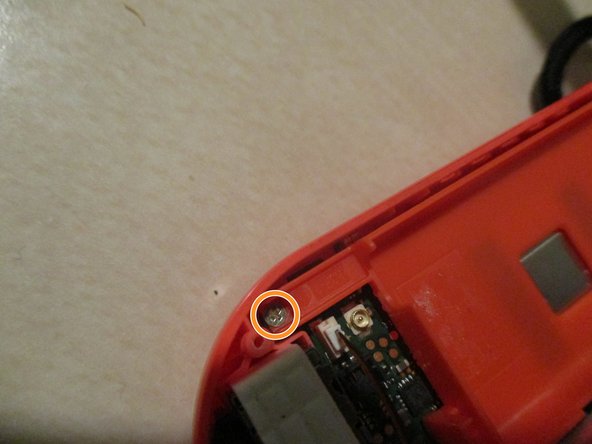
First, start by removing these 4 Y00 screws on the back of the joy con.
-
-
-
Insert the flat side of a spudger on the curved side to pry the back cover open
-
-
-
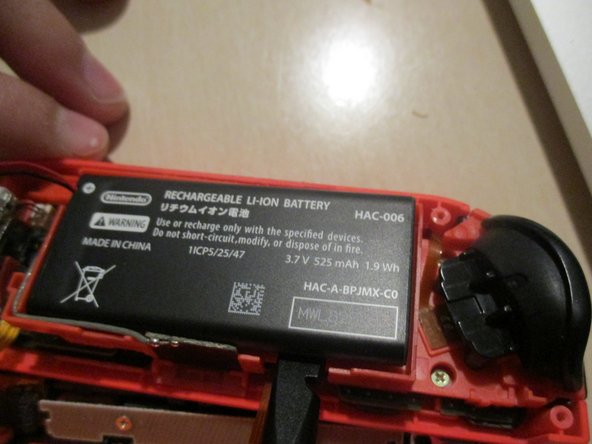
Pull the battery connector with your tweezers from the bottom carefully.
-
Remove the battery by inserting the flat side of your spudger.
-
-
-
-
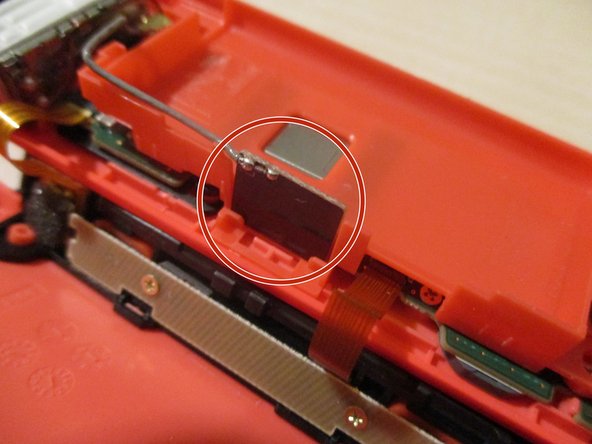
Pull the golden SMP RF connector that connects the Bt antenna with the main board.
-
remove the square antenna from the side of the battery compartment.
-
-
-
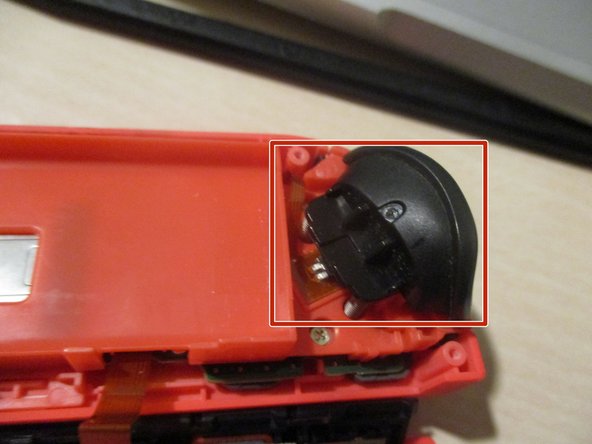
remove the ZR button and its springs. Be careful not to break the clips holding it in place.
-
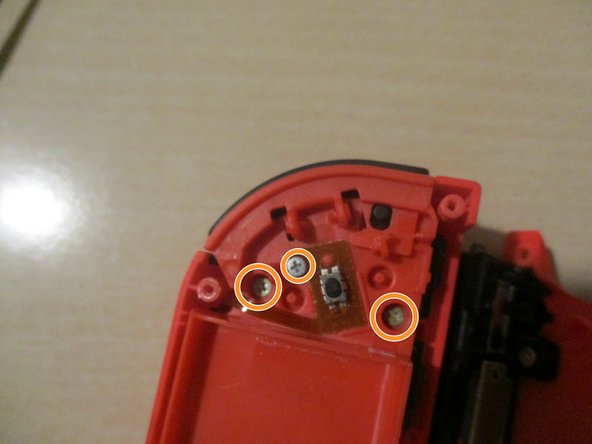
unscrew the four PH000 screws holding the battery compartment and the ZR button board. There is one hidden on the side of the hd rumble module.
-
Pick up the battery compartment.
-
-
-
Unscrew the two PH000 screws holding the joystick down.
-
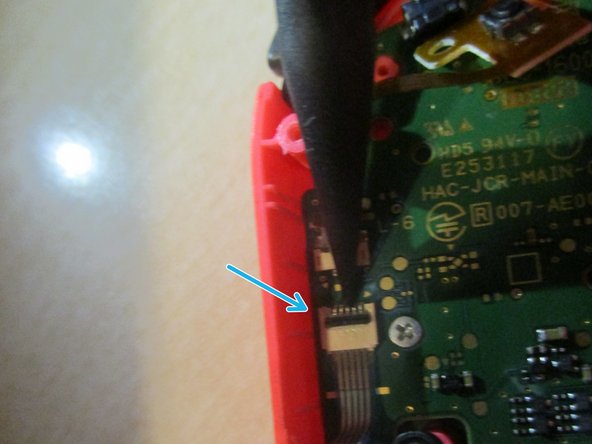
Make sure to NOT disconnect the two side board cables. It may cause fatal damage to the controller.
-
Before you remove the joystick, remove the secured ribbon cable by opening the clip using the tip of a spudger.
-
-
-
to add the new joystick, push it in firmly and make sure it has fully gone through the gasket I mentioned above.
-
Screw it in and put the ribbon cable in its socket. Don't forget to lock the cable in place.
-


To reassemble your Joy-con, follow these instructions in reverse order.
To reassemble your Joy-con, follow these instructions in reverse order.
다른 19명이 해당 안내서를 완성하였습니다.

댓글 7개
Just a tip for people doing this repair. DO NOT remove the two ribbon cables between the two parts unless you absolutely have to. I pretty much destroyed my right joycon doing so. One of the cables was so hard to replace for me that I ended up breaking the clip that holds it in. My mistake, I could’ve been more careful but it’s probably best to just not even take them out in the first place. I’ve heard these cables are very finicky to position correctly anyways.
Ok, added the bullet to step 6 so that people know. Thanks for pointing it out!
Devnol -
I did not need to take off the ZR button to fix mine - so for future fixers, try that part without taking off ZR first. :) THANK YOU for creating this tutorial. This fix WAS SO EASY compared to the 3DS XL fixes I did in the past.
You have a point. But it’s probably better to remove it because the chances of breaking it are quite high. These are very sensitive cables, but you were lucky. Someone else though might not be.
Devnol -
I do understand that not taking it off can be difficult, but I also know that putting it back on after taking it off is a pain, because you have to adjust it in a way so you don't destroy the button like I did. If you do have to put it back on, I suggest you take a thin ridged object to put over the button while putting the plastic button piece back in.