주요 콘텐츠로 건너뛰기

이 버전에는 잘못된 편집 사항이 있을 수 있습니다. 최신 확인된 스냅샷으로 전환하십시오.

필요한 것

  1. 이 단계는 번역되지 않았습니다. 번역을 도와주십시오

    : 1 단계, 이미지 1/2 : 1 단계, 이미지 2/2
    • Pull down on the battery cover release lever and pull back to remove the cover.

  2. 이 단계는 번역되지 않았습니다. 번역을 도와주십시오

    : 2 단계, 이미지 1/1
    • Remove both batteries from the device.

  3. 이 단계는 번역되지 않았습니다. 번역을 도와주십시오

    : 3 단계, 이미지 1/2 : 3 단계, 이미지 2/2
    • Remove the eight 9 mm screws from the back panel using the Tri-point Y1 screwdriver.

    • During reassembly, firmly hold the panels of the controller together while replacing the screws so the panels do not separate.

  4. 이 단계는 번역되지 않았습니다. 번역을 도와주십시오

    : 4 단계, 이미지 1/2 : 4 단계, 이미지 2/2
    • Carefully turn over the controller and place it on a flat surface.

    • Slowly separate the top panel from the bottom panel.

    • The buttons are loose and may fall off the motherboard.

    • Once separated, set aside the top panel.

    • During reassembly, make sure the front panel lines up with the buttons so they slide back into place.

  5. 이 단계는 번역되지 않았습니다. 번역을 도와주십시오

    : 5 단계, 이미지 1/3 : 5 단계, 이미지 2/3 : 5 단계, 이미지 3/3
    이 단계에 사용된 도구:
    Tweezers
    $4.99
    구매
    • Use tweezers to remove the buttons.

    • It may be easier to remove the A button off of the pad by lifting it with your fingers.

    • During reassembly, make sure all buttons are in their respective sockets so they match up with the front panel.

  6. 이 단계는 번역되지 않았습니다. 번역을 도와주십시오

    : 6 단계, 이미지 1/1
    이 단계에 사용된 도구:
    Tweezers
    $4.99
    구매
    • Using tweezers remove the three grey button pads from the motherboard.

  7. 이 단계는 번역되지 않았습니다. 번역을 도와주십시오

    : 7 단계, 이미지 1/1
    • With your fingers gently grip the motherboard on both sides and lift it away from the back panel.

    • To put the motherboard back into place, align the two metal clips under the motherboard with the slots in the back panel. The motherboard should fall into place.

  8. 이 단계는 번역되지 않았습니다. 번역을 도와주십시오

    : 8 단계, 이미지 1/3 : 8 단계, 이미지 2/3 : 8 단계, 이미지 3/3
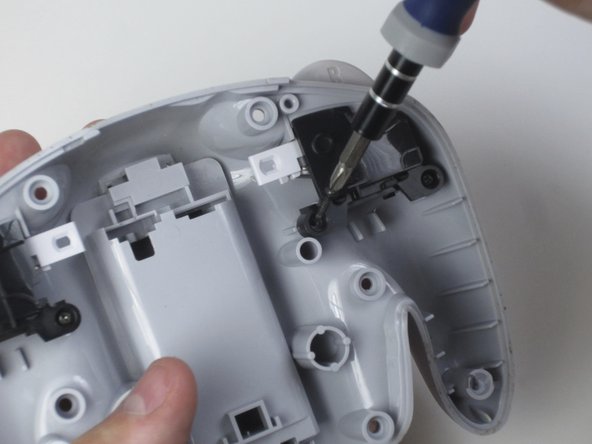
    • Remove the four 9-mm Phillips head screws with the Phillips #1 screwdriver.

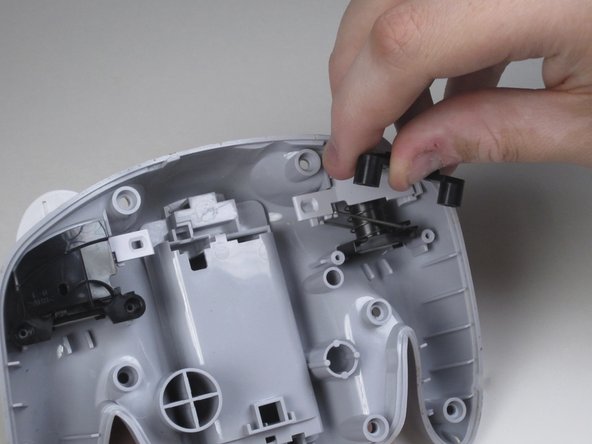
    • Lift off the black plastic covers that secure the shoulder buttons.

  9. 이 단계는 번역되지 않았습니다. 번역을 도와주십시오

    : 9 단계, 이미지 1/3 : 9 단계, 이미지 2/3 : 9 단계, 이미지 3/3
    이 단계에 사용된 도구:
    Tweezers
    $4.99
    구매
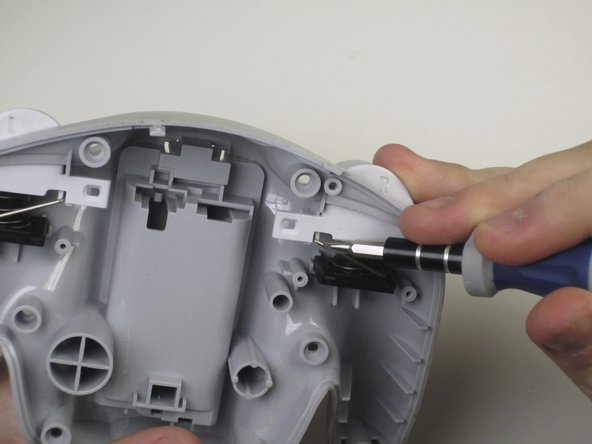
    • Using the screwdriver, carefully unlock the spring clip from its holder.

    • Once unlocked, use tweezers to pull springs out of its holster.

    • The springs will try to jump out. Be careful not to lose them when setting them aside.

    • When reattaching the clips, use tweezers to align the clip with its holder and press in until it clicks.

  10. 이 단계는 번역되지 않았습니다. 번역을 도와주십시오

    : 10 단계, 이미지 1/1
    • Once the spring is removed, take out the shoulder buttons by pulling down and out.

결승점

다른 4명이 해당 안내서를 완성하였습니다.

Travis Taylor

회원 가입일: 04/12/13

464 평판

안내서 5개 작성하였습니다

Cal Poly, Team 10-40, Amido Spring 2013 Cal Poly, Team 10-40, Amido Spring 2013 회원

CPSU-AMIDO-S13S10G40

4 회원들

안내서 37개 작성하였습니다

댓글 한 개

Where can I buy replacement shoulder buttons? Mine are starting to get sticky and don't spring back as well as they used to. I've been looking but I can't seem to find them anywhere.

Lucas Brownlee - 답글

댓글 쓰기

조회 통계:

24 시간 전: 0

7일 전: 7

30일 전: 30

전체 시간: 3,015