주요 콘텐츠로 건너뛰기

Nintendo Wii U GamePad Directional Pad Buttons Replacement

필요한 것

  1. Nintendo Wii U GamePad Directional Pad Buttons Replacement, Outer Case: 1 단계, 이미지 1/3 Nintendo Wii U GamePad Directional Pad Buttons Replacement, Outer Case: 1 단계, 이미지 2/3 Nintendo Wii U GamePad Directional Pad Buttons Replacement, Outer Case: 1 단계, 이미지 3/3
    • Remove the ten 8.9mm Tri-wing Y1 screws hidden underneath square stickers.

    • Lift up the back plate.

    • The back plate is still connected by a cable to the motherboard.

  2. Nintendo Wii U GamePad Directional Pad Buttons Replacement: 2 단계, 이미지 1/2 Nintendo Wii U GamePad Directional Pad Buttons Replacement: 2 단계, 이미지 2/2
    • Unplug the connector that connects the back plate to the motherboard.

    • Remove the back plate.

  3. Nintendo Wii U GamePad Directional Pad Buttons Replacement, Analog Stick: 3 단계, 이미지 1/2 Nintendo Wii U GamePad Directional Pad Buttons Replacement, Analog Stick: 3 단계, 이미지 2/2
    • Take out the left and right shoulder buttons in the upper corners.

    • Remove the ZR and ZL trigger buttons by lifting up and sliding outward.

  4. Nintendo Wii U GamePad Directional Pad Buttons Replacement: 4 단계, 이미지 1/2 Nintendo Wii U GamePad Directional Pad Buttons Replacement: 4 단계, 이미지 2/2
    • Remove the top rubber cover by pulling it off of its mounts to access one of the mounting screws.

    • Remove the four 5.2mm Phillips #0 screws.

  5. Nintendo Wii U GamePad Directional Pad Buttons Replacement: 5 단계, 이미지 1/2 Nintendo Wii U GamePad Directional Pad Buttons Replacement: 5 단계, 이미지 2/2
    • Use a spudger to lift the tab which releases the blue ribbon cable.

    • Remove the analog stick and button cover.

  6. Nintendo Wii U GamePad Directional Pad Buttons Replacement: 6 단계, 이미지 1/1
    • Use your thumb and push the connector towards the rightmost edge to disconnect the analog stick cable connector.

  7. Nintendo Wii U GamePad Directional Pad Buttons Replacement: 7 단계, 이미지 1/2 Nintendo Wii U GamePad Directional Pad Buttons Replacement: 7 단계, 이미지 2/2
    • Remove the two 9.0mm Tri-wing Y0 screws.

    • Lift out the analog stick.

  8. Nintendo Wii U GamePad Directional Pad Buttons Replacement, Directional Pad Buttons: 8 단계, 이미지 1/2 Nintendo Wii U GamePad Directional Pad Buttons Replacement, Directional Pad Buttons: 8 단계, 이미지 2/2
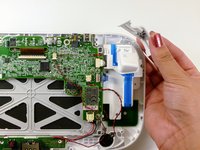
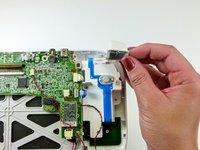
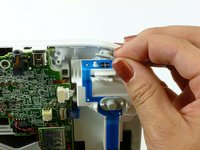
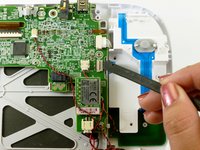
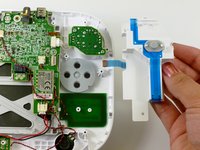
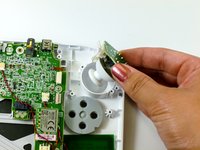
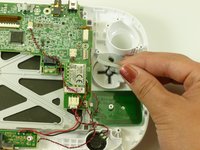
    • Lift up and remove the rubber cover for the directional pad.

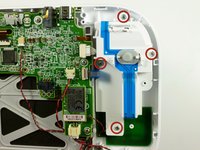
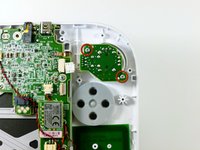
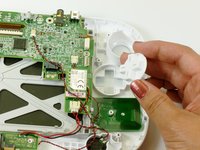
    • Remove the directional pad buttons.

결론

To reassemble your device, follow these instructions in reverse order.

다른 11명이 해당 안내서를 완성하였습니다.

Kim Arre

회원 가입일: 01/11/13

4,888 평판

안내서 8개 작성하였습니다

Cal Poly, Team 17-20, Forte Winter 2013 Cal Poly, Team 17-20, Forte Winter 2013 회원

CPSU-FORTE-W13S17G20

5 회원들

안내서 38개 작성하였습니다

댓글 한 개

Where can you find the blue ribbon mentioned in step 5, for the buttons at?

Eric - 답글

댓글 쓰기

조회 통계:

24 시간 전: 7

7일 전: 35

30일 전: 129

전체 시간: 19,831