주요 콘텐츠로 건너뛰기

Nite Ize Inova Microlight Casing Replacement

필요한 것

  1. Nite Ize Inova Microlight Casing Replacement, Case Removal: 1 단계, 이미지 1/2 Nite Ize Inova Microlight Casing Replacement, Case Removal: 1 단계, 이미지 2/2
    • Insert the plastic opening tool into the seam of the device.

  2. Nite Ize Inova Microlight Casing Replacement, Battery Removal: 2 단계, 이미지 1/3 Nite Ize Inova Microlight Casing Replacement, Battery Removal: 2 단계, 이미지 2/3 Nite Ize Inova Microlight Casing Replacement, Battery Removal: 2 단계, 이미지 3/3
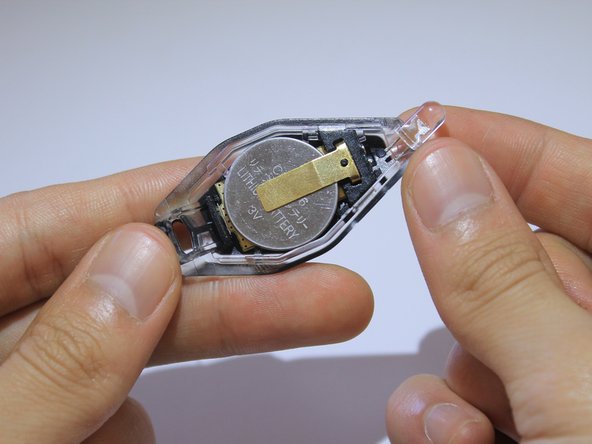
    • Squeeze the top battery using a tweezer and pull the battery away from the light bulb.

    • Repeat this step for the bottom remaining battery.

    • Do not pull up on the battery as this will bend the metal contact.

  3. Nite Ize Inova Microlight Casing Replacement, LED Light Removal: 3 단계, 이미지 1/3 Nite Ize Inova Microlight Casing Replacement, LED Light Removal: 3 단계, 이미지 2/3 Nite Ize Inova Microlight Casing Replacement, LED Light Removal: 3 단계, 이미지 3/3
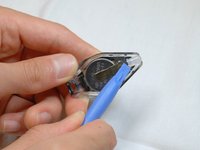
    • Place the plastic opening tool below the LED lamp and push away from the device until you hear a click.

    • Continue to remove the LED lamp the with your fingers.

  4. Nite Ize Inova Microlight Casing Replacement, Logic Board Removal: 4 단계, 이미지 1/1
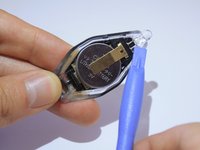
    • Place the plastic opening tool behind the logic board and bend away from the casing

  5. Nite Ize Inova Microlight Casing Replacement, Logic Board Removal: 5 단계, 이미지 1/1
    • The logic board will pop out with ease.

결론

To reassemble your device, follow these instructions in reverse order.

다른 한 분이 해당 안내서를 완성하였습니다.

Jennifer Tabadero

회원 가입일: 09/09/14

526 평판

안내서 3개 작성하였습니다

CSU Fullerton, Team 2-1, Bruce Fall 2014 CSU Fullerton, Team 2-1, Bruce Fall 2014 회원

CSUF-BRUCE-F14S2G1

3 회원들

안내서 3개 작성하였습니다

댓글 한 개

Great Job! found this one night while looking at my little blue light. Great tools, photos. +30

4-16-2017

F3ND1MUS - 답글

댓글 쓰기

조회 통계:

24 시간 전: 0

7일 전: 2

30일 전: 6

전체 시간: 796