-
-
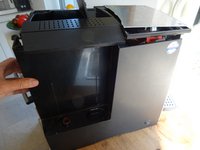
Remove all attachments such as water reservoir, coffee compartment lid, trestle drawer. Remove all coffee beans in the storage container.
-
Unscrew the five Torx T10 screws on the back.
-
-
-
Unscrew the two Torx T10 screws on the front edge of the heat plate.
-
Lift the front edge of the heat plate and slide it forward a bit to clear the tabs on the back edge.
-
Put the heat plate back down, but in such a way that you can reach the screws underneath.
-
Unscrew the two Torx T10 screws located under the heat plate.
-
-
-
-
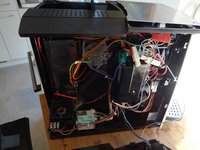
Gently lift the upper side a bit and put it back down.
-
Push the side panel on the water tank back about 2 cm.
-
Place the side panel next to the machine. Do not remove it completely yet, the cables of the switch are still connected.
-
Disconnect the flat plugs from the switch. Be sure to note the order of the cables for later reassembly.
-
Remove the side panel.
-
-
-
Lift the top side slightly.
-
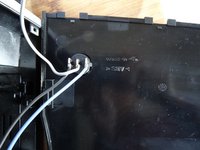
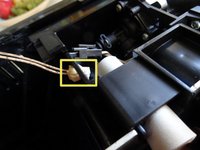
Press down the locking tab on the plug of the white sensor cable and pull off the black plug towards the front of the machine.
-
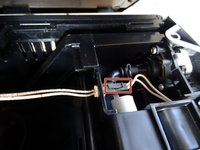
Press the two catches of the counterpart on the sides together and slide it out of the opening towards the back.
-
Now the top is free and you can remove it.
-


Work through the steps in reverse order to reassemble your device.
Work through the steps in reverse order to reassemble your device.
다른 한 분이 해당 안내서를 완성하였습니다.
다음 번역가들에게 특별히 감사 드립니다:
100%


이 번역인들은 저희가 세상을 수리하는 데 도움을 주고 있어요! 기여하시겠습니까?
번역 시작하기 ›
팀

댓글 2개
Thank you for these guides. We have been using a Nivona type 691 since 2013. It has made well over 18.000 cups of coffee since that time (mostly crema coffee). It still works great/fine. Quality of the beans has the most impact on taste, in my experience.
It has been revised twice in those 10 years, in 2016 and in 2020 (total cost about 480 euro's), including replacement of the screen. People tend to forget these costs when they buy a full automatic machine. Also the regular cleaning takes time. Using silicon grease on the o-rings of the brew unit has made quite a difference. The insides have been much cleaner since. No more wet coffee grinds in the gears.
Not sure if I will send it out for another revision. Might try to repair it myself as a hobby project, starting with replacing the O-rings of the brew unit. I want to replace it with a real espresso machine, but my wife really appreciates the convenience of this machine.
Try to do the next revision yourself! You will find more information at Melitta caffeo and Siemens Surpresso, these machines are almost the same.
VauWeh -