주요 콘텐츠로 건너뛰기

Nokero N400 LED Panel Replacement

필요한 것

  1. Nokero N400 LED Panel Replacement, Remove Battery Cover: 1 단계, 이미지 1/3 Nokero N400 LED Panel Replacement, Remove Battery Cover: 1 단계, 이미지 2/3 Nokero N400 LED Panel Replacement, Remove Battery Cover: 1 단계, 이미지 3/3
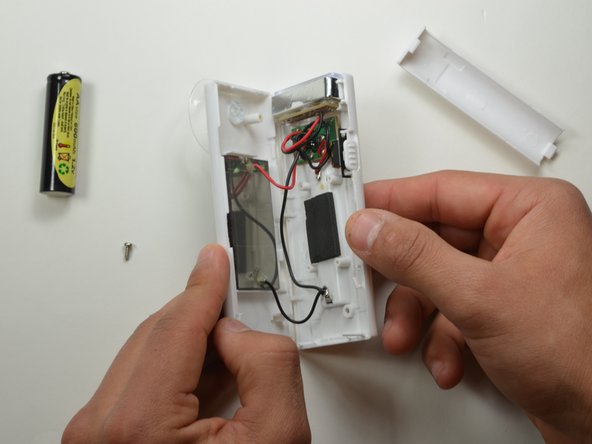
    • Press down firmly to remove the battery cover and display battery.

    • Then remove the battery.

  2. Nokero N400 LED Panel Replacement, Unscrew Back Cover: 2 단계, 이미지 1/2 Nokero N400 LED Panel Replacement, Unscrew Back Cover: 2 단계, 이미지 2/2
    • Remove the 7mm Phillips #1 screw.

  3. Nokero N400 LED Panel Replacement, Pry Open Back Cover: 3 단계, 이미지 1/2 Nokero N400 LED Panel Replacement, Pry Open Back Cover: 3 단계, 이미지 2/2
    • Place the plastic opening tool in between the two plastic panels and slowly work your way around the device.

    • Unlatch the clips on the inside and pull device apart.

    • Some clips will break when forced open.

  4. Nokero N400 LED Panel Replacement, Removing the LED Panel: 4 단계, 이미지 1/2 Nokero N400 LED Panel Replacement, Removing the LED Panel: 4 단계, 이미지 2/2
    • With the back cover of the device removed, lightly pull up on the LED assembly to lift it out of its housing.

    • The LED assembly will separate into three components; the light board, outer housing, and plastic lens.

  5. Nokero N400 LED Panel Replacement: 5 단계, 이미지 1/1
    • Set the outer housing and plastic lens aside.

    • Take a pair of pliers and cut the red and black wires connected to the light board.

    • Make sure to cut just below the light board.

    • To install the new light board, you will need to splice or solder the wires to the new light board.

결론

To reassemble your device, follow these instructions in reverse order.

다른 한 분이 해당 안내서를 완성하였습니다.

Kyle Burwell

회원 가입일: 01/20/15

173 평판

안내서 1개 작성함

USF Tampa, Team 19-2, Blackwell Winter 2015 USF Tampa, Team 19-2, Blackwell Winter 2015 회원

USFT-BLACKWELL-W15S19G2

4 회원들

안내서 5개 작성하였습니다

댓글 0개

댓글 쓰기

조회 통계:

24 시간 전: 0

7일 전: 0

30일 전: 1

전체 시간: 176