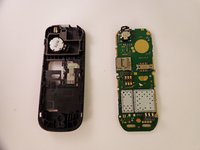
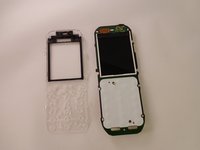
주요 콘텐츠로 건너뛰기

Nokia 1010 Screen Replacement

필요한 것

  1. Nokia 1010 Screen Replacement, Battery: 1 단계, 이미지 1/2 Nokia 1010 Screen Replacement, Battery: 1 단계, 이미지 2/2
    • Using your thumbs, press and slide down the back cover of the Nokia 1010.

  2. Nokia 1010 Screen Replacement: 2 단계, 이미지 1/3 Nokia 1010 Screen Replacement: 2 단계, 이미지 2/3 Nokia 1010 Screen Replacement: 2 단계, 이미지 3/3
    • Insert the prying tool in the notch above the battery.

    • Once the prying tool is inserted, lift up the battery.

  3. Nokia 1010 Screen Replacement, Faceplate: 3 단계, 이미지 1/2 Nokia 1010 Screen Replacement, Faceplate: 3 단계, 이미지 2/2
    • Insert the prying tool between the seam of the faceplate and the body.

  4. Nokia 1010 Screen Replacement: 4 단계, 이미지 1/3 Nokia 1010 Screen Replacement: 4 단계, 이미지 2/3 Nokia 1010 Screen Replacement: 4 단계, 이미지 3/3
    • Starting from the bottom of the phone, begin prying around the base of the phone alternating form left to right.

  5. Nokia 1010 Screen Replacement: 5 단계, 이미지 1/3 Nokia 1010 Screen Replacement: 5 단계, 이미지 2/3 Nokia 1010 Screen Replacement: 5 단계, 이미지 3/3
    • As the base loosens, slowly increase the separation between the plates and the body of the phone.

  6. Nokia 1010 Screen Replacement, Motherboard: 6 단계, 이미지 1/3 Nokia 1010 Screen Replacement, Motherboard: 6 단계, 이미지 2/3 Nokia 1010 Screen Replacement, Motherboard: 6 단계, 이미지 3/3
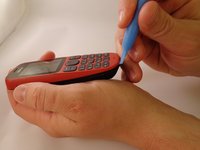
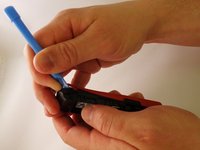
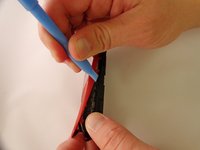
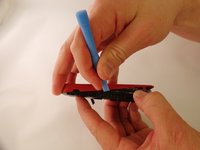
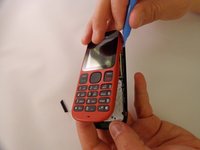
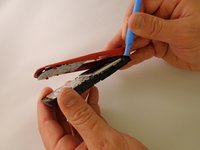
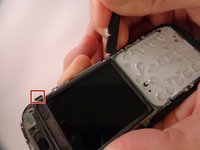
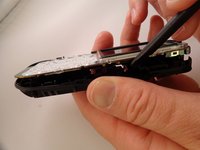
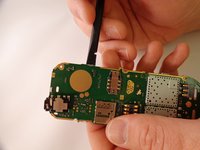
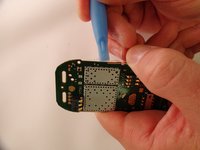
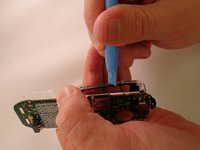
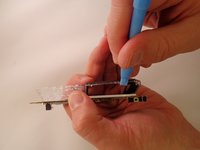
    • Using the spudger, pry back three tabs located on the left edge and three tabs located on the right edge of the body.

  7. Nokia 1010 Screen Replacement: 7 단계, 이미지 1/3 Nokia 1010 Screen Replacement: 7 단계, 이미지 2/3 Nokia 1010 Screen Replacement: 7 단계, 이미지 3/3
    • Once detached, lift and remove the faceplate from the motherboard.

  8. Nokia 1010 Screen Replacement, Screen: 8 단계, 이미지 1/3 Nokia 1010 Screen Replacement, Screen: 8 단계, 이미지 2/3 Nokia 1010 Screen Replacement, Screen: 8 단계, 이미지 3/3
    • Locate the four clear tabs that connect the screen to the motherboard.

  9. Nokia 1010 Screen Replacement: 9 단계, 이미지 1/3 Nokia 1010 Screen Replacement: 9 단계, 이미지 2/3 Nokia 1010 Screen Replacement: 9 단계, 이미지 3/3
    • Insert the prying tool between the tabs and the motherboard. Loosen and separate slowly.

결론

To reassemble your device, follow these instructions in reverse order.

다른 9명이 해당 안내서를 완성하였습니다.

Mikala Presho

회원 가입일: 04/07/15

679 평판

안내서 3개 작성하였습니다

댓글 2개

يبقه على الشعار مال النوكيه بس

حيدر حمود - 답글

You didn't even removed the screen you just removed the glass.

Macro Man - 답글

댓글 쓰기

조회 통계:

24 시간 전: 4

7일 전: 14

30일 전: 19

전체 시간: 1,829