이 버전에는 잘못된 편집 사항이 있을 수 있습니다. 최신 확인된 스냅샷으로 전환하십시오.
필요한 것
-
이 단계는 번역되지 않았습니다. 번역을 도와주십시오
-
Be sure cell phone is off before you begin to disassemble the phone.
-
Press the button on the bottom of the back of the cell phone.
-
Slide rear panel down and remove it.
-
-
이 단계는 번역되지 않았습니다. 번역을 도와주십시오
-
Using your fingernail, pry the back of the battery upwards and pull out.
-
-
이 단계는 번역되지 않았습니다. 번역을 도와주십시오
-
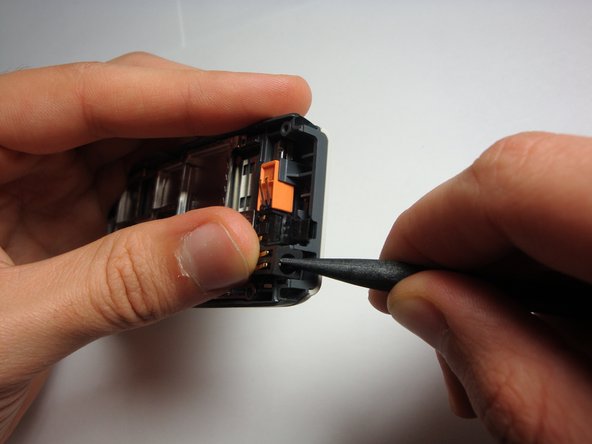
Insert the plastic opening tool under the faceplate.
-
Separate the faceplate from main body by twisting the prying tool with some force.
-
The faceplate is held by three plastic fasteners, so pry evenly on both sides of phone.
-
-
-
이 단계는 번역되지 않았습니다. 번역을 도와주십시오
-
Locate and remove the six screws on the front of the phone using a T6 Torx.
-
All 6 screws are 6.9mm long.
-
-
이 단계는 번역되지 않았습니다. 번역을 도와주십시오
-
After removing screws, lift the motherboard assembly straight off the cell phone body.
-
-
이 단계는 번역되지 않았습니다. 번역을 도와주십시오
-
With the logic board and LCD unit removed, gently pry out the charging port.
-


팀

Cal Poly, Team 20-8, Maness Fall 2010 Cal Poly, Team 20-8, Maness Fall 2010 회원
CPSU-MANESS-F10S20G8
4 회원들
안내서 24개 작성하였습니다