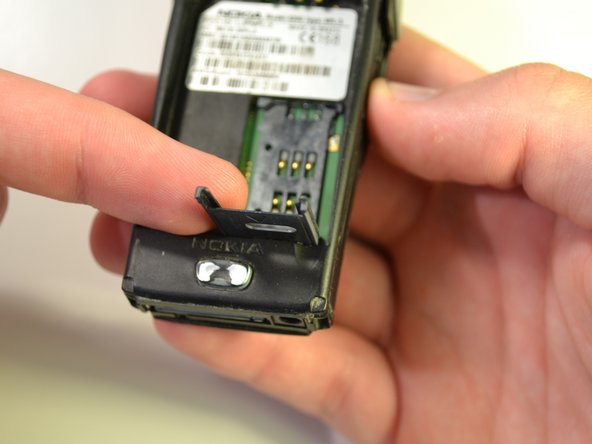
주요 콘텐츠로 건너뛰기

Nokia 6200 Classic SIM Card Replacement

  1. Nokia 6200 Classic SIM Card Replacement, Battery: 1 단계, 이미지 1/1
    • Turn the phone so it is face down (keypad side is down).

  2. Nokia 6200 Classic SIM Card Replacement: 2 단계, 이미지 1/3 Nokia 6200 Classic SIM Card Replacement: 2 단계, 이미지 2/3 Nokia 6200 Classic SIM Card Replacement: 2 단계, 이미지 3/3
    • Press and hold the button located at the bottom of the phone.

    • Slide the back of the phone downwards and away from the main body.

    • Remove the backing and place it to the side.

  3. Nokia 6200 Classic SIM Card Replacement: 3 단계, 이미지 1/3 Nokia 6200 Classic SIM Card Replacement: 3 단계, 이미지 2/3 Nokia 6200 Classic SIM Card Replacement: 3 단계, 이미지 3/3
    • Locate indentation from which battery can be removed.

    • Place finger in indentation and lift battery up from phone's body.

    • Remove battery from phone's body.

  4. Nokia 6200 Classic SIM Card Replacement, SIM Card: 4 단계, 이미지 1/1
    • Push the SimCard towards the bottom of the phone.

  5. Nokia 6200 Classic SIM Card Replacement: 5 단계, 이미지 1/2 Nokia 6200 Classic SIM Card Replacement: 5 단계, 이미지 2/2
    • Slide finger underneath top of SimCard.

    • Lift up the SimCard and rotate the top of the SimCard so it moves toward the bottom of the phone.

  6. Nokia 6200 Classic SIM Card Replacement: 6 단계, 이미지 1/2 Nokia 6200 Classic SIM Card Replacement: 6 단계, 이미지 2/2
    • Pull up on the SimCard and remove it from the back of the phone.

    • Place the SimCard to the side.

결론

To insert a new SimCard, simply push the card in as shown in step 6, and snap it in place.

Reid Polstra

회원 가입일: 10/22/12

1 평판

안내서 7개 작성하였습니다

Clemson, Team 15-5, Benson Fall 2012 Clemson, Team 15-5, Benson Fall 2012 회원

CLEM-BENSON-F12S15G5

3 회원들

안내서 7개 작성하였습니다

댓글 0개

댓글 쓰기

조회 통계:

24 시간 전: 1

7일 전: 1

30일 전: 1

전체 시간: 765