주요 콘텐츠로 건너뛰기

Nokia Lumia 930 Screen Replacement

필요한 것

  1. Nokia Lumia 930 Screen Replacement, Battery: 1 단계, 이미지 1/1
    • Pull the SIM card holder out of the top of the phone using your fingernail.

  2. Nokia Lumia 930 Screen Replacement: 2 단계, 이미지 1/2 Nokia Lumia 930 Screen Replacement: 2 단계, 이미지 2/2
    • Place tweezers or an opening tool in the SIM card slot and push upwards until the back panel pops out.

  3. Nokia Lumia 930 Screen Replacement: 3 단계, 이미지 1/2 Nokia Lumia 930 Screen Replacement: 3 단계, 이미지 2/2
    • Wedge a plastic opening tool between the two panels. Slide it along each side of the phone to completely remove the back panel.

  4. Nokia Lumia 930 Screen Replacement: 4 단계, 이미지 1/1
    • Remove the 4mm Torx #4 screw that's securing the battery connector.

  5. Nokia Lumia 930 Screen Replacement: 5 단계, 이미지 1/1
    • Use tweezers to remove the battery connector strap.

  6. Nokia Lumia 930 Screen Replacement: 6 단계, 이미지 1/2 Nokia Lumia 930 Screen Replacement: 6 단계, 이미지 2/2
    • Remove all ten 4mm Torx #4 screws that secure the battery cover to the frame of the phone.

  7. Nokia Lumia 930 Screen Replacement: 7 단계, 이미지 1/3 Nokia Lumia 930 Screen Replacement: 7 단계, 이미지 2/3 Nokia Lumia 930 Screen Replacement: 7 단계, 이미지 3/3
    • Use the flat end of a spudger to pry the battery cover from the phone's frame.

  8. Nokia Lumia 930 Screen Replacement: 8 단계, 이미지 1/1
    • Pull up on the heat spreader.

    • Be careful not to tear it!

  9. Nokia Lumia 930 Screen Replacement: 9 단계, 이미지 1/1
    • Use the flat end of the spudger to lift up the battery.

    • The battery is glued in place. Pry up carefully, not to damage it.

    • Two flex cables are directly underneath the battery.

  10. Nokia Lumia 930 Screen Replacement: 10 단계, 이미지 1/1
    • Remove the battery from the phone.

  11. Nokia Lumia 930 Screen Replacement, Motherboard: 11 단계, 이미지 1/2 Nokia Lumia 930 Screen Replacement, Motherboard: 11 단계, 이미지 2/2
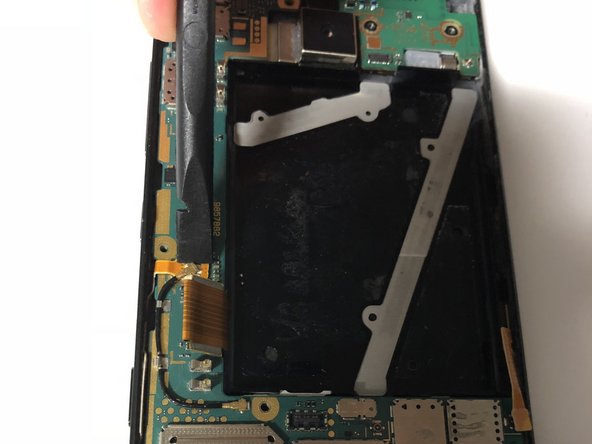
    • Use the flat end of a spudger to disconnect the camera connectors.

    • Pull the camera up and out to remove it from the phone.

  12. Nokia Lumia 930 Screen Replacement: 12 단계, 이미지 1/1
    • Use the flat end of a spudger to disconnect the six ribbon cables from the motherboard.

  13. Nokia Lumia 930 Screen Replacement: 13 단계, 이미지 1/3 Nokia Lumia 930 Screen Replacement: 13 단계, 이미지 2/3 Nokia Lumia 930 Screen Replacement: 13 단계, 이미지 3/3
    • Use the flat end of a spudger to pry up the orange flex cable underneath the battery.

    • Remove the orange flex cable from the phone.

  14. Nokia Lumia 930 Screen Replacement: 14 단계, 이미지 1/1
    • Repeat the previous step for the black jumper flex cable under the battery.

  15. Nokia Lumia 930 Screen Replacement: 15 단계, 이미지 1/2 Nokia Lumia 930 Screen Replacement: 15 단계, 이미지 2/2
    • Use the flat end of a spudger to disconnect both ends of the antenna cable from the motherboard.

    • Remove the antenna.

  16. Nokia Lumia 930 Screen Replacement: 16 단계, 이미지 1/1
    • Use tweezers to grab the adhesive that is under the LTE flex cable and pull it outwards and towards the bottom end of the phone.

    • Apply new adhesive when reassembling the phone.

  17. Nokia Lumia 930 Screen Replacement: 17 단계, 이미지 1/3 Nokia Lumia 930 Screen Replacement: 17 단계, 이미지 2/3 Nokia Lumia 930 Screen Replacement: 17 단계, 이미지 3/3
    • Use a spudger to pry up the bottom end of the motherboard, then pull it out.

  18. Nokia Lumia 930 Screen Replacement, Daughterboard: 18 단계, 이미지 1/2 Nokia Lumia 930 Screen Replacement, Daughterboard: 18 단계, 이미지 2/2
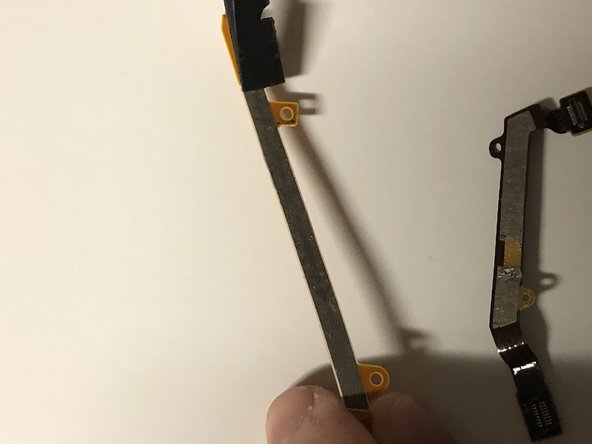
    • Use the pointed end of the spudger to pry up the daughterboard.

    • Use tweezers to lift the daughterboard out of the phone.

  19. Nokia Lumia 930 Screen Replacement, Display: 19 단계, 이미지 1/3 Nokia Lumia 930 Screen Replacement, Display: 19 단계, 이미지 2/3 Nokia Lumia 930 Screen Replacement, Display: 19 단계, 이미지 3/3
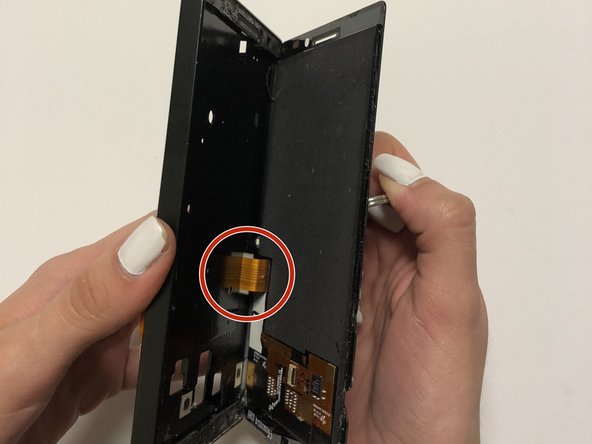
    • Place a suction cup in the center of the screen, then pry the display away from the frame.

    • When removing the display, pull slowly so that the flex cable does not become damaged.

    • Be sure to fold the display flex cable and ensure it is inserted safely when you are reassembling the display.

    • Remove any adhesive on the display and add new adhesive tape when reassembling the display.

결론

To reassemble your device, follow these instructions in reverse order.

다른 2명이 해당 안내서를 완성하였습니다.

Brianna Rivera

회원 가입일: 02/21/18

405 평판

안내서 2개 작성하였습니다

댓글 0개

댓글 쓰기

조회 통계:

24 시간 전: 2

7일 전: 5

30일 전: 13

전체 시간: 2,504