주요 콘텐츠로 건너뛰기

Nokia N70 Speaker Replacement

필요한 것

  1. Nokia N70 Speaker Replacement, Battery: 1 단계, 이미지 1/1
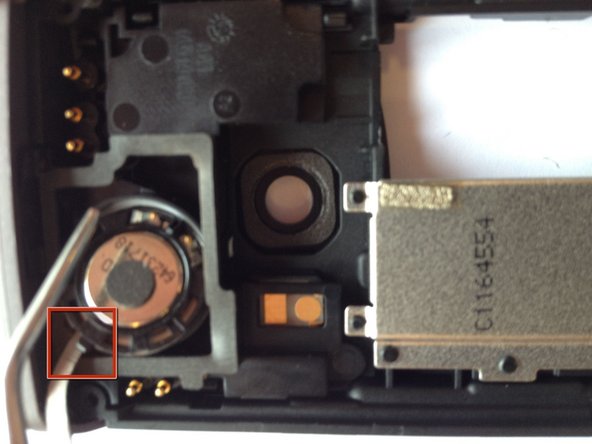
    • Orient the phone as shown.

    • Press the button with the plastic opening tool and slide the back case downward relative to the phone.

  2. Nokia N70 Speaker Replacement: 2 단계, 이미지 1/1
    • Remove the battery cover by lifting it away from the phone.

  3. Nokia N70 Speaker Replacement: 3 단계, 이미지 1/1
    • Insert the plastic opening tool into the marked space.

    • Lift up the side of the battery closest to the bottom edge of the phone using the plastic opening tool.

  4. Nokia N70 Speaker Replacement: 4 단계, 이미지 1/1
    • Remove the battery from the phone.

  5. Nokia N70 Speaker Replacement, Keypad: 5 단계, 이미지 1/3 Nokia N70 Speaker Replacement, Keypad: 5 단계, 이미지 2/3 Nokia N70 Speaker Replacement, Keypad: 5 단계, 이미지 3/3
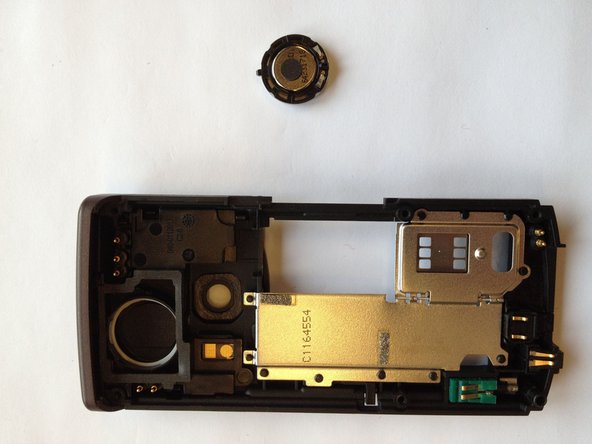
    • Insert the plastic opening tool in the marked areas in between the front and back covers.

    • Pry each corner with the plastic opening tool until the front case completely detaches.

  6. Nokia N70 Speaker Replacement: 6 단계, 이미지 1/3 Nokia N70 Speaker Replacement: 6 단계, 이미지 2/3 Nokia N70 Speaker Replacement: 6 단계, 이미지 3/3
    • Orient the phone so that the keypad is facing you.

    • Remove the keypad by lifting it away from the phone.

  7. Nokia N70 Speaker Replacement, Speaker: 7 단계, 이미지 1/2 Nokia N70 Speaker Replacement, Speaker: 7 단계, 이미지 2/2
    • Use the T6 Torx screwdriver to remove the six 15 mm Torx screws.

  8. Nokia N70 Speaker Replacement: 8 단계, 이미지 1/3 Nokia N70 Speaker Replacement: 8 단계, 이미지 2/3 Nokia N70 Speaker Replacement: 8 단계, 이미지 3/3
    • Lift the bottom edge of the front panel at a 45 degree angle.

    • Remove front panel by slowly pulling it away from the phone at a 45 degree angle.

  9. Nokia N70 Speaker Replacement: 9 단계, 이미지 1/3 Nokia N70 Speaker Replacement: 9 단계, 이미지 2/3 Nokia N70 Speaker Replacement: 9 단계, 이미지 3/3
    • Locate the speaker location located on the back panel of the phone.

    • Using the tweezers place one side of tweezers in the rectangular slot where the speaker is located

    • Slowly lift speaker away from the back panel.

결론

To reassemble your device, follow these instructions in reverse order.

Justin

회원 가입일: 10/12/11

984 평판

안내서 5개 작성하였습니다

Cal Poly, Team 6-2, Regan Fall 2011 Cal Poly, Team 6-2, Regan Fall 2011 회원

CPSU-REGAN-F11S6G2

4 회원들

안내서 10개 작성하였습니다

댓글 0개

댓글 쓰기

조회 통계:

24 시간 전: 0

7일 전: 2

30일 전: 4

전체 시간: 4,082