주요 콘텐츠로 건너뛰기

Nokia X Headphone Jack Replacement

필요한 것

  1. Nokia X Headphone Jack Replacement, Battery: 1 단계, 이미지 1/1
    • The first step is to remove the back cover off of the phone. To do this, place both your thumbs on the two top corners of the device and simply pop it off.

  2. Nokia X Headphone Jack Replacement: 2 단계, 이미지 1/1
    • To remove the battery, simply use your finger to pry the battery out of its slot.

  3. Nokia X Headphone Jack Replacement: 3 단계, 이미지 1/1
    • Inserting a new battery is as simple as lining up the gold connectors and sliding the battery in text-side down.

  4. Nokia X Headphone Jack Replacement, Display Assembly: 4 단계, 이미지 1/2 Nokia X Headphone Jack Replacement, Display Assembly: 4 단계, 이미지 2/2
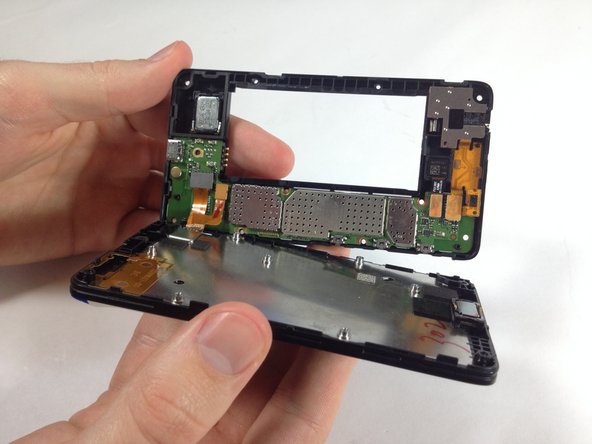
    • Remove the four 5.33mm T5 Torx screws which are located in the corners of the phone.

    • Remove the seven 4.00mm T5 Torx screws that line the phone between the corners.

  5. Nokia X Headphone Jack Replacement: 5 단계, 이미지 1/2 Nokia X Headphone Jack Replacement: 5 단계, 이미지 2/2
    • To remove the screen from the motherboard, you will need to apply some force until you feel it snap off. If the connectors unhook themselves, don't worry.

  6. Nokia X Headphone Jack Replacement: 6 단계, 이미지 1/1
    • If the connectors are still attached, simply unhook them by lifting the top of the connector with your finger.

  7. Nokia X Headphone Jack Replacement, Headphone Jack: 7 단계, 이미지 1/2 Nokia X Headphone Jack Replacement, Headphone Jack: 7 단계, 이미지 2/2
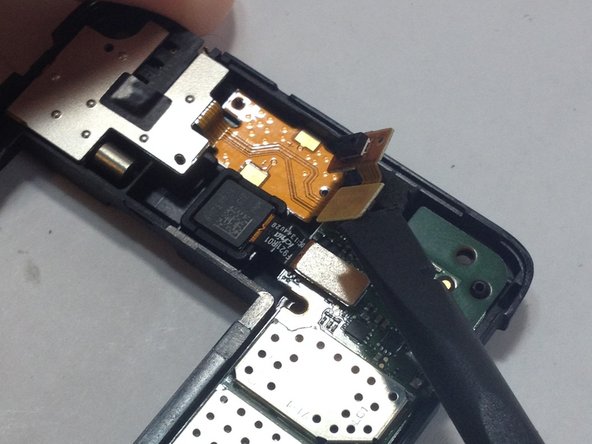
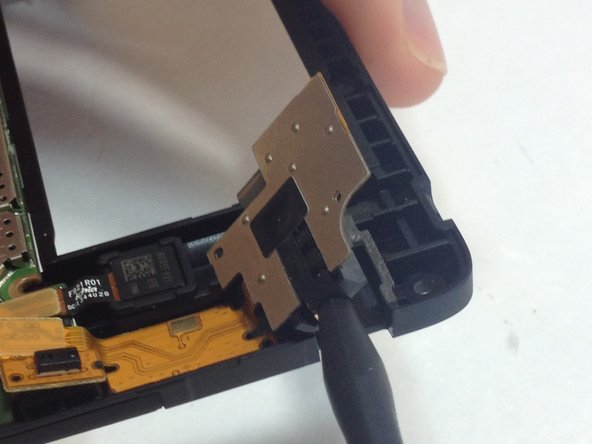
    • Using the flat end of the spudger tool, unhook the two connectors connecting the audio jack to the motherboard.

    • The top connecter is attached via an adhesive as well, it will require a little bit of force to remove it.

  8. Nokia X Headphone Jack Replacement: 8 단계, 이미지 1/3 Nokia X Headphone Jack Replacement: 8 단계, 이미지 2/3 Nokia X Headphone Jack Replacement: 8 단계, 이미지 3/3
    • Gently insert the pointed end of the spudger tool into the audio jack and lightly press upwards until the jack snaps loose.

    • It will take a bit of force to disconnect the biggest circuit from the motherboard as it is attached via an adhesive.

결론

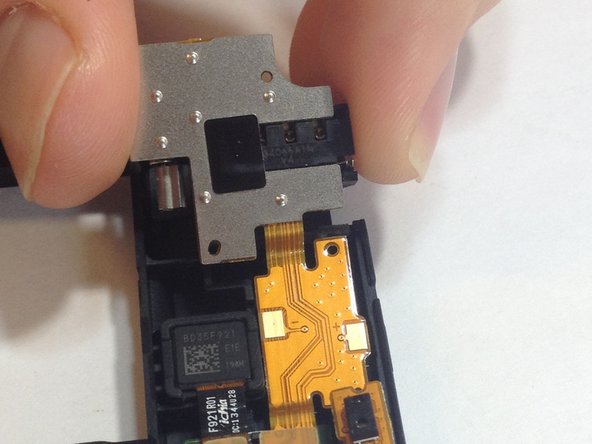
To reassemble your device, follow these instructions in reverse order.

다른 11명이 해당 안내서를 완성하였습니다.

Avery Dorsey

회원 가입일: 01/21/15

1,894 평판

안내서 4개 작성하였습니다

USF Tampa, Team 6-1, Brown Winter 2015 USF Tampa, Team 6-1, Brown Winter 2015 회원

USFT-BROWN-W15S6G1

3 회원들

안내서 8개 작성하였습니다

댓글 0개

댓글 쓰기

조회 통계:

24 시간 전: 0

7일 전: 0

30일 전: 0

전체 시간: 3,349