주요 콘텐츠로 건너뛰기

NuVision TM1088 Motherboard Replacement

필요한 것

  1. NuVision TM1088 Motherboard Replacement, Rear Cover: 1 단계, 이미지 1/1
    • Place the plastic opening tool between the front and rear cover and pry up on each corner of the cover.

  2. NuVision TM1088 Motherboard Replacement, Motherboard: 2 단계, 이미지 1/1
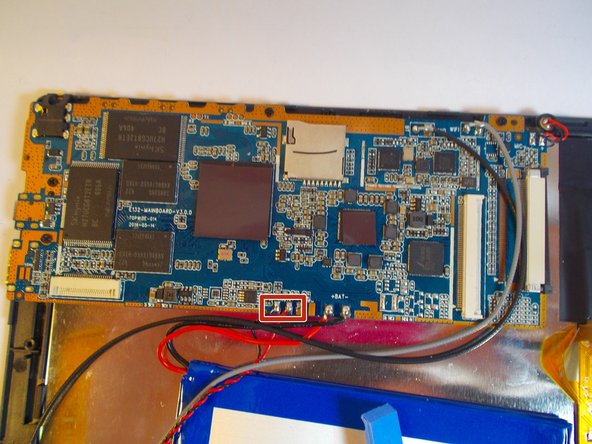
    • Remove the two plugs for the screen by pulling up and away from the motherboard.

  3. NuVision TM1088 Motherboard Replacement: 3 단계, 이미지 1/1
    • Remove the plug for the cameras by pulling the plug up and away from the motherboard.

  4. NuVision TM1088 Motherboard Replacement: 4 단계, 이미지 1/1
    • Melt solder and remove red and black wires leading to the battery.

  5. NuVision TM1088 Motherboard Replacement: 5 단계, 이미지 1/1
    • Melt the solder on the black and gray wires and remove wires from motherboard.

  6. NuVision TM1088 Motherboard Replacement: 6 단계, 이미지 1/1
    • Melt the solder and remove the red and black wires leading to the speaker.

  7. NuVision TM1088 Motherboard Replacement: 7 단계, 이미지 1/1
    • Remove the four 4 mm Phillips head screws holding in the motherboard.

  8. NuVision TM1088 Motherboard Replacement: 8 단계, 이미지 1/1
    • Lift the motherboard away from the front cover assembly.

결론

To reassemble your device, follow these instructions in reverse order.

다른 한 분이 해당 안내서를 완성하였습니다.

Nathaniel Nasman

회원 가입일: 03/23/15

750 평판

안내서 5개 작성하였습니다

UMass Dartmouth, Team 1-1, Miles Spring 2015 UMass Dartmouth, Team 1-1, Miles Spring 2015 회원

UMASSD-MILES-S15S1G1

3 회원들

안내서 10개 작성하였습니다

댓글 0개

댓글 쓰기

조회 통계:

24 시간 전: 0

7일 전: 0

30일 전: 3

전체 시간: 1,646