주요 콘텐츠로 건너뛰기

Numark TT1600 Tone Arm Replacement

필요한 것

  1. Numark TT1600 Tone Arm Replacement, Tone Arm: 1 단계, 이미지 1/2 Numark TT1600 Tone Arm Replacement, Tone Arm: 1 단계, 이미지 2/2
    • Flip over the turntable and remove the 9 screws on the outer edges.

  2. Numark TT1600 Tone Arm Replacement: 2 단계, 이미지 1/1
    • Remove the back cover by pulling it apart.

  3. Numark TT1600 Tone Arm Replacement: 3 단계, 이미지 1/3 Numark TT1600 Tone Arm Replacement: 3 단계, 이미지 2/3 Numark TT1600 Tone Arm Replacement: 3 단계, 이미지 3/3
    • Remove the clip located on the backside of the audio jack housing by gently pulling it out.

    • There will be some resistance but continue to pull gently.

    • The clip is located right underneath the audio jacks.

  4. Numark TT1600 Tone Arm Replacement: 4 단계, 이미지 1/3 Numark TT1600 Tone Arm Replacement: 4 단계, 이미지 2/3 Numark TT1600 Tone Arm Replacement: 4 단계, 이미지 3/3
    • Remove the screw that connects the black wire of the tone arm to the base of the audio jack housing.

  5. Numark TT1600 Tone Arm Replacement: 5 단계, 이미지 1/2 Numark TT1600 Tone Arm Replacement: 5 단계, 이미지 2/2
    • Gently pull the wire that you just unscrewed to release it from the clip.

  6. Numark TT1600 Tone Arm Replacement: 6 단계, 이미지 1/3 Numark TT1600 Tone Arm Replacement: 6 단계, 이미지 2/3 Numark TT1600 Tone Arm Replacement: 6 단계, 이미지 3/3
    • Remove the two screws connecting the circuit board to the tone arm.

  7. Numark TT1600 Tone Arm Replacement: 7 단계, 이미지 1/2 Numark TT1600 Tone Arm Replacement: 7 단계, 이미지 2/2
    • Remove the two remaining screws connecting the tone arm to the device.

  8. Numark TT1600 Tone Arm Replacement: 8 단계, 이미지 1/1
    • Flip the turntable back over to the top side.

    • Remove the counter weight located at the back of the tone arm.

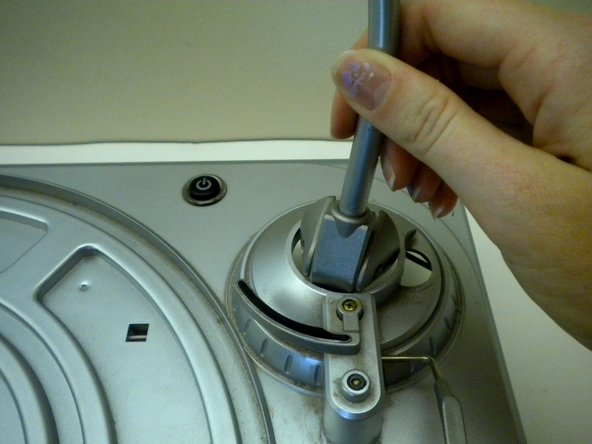
  9. Numark TT1600 Tone Arm Replacement: 9 단계, 이미지 1/3 Numark TT1600 Tone Arm Replacement: 9 단계, 이미지 2/3 Numark TT1600 Tone Arm Replacement: 9 단계, 이미지 3/3
    • Push out the pin keeping the tone arm in place using a Phillips #00 screwdriver.

    • Once you have pushed the pin out with the screwdriver, pull the rest of it out using your hand.

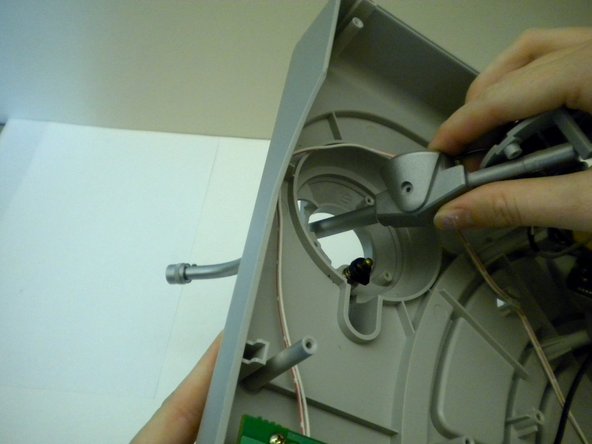
  10. Numark TT1600 Tone Arm Replacement: 10 단계, 이미지 1/3 Numark TT1600 Tone Arm Replacement: 10 단계, 이미지 2/3 Numark TT1600 Tone Arm Replacement: 10 단계, 이미지 3/3
    • Pick up the tone arm and point the back end of it towards its base.

    • Push the back end of the tone arm into the hole.

    • Flip the turntable over and pull the tone arm all the way through the hole.

결론

To reassemble your device, follow these instructions in reverse order.

다른 3명이 해당 안내서를 완성하였습니다.

Nikolai

회원 가입일: 10/12/11

254 평판

안내서 5개 작성하였습니다

Cal Poly, Team 17-14, Regan Fall 2011 Cal Poly, Team 17-14, Regan Fall 2011 회원

CPSU-REGAN-F11S17G14

4 회원들

안내서 11개 작성하였습니다

댓글 0개

댓글 쓰기

조회 통계:

24 시간 전: 0

7일 전: 6

30일 전: 28

전체 시간: 8,211