이 버전에는 잘못된 편집 사항이 있을 수 있습니다. 최신 확인된 스냅샷으로 전환하십시오.
필요한 것
-
이 단계는 번역되지 않았습니다. 번역을 도와주십시오
-
Remove all the screws using your Phillips #00 holding the back plate in place. This includes:
-
On the Back: Unscrew the 4mm screw to the right of the viewfinder.
-
On the Bottom:
-
Unscrew the 3mm screw in the top left corner.
-
Unscrew the four 3mm screws under the battery cover.
-
On the Right Side: Unscrew the one 3mm screw holding the right-side panel.
-
On the Left Side: Unscrew the two 2mm screws holding the left-side panel.
-
-
-
이 단계는 번역되지 않았습니다. 번역을 도와주십시오
-
After you remove the back cover:
-
Gently pull the two ribbon cables out of their sockets.
-
Gently disconnect the white cable.
-
-
이 단계는 번역되지 않았습니다. 번역을 도와주십시오
-
Peel the black tape off the back of the LCD.
-
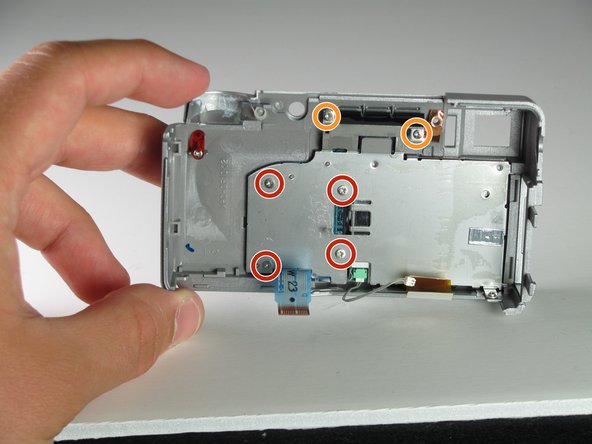
Using the Phillips #00 remove the four 3mm screws on the LCD bracket.
-
Remove the two 2mm screws from the top of the bracket.
-
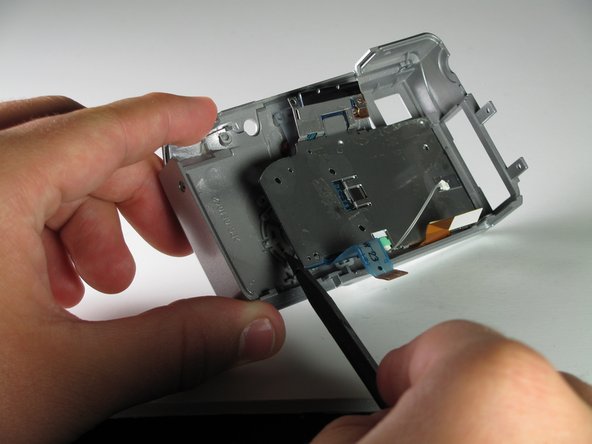
Use a spudger to pop the LCD screen out of the camera’s backplate.
-
다른 2명이 해당 안내서를 완성하였습니다.


