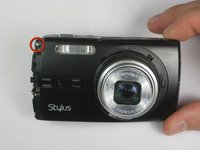
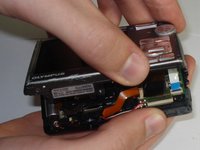
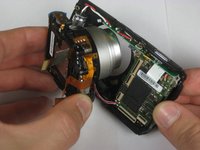
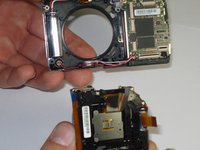
주요 콘텐츠로 건너뛰기

Olympus Stylus 1010 Lens Replacement

필요한 것

  1. Olympus Stylus 1010 Lens Replacement, Disassembling Olympus Stylus 1010 Case: 1 단계, 이미지 1/2 Olympus Stylus 1010 Lens Replacement, Disassembling Olympus Stylus 1010 Case: 1 단계, 이미지 2/2
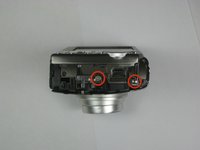
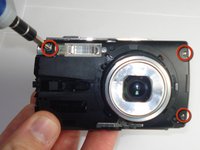
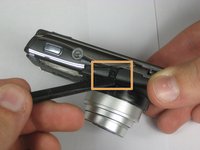
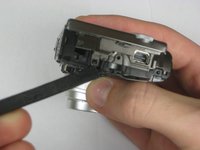
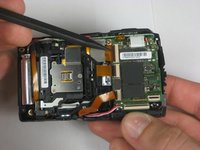
    • Remove the five Phillips #00 bottom and right side panel screws.

  2. Olympus Stylus 1010 Lens Replacement: 2 단계, 이미지 1/1
    • Remove the right side panel by pulling off the large silver piece.

  3. Olympus Stylus 1010 Lens Replacement: 3 단계, 이미지 1/2 Olympus Stylus 1010 Lens Replacement: 3 단계, 이미지 2/2
    • Remove the remaining three Phillips #00 side and front panel screws.

  4. Olympus Stylus 1010 Lens Replacement: 4 단계, 이미지 1/1
    • Using your thumb and forefinger, pull off the silver name plate and silver "T-shape" piece.

  5. Olympus Stylus 1010 Lens Replacement: 5 단계, 이미지 1/1
    • Remove the black front panel by sliding it towards the lens and then pulling it up off of the camera.

  6. Olympus Stylus 1010 Lens Replacement: 6 단계, 이미지 1/3 Olympus Stylus 1010 Lens Replacement: 6 단계, 이미지 2/3 Olympus Stylus 1010 Lens Replacement: 6 단계, 이미지 3/3
    • Remove the three Phillips #00 screws from the front of the camera.

    • Using a spudger, lift the two tabs to separate the case—one tab on top and one tab on the right side.

  7. Olympus Stylus 1010 Lens Replacement: 7 단계, 이미지 1/3 Olympus Stylus 1010 Lens Replacement: 7 단계, 이미지 2/3 Olympus Stylus 1010 Lens Replacement: 7 단계, 이미지 3/3
    • Using a plastic spudger, lift up the black clips.

    • Still using the plastic spudger, detach the gold connector strip and white connector strip.

    • Using both hands, pull the camera apart into two pieces.

  8. Olympus Stylus 1010 Lens Replacement, Lens: 8 단계, 이미지 1/2 Olympus Stylus 1010 Lens Replacement, Lens: 8 단계, 이미지 2/2
    • Using a plastic spudger, lift up the black clips.

    • Still using the spudger, detach the three gold wire tape connectors from the inside of the camera.

  9. Olympus Stylus 1010 Lens Replacement: 9 단계, 이미지 1/1
    • Remove the three screws from the inside of the camera using a #00 screwdriver.

  10. Olympus Stylus 1010 Lens Replacement: 10 단계, 이미지 1/2 Olympus Stylus 1010 Lens Replacement: 10 단계, 이미지 2/2
    • Using your thumb and forefinger, pull the lens piece straight out from the body of the camera.

결론

To reassemble your device, follow these instructions in reverse order.

다른 2명이 해당 안내서를 완성하였습니다.

Max McIntyre

회원 가입일: 01/21/11

526 평판

안내서 4개 작성하였습니다

Cal Poly, Team 13-4, Forte Winter 2011 Cal Poly, Team 13-4, Forte Winter 2011 회원

CPSU-FORTE-W11S13G4

6 회원들

안내서 12개 작성하였습니다

댓글 0개

댓글 쓰기

조회 통계:

24 시간 전: 0

7일 전: 5

30일 전: 12

전체 시간: 5,909