필요한 것
-
이 단계는 번역되지 않았습니다. 번역을 도와주십시오
-
Locate the 2 screws on the bottom of the slider.
-
Remove both screws with a #00 Phillips screwdriver.
-
-
이 단계는 번역되지 않았습니다. 번역을 도와주십시오
-
Gently pull on the bottom of the slider until it comes off the lower track.
-
There is a little piece that connects the slider to the track. Be sure not to lose this as it is needed to put the slider back on.
-
-
이 단계는 번역되지 않았습니다. 번역을 도와주십시오
-
Locate the 3 screws on the outer metal band and remove them with a #00 Phillips screwdriver.
-
-
이 단계는 번역되지 않았습니다. 번역을 도와주십시오
-
Use the spudger to peel off the outer metal band, starting from the bottom of the camera.
-
-
이 단계는 번역되지 않았습니다. 번역을 도와주십시오
-
The shutter button can now be removed. It is not connected to the camera and can be lifted off.
-
-
-
이 단계는 번역되지 않았습니다. 번역을 도와주십시오
-
Remove the memory card.
-
Locate and remove the 2 screws using a #00 Phillips screwdriver.
-
-
이 단계는 번역되지 않았습니다. 번역을 도와주십시오
-
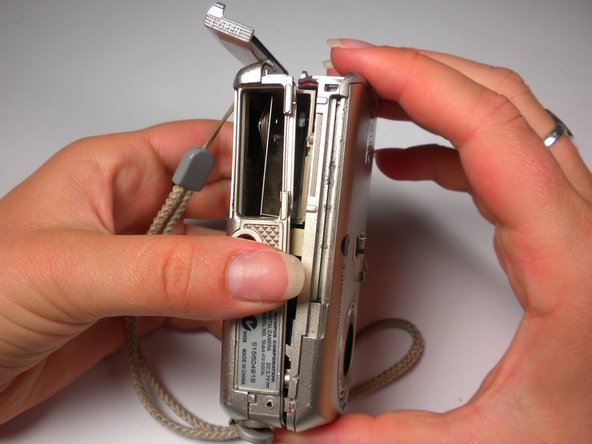
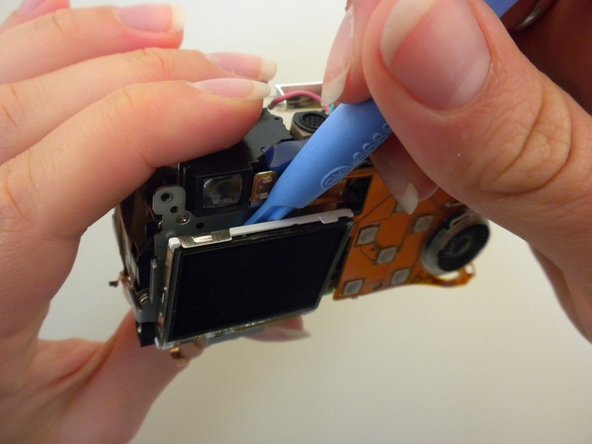
Use a spudger around the edge of the case to loosen it.
-
Carefully wiggle the back case off. This may require a fair amount of force.
-
-
이 단계는 번역되지 않았습니다. 번역을 도와주십시오
-
Locate the 3 internal screws holding on the front of the case. Remove them with a #00 Phillips screwdriver.
-
-
이 단계는 번역되지 않았습니다. 번역을 도와주십시오
-
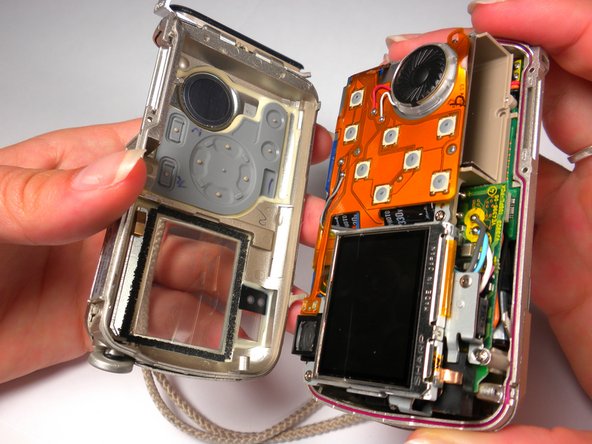
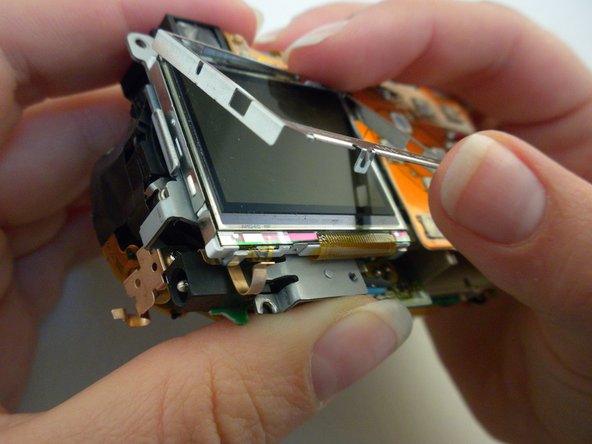
While grasping the interior and the front case, gently pull until they start to come apart. Some light wiggling may be required.
-
Be careful not to completely pull the front case off because it will still be connected with wires.
-
-
이 단계는 번역되지 않았습니다. 번역을 도와주십시오
-
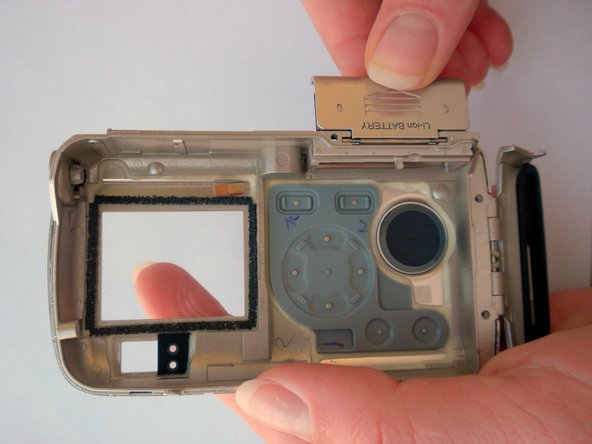
Locate the gray compartment covering the flash.
-
Position your flat head screw driver or small spudger underneath the tab that is keeping the gray cover on.
-
Gently lift the tab so the gray compartment becomes free.
-
-
이 단계는 번역되지 않았습니다. 번역을 도와주십시오
-
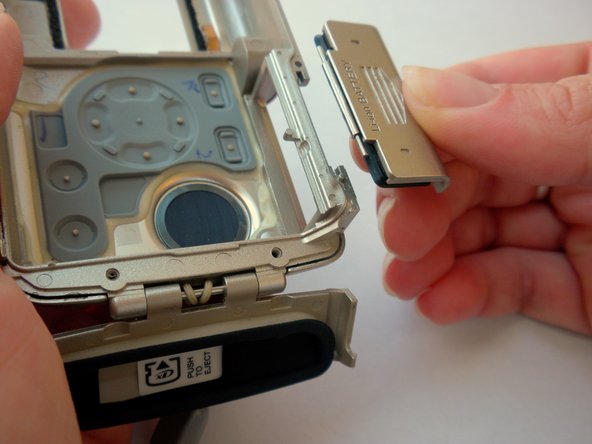
Use the spudger around the perimeter of the gray compartment to detach it from the front case.
-
The gray compartment can now be removed from the flash unit.
-
The flash unit can now be removed, and a new one soldered back on.
-
-
이 단계는 번역되지 않았습니다. 번역을 도와주십시오
-
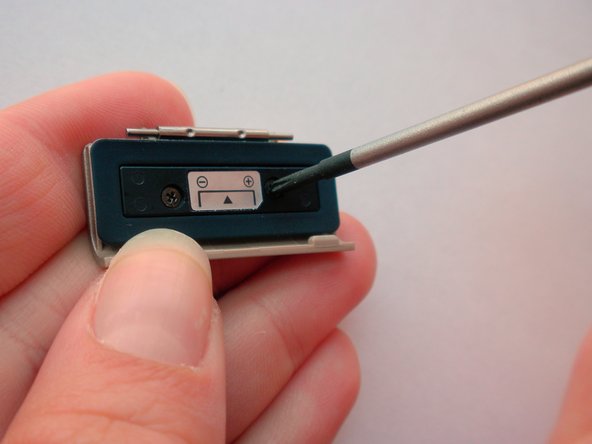
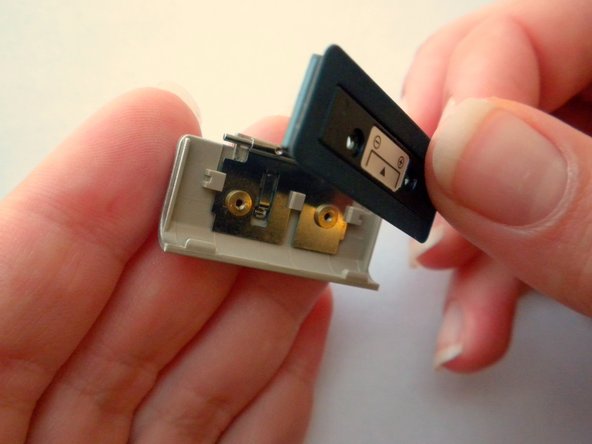
Locate and unscrew the 2 screws with a #00 Phillips screwdriver.
-
Remove the black seal.
-
-
이 단계는 번역되지 않았습니다. 번역을 도와주십시오
-
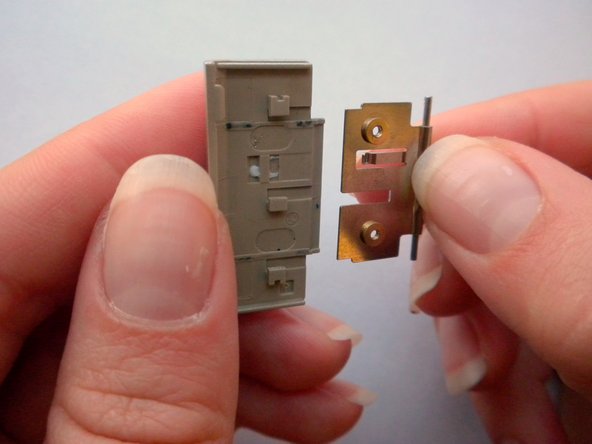
This is what the battery cover and back case look like completely disassembled.
-
-
이 단계는 번역되지 않았습니다. 번역을 도와주십시오
-
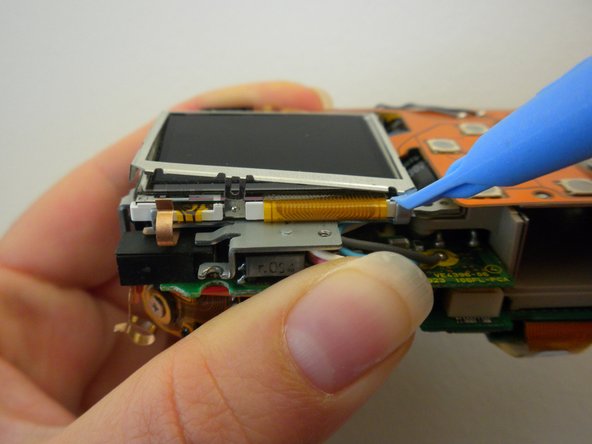
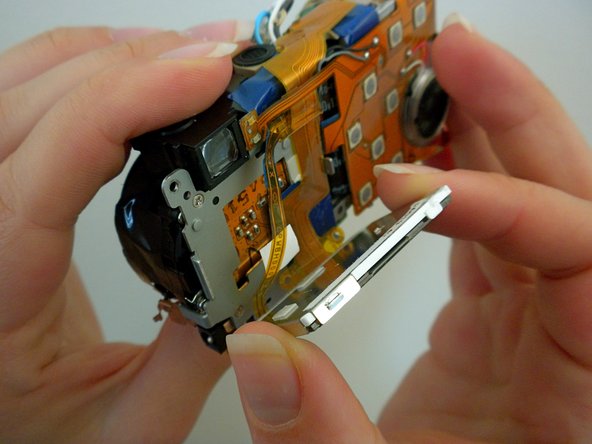
This is what the camera will look like now that the LCD screen is removed.
-


팀

Cal Poly, Team 6-13, Maness Spring 2010 Cal Poly, Team 6-13, Maness Spring 2010 회원
CPSU-MANESS-S10S6G13
5 회원들
안내서 17개 작성하였습니다