주요 콘텐츠로 건너뛰기

Olympus Stylus Tough 6020 Lens Replacement

필요한 것

  1. Olympus Stylus Tough 6020 Lens Replacement, Battery: 1 단계, 이미지 1/1
    • Slide and push the battery casing to open it.

    • Push the battery to eject it.

  2. Olympus Stylus Tough 6020 Lens Replacement, Bottom Plating: 2 단계, 이미지 1/3 Olympus Stylus Tough 6020 Lens Replacement, Bottom Plating: 2 단계, 이미지 2/3 Olympus Stylus Tough 6020 Lens Replacement, Bottom Plating: 2 단계, 이미지 3/3
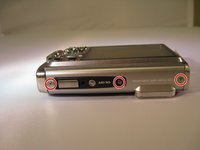
    • Turn the camera so that you are facing the bottom of the camera.

    • Using a Phillips 00 screwdriver, unscrew the three 3.9mm screws on the bottom of the camera.

    • Using a spudger, pry off the plating on the bottom of the camera.

  3. Olympus Stylus Tough 6020 Lens Replacement, Top Plating: 3 단계, 이미지 1/3 Olympus Stylus Tough 6020 Lens Replacement, Top Plating: 3 단계, 이미지 2/3 Olympus Stylus Tough 6020 Lens Replacement, Top Plating: 3 단계, 이미지 3/3
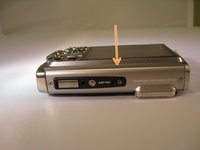
    • Turn the camera so that you are facing the top of the camera.

    • Using a Phillips 00 screwdriver, unscrew the three 3.9mm screws located on the top of the camera.

    • Using a spudger, pry off the plating on the top of the camera.

  4. Olympus Stylus Tough 6020 Lens Replacement, Left Plating: 4 단계, 이미지 1/2 Olympus Stylus Tough 6020 Lens Replacement, Left Plating: 4 단계, 이미지 2/2
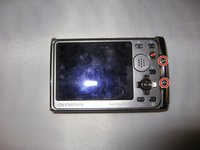
    • Turn the camera so the LCD is facing upwards.

    • Using a Phillips 00 screwdriver, unscrew the two 3.9mm screws located on the left side of the device.

  5. Olympus Stylus Tough 6020 Lens Replacement, Black "Olympus" Face Plate: 5 단계, 이미지 1/3 Olympus Stylus Tough 6020 Lens Replacement, Black "Olympus" Face Plate: 5 단계, 이미지 2/3 Olympus Stylus Tough 6020 Lens Replacement, Black "Olympus" Face Plate: 5 단계, 이미지 3/3
    • Using a Phillips 00 screwdriver, unscrew the 3.9mm screw located next to the black "Olympus" face plate.

    • Using a T6 Torx screwdriver, unscrew the two 3.5mm screws located on the black "Olympus" face plate.

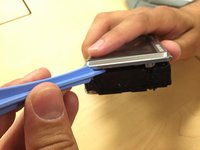
    • Using a spudger, gently pry off the black "Olympus" face plate.

  6. Olympus Stylus Tough 6020 Lens Replacement, End Casing: 6 단계, 이미지 1/3 Olympus Stylus Tough 6020 Lens Replacement, End Casing: 6 단계, 이미지 2/3 Olympus Stylus Tough 6020 Lens Replacement, End Casing: 6 단계, 이미지 3/3
    • Using a Phillips 00 screwdriver, unscrew the two 3.9mm screws to the right of the cursor pad on the U-shaped frame.

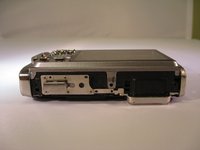
    • Turn the device over so the front of the camera is facing you.

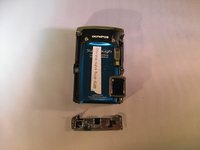
    • Using a Phillips 00 screwdriver, unscrew the two 3.9mm screws on the end casing.

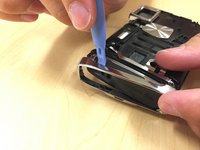
    • Using a spudger, pry off the end casing.

  7. Olympus Stylus Tough 6020 Lens Replacement, Blue Face Plate: 7 단계, 이미지 1/3 Olympus Stylus Tough 6020 Lens Replacement, Blue Face Plate: 7 단계, 이미지 2/3 Olympus Stylus Tough 6020 Lens Replacement, Blue Face Plate: 7 단계, 이미지 3/3
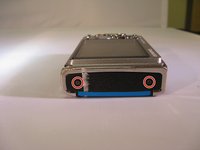
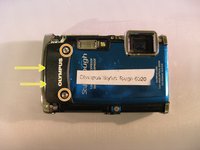
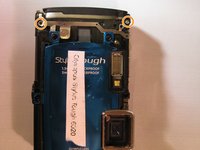
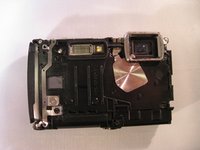
    • Turn the camera so the blue face plate is visible.

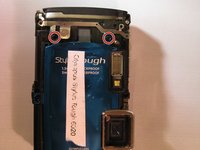
    • Using a Phillips 00 screwdriver, unscrew the two 3mm screws on the blue plate.

    • Using a Phillips 00 screwdriver, unscrew the 3.9mm screw located at the bottom of the camera straight down from the flash.

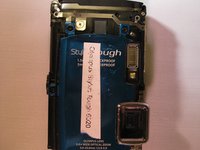
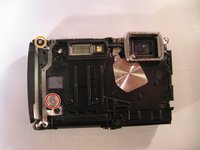
    • Using a spudger, gently pry off the blue face plate.

  8. Olympus Stylus Tough 6020 Lens Replacement, Back Plate: 8 단계, 이미지 1/1
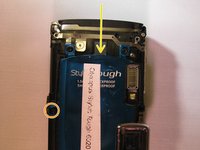
    • Using a Phillips 00 screwdriver, unscrew the 9mm screws on the top of the camera to the right of the flash.

  9. Olympus Stylus Tough 6020 Lens Replacement: 9 단계, 이미지 1/3 Olympus Stylus Tough 6020 Lens Replacement: 9 단계, 이미지 2/3 Olympus Stylus Tough 6020 Lens Replacement: 9 단계, 이미지 3/3
    • Using a Phillips 00 screwdriver, unscrew the wide 3.5mm screw located in the middle of the camera.

    • Using a Phillips 00 screwdriver, unscrew the 9mm screw located at the top left corner of the camera.

    • Using a spudger, separate the black plate from the camera.

  10. Olympus Stylus Tough 6020 Lens Replacement, Lens: 10 단계, 이미지 1/1
    • Unscrew screws on place holder plates

  11. Olympus Stylus Tough 6020 Lens Replacement: 11 단계, 이미지 1/1
    • Gently lift Lens compartment out of device.

  12. Olympus Stylus Tough 6020 Lens Replacement: 12 단계, 이미지 1/1
    • From top view, unscrew 3 screws

    • Do not worry about the screw on top of the 2 screws.

  13. Olympus Stylus Tough 6020 Lens Replacement: 13 단계, 이미지 1/2 Olympus Stylus Tough 6020 Lens Replacement: 13 단계, 이미지 2/2
    • Lens comes off

결론

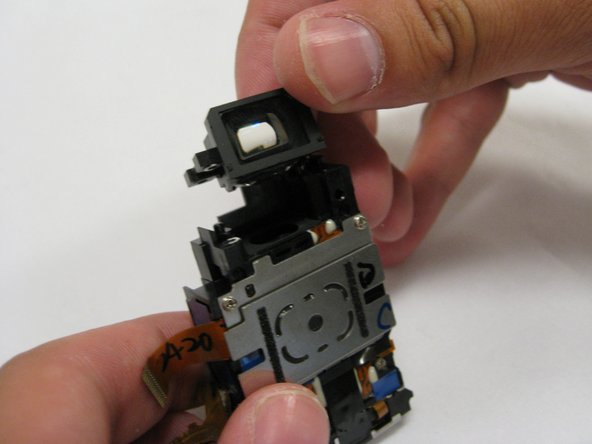
To reassemble your device, follow these instructions in reverse order.

Violeta

회원 가입일: 04/08/15

101 평판

안내서 1개 작성함

댓글 0개

댓글 쓰기

조회 통계:

24 시간 전: 2

7일 전: 3

30일 전: 6

전체 시간: 518