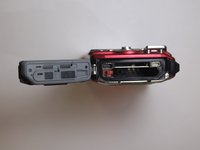
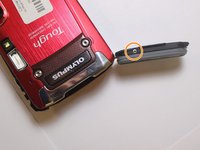
주요 콘텐츠로 건너뛰기

Olympus TG-820 iHS Locking Mechanism Replacement

필요한 것

  1. Olympus TG-820 iHS Locking Mechanism Replacement, Battery: 1 단계, 이미지 1개 중 1개
    • Orient camera to look directly at battery compartment side as shown.

  2. Olympus TG-820 iHS Locking Mechanism Replacement: 2 단계, 이미지 3개 중 1개 Olympus TG-820 iHS Locking Mechanism Replacement: 2 단계, 이미지 3개 중 2개 Olympus TG-820 iHS Locking Mechanism Replacement: 2 단계, 이미지 3개 중 3개
    • Locate the two latches on the battery compartment.

    • First, move the "lock" switch left to reveal red indicator.

    • Next, move the "cover latch" switch downward to reveal red indicator.

    • You have to move the switches in that order for the compartment to unlatch.

  3. Olympus TG-820 iHS Locking Mechanism Replacement: 3 단계, 이미지 2개 중 1개 Olympus TG-820 iHS Locking Mechanism Replacement: 3 단계, 이미지 2개 중 2개
    • Allow the battery compartment latch to completely open.

    • Insert battery with the writing face up.

    • The bigger slot is for the battery. The smaller slot is for the memory card.

    • Battery not shown.

  4. Olympus TG-820 iHS Locking Mechanism Replacement, Locking Mechanism: 4 단계, 이미지 3개 중 1개 Olympus TG-820 iHS Locking Mechanism Replacement, Locking Mechanism: 4 단계, 이미지 3개 중 2개 Olympus TG-820 iHS Locking Mechanism Replacement, Locking Mechanism: 4 단계, 이미지 3개 중 3개
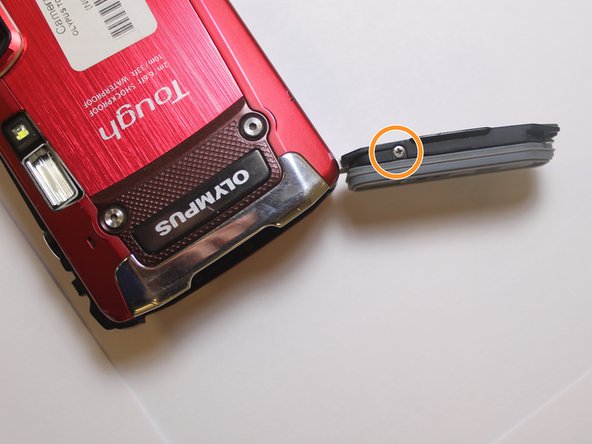
    • Locate and remove the 4.7mm Phillips #000 screw on the back side of the battery compartment locking mechanism.

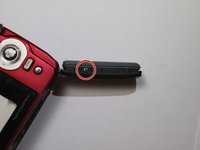
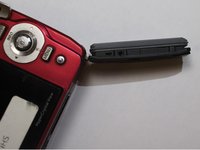
    • Locate and remove the 4.7mm Phillips #000 screw on the front side of the battery compartment locking mechanism.

  5. Olympus TG-820 iHS Locking Mechanism Replacement: 5 단계, 이미지 1개 중 1개
    • Locate the two screws on the side of the battery compartment.

    • Remove the two 4.85mm Phillips #000 screws.

  6. Olympus TG-820 iHS Locking Mechanism Replacement: 6 단계, 이미지 2개 중 1개 Olympus TG-820 iHS Locking Mechanism Replacement: 6 단계, 이미지 2개 중 2개
    • Once all 4 screws are out, the back panel of the battery compartment will come off.

    • The entire battery compartment cover will also detach from the camera.

결론

To reassemble your device, follow these instructions in reverse order.

작성자

2다른 기여자 명과 함께

Larissa Knight

회원 가입일: 03/21/16

549 평판

안내서 5개를 작성함

Clemson, Team 7-2, Benson Spring 2016 Clemson, Team 7-2, Benson Spring 2016 회원

CLEM-BENSON-S16S7G2

4 회원들

안내서 16개를 작성함

0가이드 댓글

댓글 쓰기

조회 통계:

지난 24시간: 0

지난 7일: 0

지난 30일: 7

전체 시간: 616