소개
If your phone is not switching on, you may be required to replace the motherboard. This guide will help you do so.
필요한 것
-
-
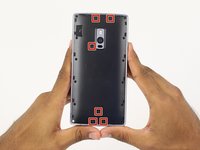
Make sure that your phone is turned off before proceeding
-
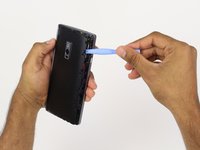
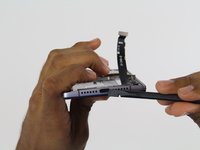
Use an opening pick, your thumbnail, or a spudger to gently pry off the external casing
 FixBot에 문의하기
-
-
-
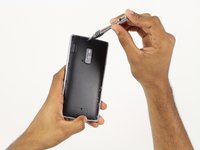
Locate the SIM card tray on the back of the phone
-
Use your thumb to gently slide out the tray
-
-
이 단계에 사용된 도구:Tweezers$4.99
-
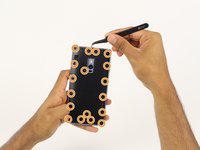
Find and carefully remove all 6 rubber screw covers with the tweezers.
-
Unscrew all 18 screws from the mid frame.
-
-
-
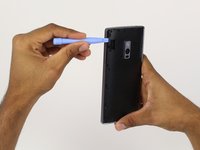
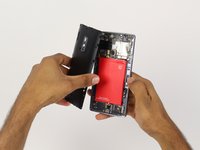
Carefully pry up the mid frame from the back of the phone with the plastic opening tools.
-
Slowly work your way around the phone releasing all the clips that hold the frame in place.
-
-
-
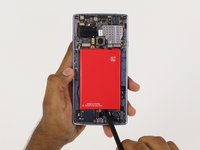
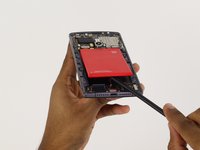
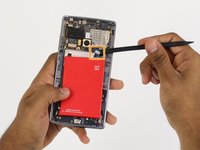
Using the spudger tool, pry the battery up from the adhesive.
-
Once the battery is loose from the adhesive holding it down, use the spudger tool to pry up the connection from the battery to the phone on the top right hand side.
-
-
-
-
Use the spudger tool to pry off the connections at the bottom-right of the front-facing camera.
-
Be sure to disconnect both connections before attempting to lift off the wiring.
-
-
-
Use the spudger tool to pry off the connection on the left of the front facing camera.
-
-
이 단계에 사용된 도구:Tweezers$4.99
-
Use the tweezers to lift up the camera from its groove.
-
The camera has a long, flat portion at the bottom, so be sure to slide the camera up while lifting it up.
-
-
-
Use a spudger to pry off the connection below the front-facing camera.
-
Using the tweezers, carefully remove the camera from its groove.
-
-
-
Use the spudger tool to pry up the top connection of the charging port.
-
Follow the cable with the spudger and slowly pry it up from the adhesive holding it down.
-
Stop at the next connection.
-
-
-
Again, using the spudger tool, pry up the final 4 connections on the charging port
-
Again, just like before, slowly follow the cable with the spudger tool lifting it up from the adhesive backing.
-
-
-
Using the spudger tool on the bottom of the phone, push the charging part inward.
-
Once the charging port is free from the frame, use your fingers to remove the charging port the rest of the way.
-
-
-
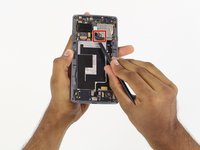
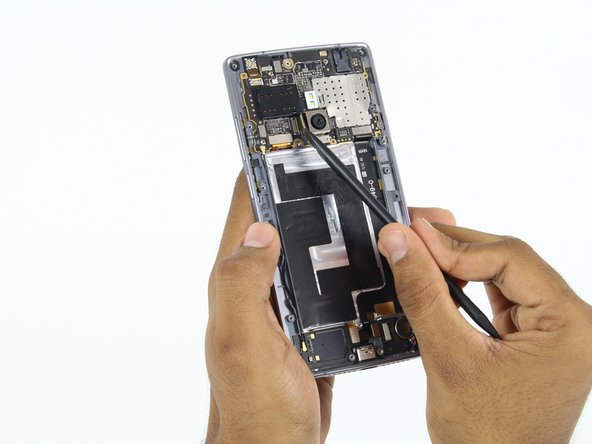
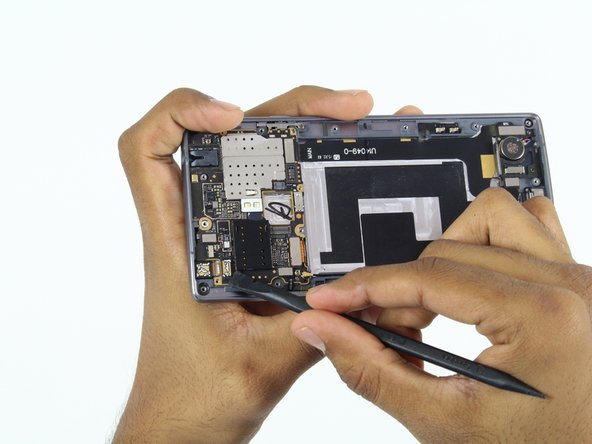
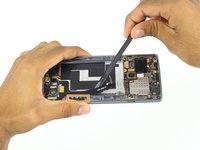
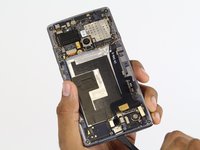
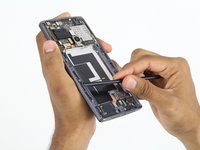
Use the spudger tool to pry off the long wire connecting the motherboard (top) and the daughter-board (bottom).
-
Try to use the spudger to pry off as much of the wire as possible before attempting to remove it.
-
-
-
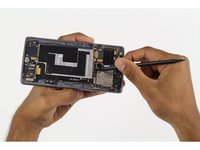
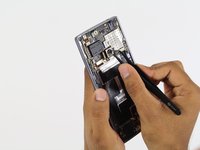
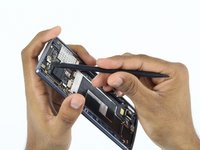
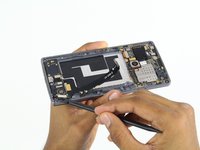
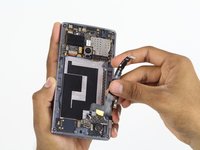
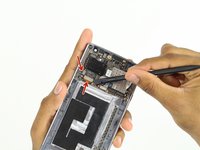
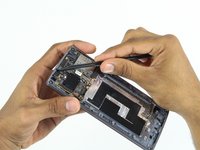
Use the spudger tool to pry off the 2 connections at the bottom-left of the motherboard.
-
-
-
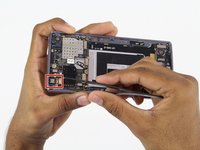
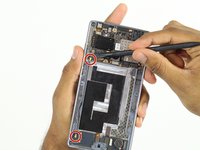
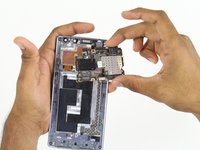
Use the screwdriver to unscrew the screw fastened at the bottom right of the motherboard.
-
-
-
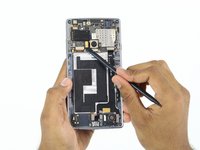
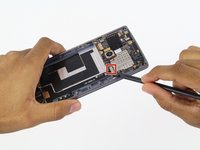
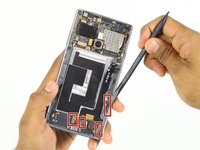
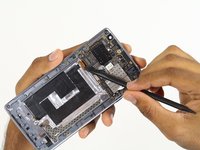
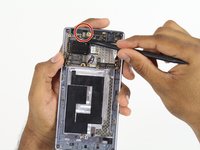
Use the spudger tool to pry up the connection at the top of the motherboard.
-
-
-
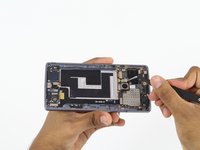
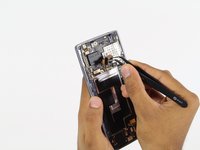
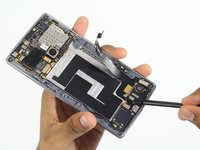
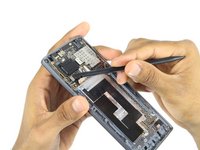
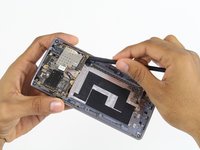
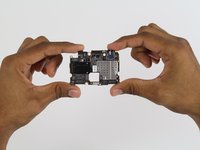
Insert the spudger tool underneath the bottom right corner of the motherboard.
-
Gently work your way around the underside of the board, making sure that it is completely detached before attempting to remove it.
-


To reassemble your device, follow these instructions in reverse order.
다른 13명이 해당 안내서를 완성하였습니다.
팀

Cal Poly, Team 4-5, Maness Fall 2015 Cal Poly, Team 4-5, Maness Fall 2015 회원
CPSU-MANESS-F15S4G5
4 회원들
안내서 31개를 작성함
3가이드 댓글
Perfect. How can change de microphone and audio plug?
something?
where can i find the replace of the motherboard?
hi,
where the wifi antena location?
Nimrod Cohen - 답글 공유