소개
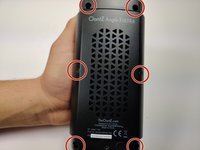
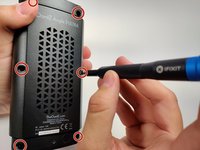
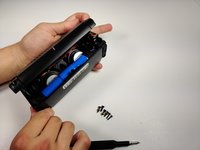
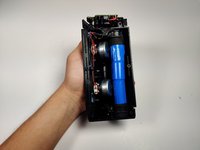
This guide will help you open up your Oontz Angle 3 Ultra, which will allow you to work on its sensitive internals. To open up the speaker, you must remove the back panel to access the inner components of the device.
필요한 것
-
이 단계에 사용된 도구:Tweezers$4.99
-
Remove the two black rubber sheaths around the edges of the speaker.
-
Under the symbol-marked sheath there is a white rubber covering for the buttons. Peel this away to reveal the panel underneath.
-
On two corners of its triangular face there is a small divot, which allows you to use your fingernails or a pair of tweezers to grip and peel away the covering.
-
-


To reassemble your device, follow these instructions in reverse order.
다른 한 분이 해당 안내서를 완성하였습니다.
팀

Embry-Riddle Aeronautical University, Team S6-G9, Rauch Spring 2020 Embry-Riddle Aeronautical University, Team S6-G9, Rauch Spring 2020 회원
ERAU-RAUCH-S20S6G9
3 회원들
안내서 6개를 작성함