주요 콘텐츠로 건너뛰기

Opening Tapco Link Series device

필요한 것

  1. Opening Tapco Link Series device, Introduction: 1 단계, 이미지 1/1
    • Put the device in front of you, with the knob labels the right side up

  2. Opening Tapco Link Series device, Revealing Screws: 2 단계, 이미지 1/2 Opening Tapco Link Series device, Revealing Screws: 2 단계, 이미지 2/2
    • Pry the rubber off the top of the device

    • All the rubber

    • Use your fingernails, then pull with your bare hands. Do no use a heat gun or prying tool as they will damage the adhesive.

    • 5 screw holes will appear. Leave them alone for now.

  3. Opening Tapco Link Series device: 3 단계, 이미지 1/2 Opening Tapco Link Series device: 3 단계, 이미지 2/2
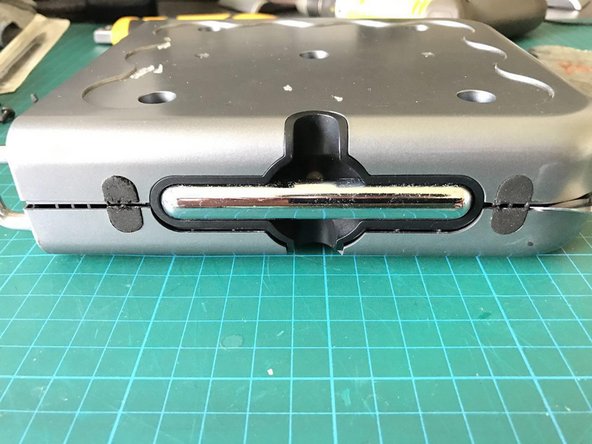
    • Look at the side of the device with the metal stand

    • Take a heat gun to the two small foam pads

    • You only need to pry off the halves on the top plastic shell

    • Put scraps of glossy paper on the foam pads to prevent them from sticking on again

    • Alternatively, if you do not mind sacrificing aesthetics, you may slice the foam pads down the middle as in the picture.

  4. Opening Tapco Link Series device: 4 단계, 이미지 1/2 Opening Tapco Link Series device: 4 단계, 이미지 2/2
    • Now remove the 5 Philips screws on top

  5. Opening Tapco Link Series device: 5 단계, 이미지 1/1
    • Simply lift off the top

    • No clips anywhere

  6. Opening Tapco Link Series device: 6 단계, 이미지 1/1
    • You could now lift out the whole innards

    • They are not attached to the bottom shell

    • No, the mess of glue is how it left the factory

결론

To reassemble your device, follow these instructions in reverse order.

Tobias

회원 가입일: 07/24/14

10 평판

안내서 2개 작성하였습니다

댓글 0개

댓글 쓰기

조회 통계:

24 시간 전: 0

7일 전: 0

30일 전: 1

전체 시간: 201