소개
The motherboard is where all the logic and commands take place in a phone. Every electronic component of the phone is connected to the motherboard and receives commands from the motherboard based on what the user selects. Disassembling the motherboard is necessary to replace some parts that are directly connected to the motherboard and are located behind the motherboard assembly.
필요한 것
-
-
Turn the phone over so that you are facing the back side of the phone.
-
With your fingers, pry the back cover up starting from the top of the phone near the headphone jack and camera.
-
Completely remove the back cover by moving down the sides and bottom with your fingers.
-
-
-
With your finger, remove the battery from the phone by gently lifting the top-right corner nearest to the camera.
-
-
-
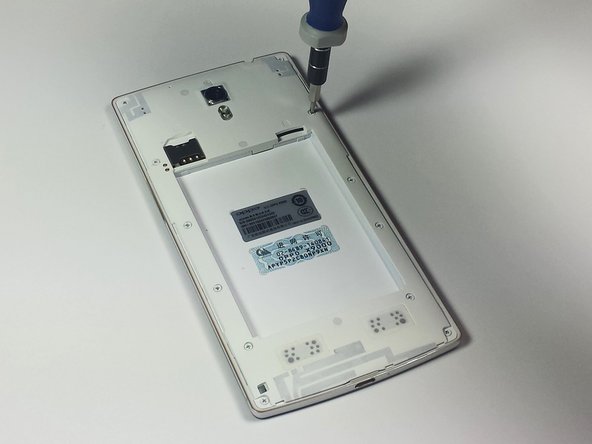
Remove the twelve exposed 3.6 mm Phillips screws on the rear of the phone using the 3.6 mm Phillips screwdriver.
-
-
-
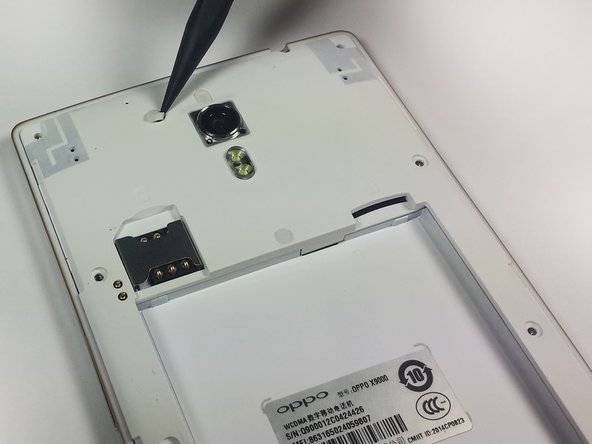
Remove the three circular rubber screw covers on the back of the phone by slipping the spudger into the border between the rubber cover and the chassis. In one motion, pry the stopper out of the hole. This can take some force.
-
-
-
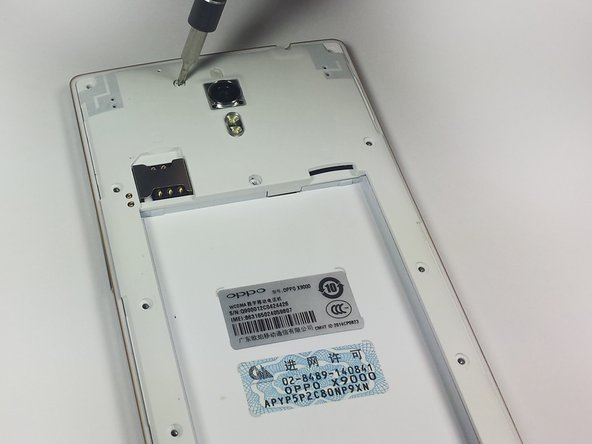
With the 3.6 mm Phillips screwdriver, remove the three newly exposed 3.6mm Phillips screws.
-
-
-
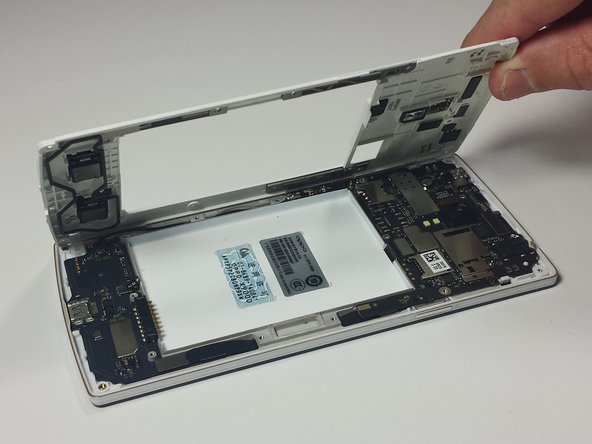
Insert the plastic opening tool underneath the chassis near the power button and pry the chassis from the phone. This should take a little force.
-
-
-
-
Use the sharp end of the spudger to pry the power button bracket from the side of the rear case.
-
-
-
Rotate the phone onto its side so that the power button falls out with ease.
-
-
-
Use the sharp end of the spudger to pry the volume button bracket from the side of the rear case.
-
-
-
Rotate the phone onto its side so that the volume button falls out with ease.
-
-
-
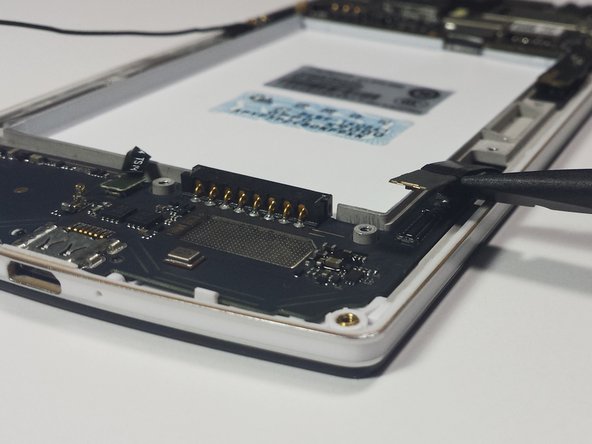
Using the flat end of the spudger, pry the four tape connectors straight up out of their respective motherboard sockets.
-
-
-
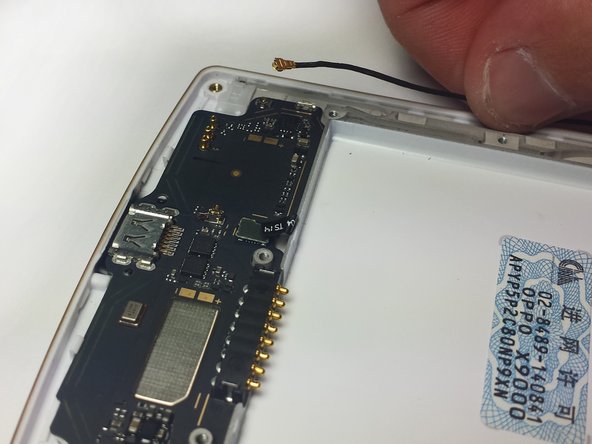
With your fingers, gently pull upwards on the WiFi antenna near the connection on the smaller motherboard until the antenna is no longer connected to the bottom motherboard.
-
-
-
Use the spudger to carefully pry the small motherboard off of the phone.
-
Start from the sides of the lower motherboard closest to the charging port. Carefully pry the motherboard off until it is no longer connected to the phone.
-
-
-
Use the spudger to carefully pry the bigger motherboard off of the phone.
-
Start from the top of the large motherboard. Carefully pry the motherboard off until it is no longer connected to the phone.
-


To reassemble your device, follow these instructions in reverse order.
To reassemble your device, follow these instructions in reverse order.
다른 6명이 해당 안내서를 완성하였습니다.
팀

Cal Poly, Team 4-45, Amido Fall 2014 Cal Poly, Team 4-45, Amido Fall 2014 회원
CPSU-AMIDO-F14S4G45
5 회원들
안내서 11개 작성하였습니다
댓글 6개
I bought a kit lcd + touch + frame to replace because I broke my.
But they lack the two connecting cables of motherboards, those of the step 13 and 14. How can I remove them from the broken frame and insert them into the new one?
davidinglese did you come up with a solution? or anyone else know how to get those connectors out of the tunnel?
Asim Mehta - 답글
I had to disassemble the touch from the display to remove the old cable and insert it into the new kit
I really liked your article , your article is very petrified me in the learning process and provide additional knowledge to me , maybe I can learn more from you , I will wait for your next article, thanks. Visit here: https://speedycustomessaywriting.org/
Hello, I have replaced the display of a Find 7 (not 7a) and now have a phenomenon. The smartphone does not charge the battery. The software shows, the battery is being charged. Also, the charging LED works. I can transfer data via the USB port. So everything works fine - only the battery didn't charged. Of course, I have already tested various charging cables and batteries. Likewise, I changed the USB board. Unfortunately again and again the same problem. The smartphone does not charge the battery.
Greetings and sorry for my bad English