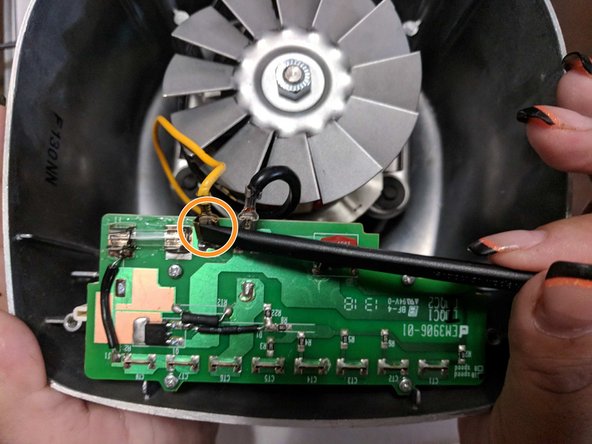
주요 콘텐츠로 건너뛰기

Oster BLSTSS-PZO Circuitboard Replacement

필요한 것

  1. Oster BLSTSS-PZO Circuitboard  Replacement, Circuitboard: 1 단계, 이미지 1/1
    • Use the prying tools to open the four plastic screw holes on the bottom of the blender.

  2. Oster BLSTSS-PZO Circuitboard  Replacement: 2 단계, 이미지 1/1
    • Use the Phillips #1 Screwdriver to unscrew the four 16 mm screws and remove the plastic bottom.

  3. Oster BLSTSS-PZO Circuitboard  Replacement: 3 단계, 이미지 1/1
    • Gently remove the circuit board.

  4. Oster BLSTSS-PZO Circuitboard  Replacement: 4 단계, 이미지 1/2 Oster BLSTSS-PZO Circuitboard  Replacement: 4 단계, 이미지 2/2
    • Use the spudger to detach the black wire from the circuit board.

    • Repeat for yellow wire.

  5. Oster BLSTSS-PZO Circuitboard  Replacement: 5 단계, 이미지 1/3 Oster BLSTSS-PZO Circuitboard  Replacement: 5 단계, 이미지 2/3 Oster BLSTSS-PZO Circuitboard  Replacement: 5 단계, 이미지 3/3
    • Use the Phillips #1 to remove the four 8mm screws.

    • Use the medal spudger to detach the circuit board from the buttons.

    • Gently pull and release circuit board from buttons.

결론

To reassemble your device, follow these instructions in reverse order.

다른 한 분이 해당 안내서를 완성하였습니다.

Tristian Cruz

회원 가입일: 09/20/17

263 평판

안내서 2개 작성하였습니다

댓글 0개

댓글 쓰기

조회 통계:

24 시간 전: 2

7일 전: 4

30일 전: 11

전체 시간: 504