주요 콘텐츠로 건너뛰기

PSP 300x Analog Stick Replacement

필요한 것

  1. PSP 300x Analog Stick Replacement, Battery: 1 단계, 이미지 1/3 PSP 300x Analog Stick Replacement, Battery: 1 단계, 이미지 2/3 PSP 300x Analog Stick Replacement, Battery: 1 단계, 이미지 3/3
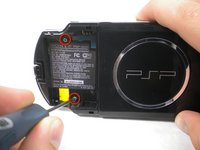
    • Place the PSP face down and locate the battery cover on the left side of the device.

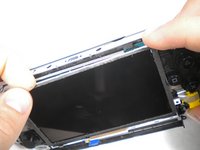
    • Lift and remove the battery cover to reveal the battery.
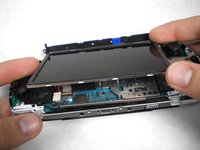
    • Remove the battery.

  2. PSP 300x Analog Stick Replacement, Casing: 2 단계, 이미지 1/1
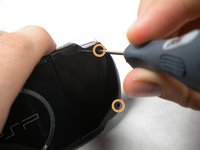
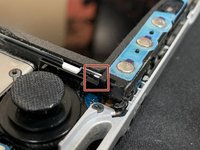
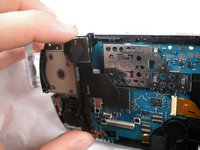
    • Peel back the warranty sticker that is behind the battery with a spudger or your fingernail.

  3. PSP 300x Analog Stick Replacement: 3 단계, 이미지 1/2 PSP 300x Analog Stick Replacement: 3 단계, 이미지 2/2
    • Unscrew all four screws from the back of the PSP with the Phillips #00 Screwdriver.

    • Two are located behind the battery's warranty sticker.

    • Two are located on the right side of the PSP.

  4. PSP 300x Analog Stick Replacement: 4 단계, 이미지 1/1
    • Next, unscrew the two screws located at the top of the PSP.

  5. PSP 300x Analog Stick Replacement: 5 단계, 이미지 1/1
    • Then, remove the single screw from the bottom edge of the PSP (which is positioned next to the barcode).

  6. PSP 300x Analog Stick Replacement: 6 단계, 이미지 1/2 PSP 300x Analog Stick Replacement: 6 단계, 이미지 2/2
    • Slide the spudger in between the outer casing of the PSP, beginning at the "R" shoulder button, and gently pry off the casing.


    • Remove the front casing completely.

  7. PSP 300x Analog Stick Replacement, LCD Screen: 7 단계, 이미지 1/2 PSP 300x Analog Stick Replacement, LCD Screen: 7 단계, 이미지 2/2
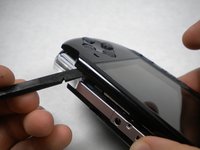
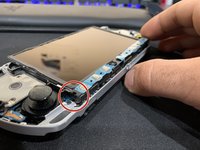
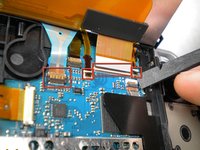
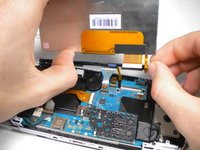
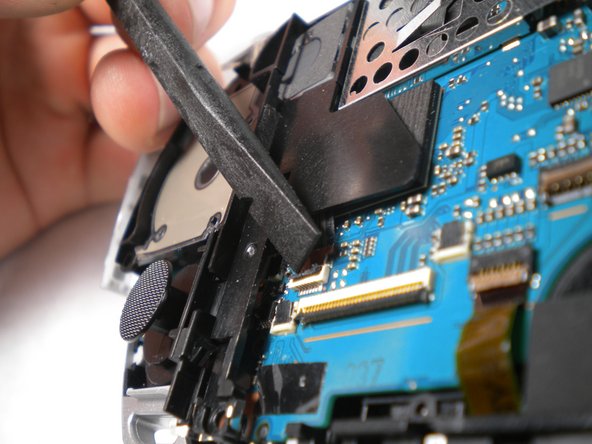
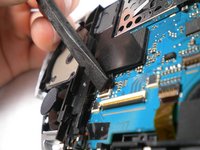
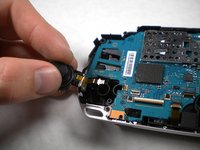
    • Push the homebar to the right to release the tab located on the right side of the LCD screen.

    • DO NOT completely remove the homebar, as it is still connected by ribbon cables.

  8. PSP 300x Analog Stick Replacement: 8 단계, 이미지 1/3 PSP 300x Analog Stick Replacement: 8 단계, 이미지 2/3 PSP 300x Analog Stick Replacement: 8 단계, 이미지 3/3
    • Slowly lift the LCD screen off the PSP starting at the top edge corner.

    • Again, the LCD screen is attached by ribbon cables, so do not remove it completely.

    • Orientation of PSP is flipped in photo.

  9. PSP 300x Analog Stick Replacement: 9 단계, 이미지 1/2 PSP 300x Analog Stick Replacement: 9 단계, 이미지 2/2
    • Flip the small brown locks on the four ribbon cable connectors up using a spudger or fingernail.

    • Pull all four ribbon cables out.

    • Now remove the LCD screen and homebar from the PSP.

  10. PSP 300x Analog Stick Replacement: 10 단계, 이미지 1/1
    • Remove the metal tab that lies above the LCD screen.

    • Upon reassembly, make note that the stamped lettering faces down, and the large tab fits just above the motherboard to the right hand side of the left trigger.

  11. PSP 300x Analog Stick Replacement, Trigger Buttons: 11 단계, 이미지 1/1
    • Remove the screw securing 'L' trigger to the PSP.

  12. PSP 300x Analog Stick Replacement: 12 단계, 이미지 1/1
    • Remove the white plastic piece that holds the 'L' trigger in place.

  13. PSP 300x Analog Stick Replacement: 13 단계, 이미지 1/1
    • Remove the 'L' trigger from the PSP.

  14. PSP 300x Analog Stick Replacement: 14 단계, 이미지 1/1
    • Remove the screw securing the 'R' trigger.

  15. PSP 300x Analog Stick Replacement: 15 단계, 이미지 1/1
    • Remove the white plastic piece that holds the 'R' trigger in place.

  16. PSP 300x Analog Stick Replacement: 16 단계, 이미지 1/1
    • Remove the 'R' trigger from the PSP.

  17. PSP 300x Analog Stick Replacement, Analog Stick: 17 단계, 이미지 1/1
    • Remove the screw from the bottom left edge of the PSP.

  18. PSP 300x Analog Stick Replacement: 18 단계, 이미지 1/1
    • Being careful not to break the ribbon cable, use the spudger to peel the adhesive button of the the 'L' trigger off the PSP.

  19. PSP 300x Analog Stick Replacement: 19 단계, 이미지 1/2 PSP 300x Analog Stick Replacement: 19 단계, 이미지 2/2
    • Using a fingernail or spudger, flip up the retaining bracket on the d-pad and 'L' trigger ribbon cable.

    • Lift the black plastic bracket along with the d-pad contact pad, disconnecting the ribbon cable as you lift.

  20. PSP 300x Analog Stick Replacement: 20 단계, 이미지 1/1
    • Remove the cable from the connector and remove the entire black piece from the PSP.

  21. PSP 300x Analog Stick Replacement: 21 단계, 이미지 1/1
    • Remove the screw holding the analog stick in place.

  22. PSP 300x Analog Stick Replacement: 22 단계, 이미지 1/2 PSP 300x Analog Stick Replacement: 22 단계, 이미지 2/2
    • Flip up the lock on the analog sticks ribbon cable.

    • Remove the analog stick from the PSP.

결론

To reassemble your device, follow these instructions in reverse order.

다른 20명이 해당 안내서를 완성하였습니다.

mbnewsom

회원 가입일: 10/28/09

3,094 평판

안내서 11개 작성하였습니다

댓글 0개

댓글 쓰기

조회 통계:

24 시간 전: 18

7일 전: 105

30일 전: 496

전체 시간: 34,645