소개
Did you drop your PSP? If your LCD is broken for any reason, you're in luck! This guide will show you how to replace that LCD with a brand new one.
필요한 것
-
-
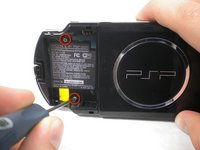
Press the button securing the battery door to the PSP 300xc, and lift the battery door off.
-
Lift the battery out of the PSP.
 FixBot에 문의하기
-
-
-
Use a spudger or your fingernail to remove the warranty sticker stuck to the inside of the battery tray
-
-
-
-
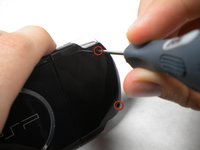
Insert a spudger between the front case and PSP, and slide the spudger along the perimeter of the front case to remove it.
-
-
-
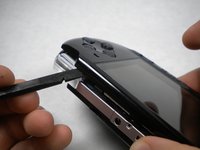
Push the home bar to the right about 1cm to release a tab, and begin to lift the right end of the home bar slightly.
-
-
-
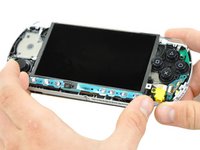
Insert a spudger under the LCD, beside the black plastic tab.
-
Push the LCD to the left and pry up to release the left edge of the LCD from under the plastic tab.
-
-
-
Insert a spudger under the LCD, beside the black plastic tab.
-
Push the LCD to the right and pry up to release the right edge of the LCD from under the plastic tab.
-
-
-
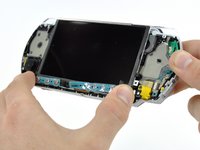
Rotate the LCD away from the PSP to reveal the LCD and home bar ribbon cables.
-
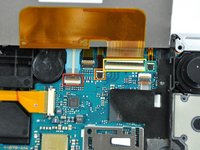
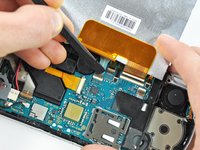
Use your fingernail or the edge of a plastic opening tool to flip up the retaining flap on the following four ZIF connectors:
-
Home bar cable
-
Microphone cable
-
LCD display data cable
-
Touchscreen cable
-
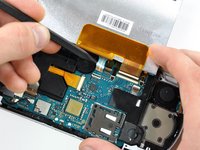
After flipping up the locking tabs on all four connectors, use your fingers or a spudger to gently pull the cables straight out of the connectors.
-


To reassemble your device, follow these instructions in reverse order.
다른 11명이 해당 안내서를 완성하였습니다.
