이 버전에는 잘못된 편집 사항이 있을 수 있습니다. 최신 확인된 스냅샷으로 전환하십시오.
필요한 것
-
이 단계는 번역되지 않았습니다. 번역을 도와주십시오
-
Unscrew the four Phillips screws on the back of the PSP Go.
-
Rotate the PSP so you can see the top of the device.
-
Unscrew the two Phillips screws next to the volume buttons.
-
-
이 단계는 번역되지 않았습니다. 번역을 도와주십시오
-
Use a plastic opening tool around the perimeter of the back cover to loosen it on all sides.
-
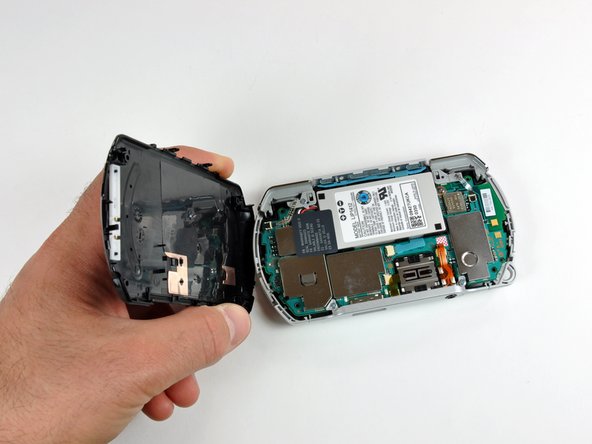
Open the back cover by gently lifting the right side, and rotating it to the left side (as if you were opening a book).
-
-
-
이 단계는 번역되지 않았습니다. 번역을 도와주십시오
-
Remove the two Phillips screws holding the bottom plate.
-
Gently lift the bottom plate away from the device.
-
-
이 단계는 번역되지 않았습니다. 번역을 도와주십시오
-
Use a pair of tweezers and grasp the black plastic portion of the headphone jack cable.
-
Slowly pull out the cable. If it's hard to pull, wiggle it slightly side-to-side while pulling it.
-
다른 2명이 해당 안내서를 완성하였습니다.


