주요 콘텐츠로 건너뛰기

Palm Centro Screen Replacement

필요한 것

  1. Palm Centro Screen Replacement, Disassembling Palm Centro Battery: 1 단계, 이미지 1/2 Palm Centro Screen Replacement, Disassembling Palm Centro Battery: 1 단계, 이미지 2/2
    • Press and slide open the battery cover.

  2. Palm Centro Screen Replacement: 2 단계, 이미지 1/1
    • Caution: Turn cell phone off before removing battery!

    • Press battery to the right.

    • Then lift up battery pack to remove.

  3. Palm Centro Screen Replacement: 3 단계, 이미지 1/1
    • Phone with battery removed

  4. Palm Centro Screen Replacement, Back Housing: 4 단계, 이미지 1/1
    • Remove the touchpad pen from the top left corner on the back to reveal the last of 6 screws to be removed.

  5. Palm Centro Screen Replacement: 5 단계, 이미지 1/1
    • Lift the rubber cap at the top right to reveal the sixth screw.

    • Caution: There is a small Palm sticker under the rubber cap. Tampering with or removing this sticker will void your warranty!

    • Remove the six screws using the T5 Torx screwdriver.

  6. Palm Centro Screen Replacement: 6 단계, 이미지 1/2 Palm Centro Screen Replacement: 6 단계, 이미지 2/2
    • Remove the SIM card so housing can be separated.

  7. Palm Centro Screen Replacement: 7 단계, 이미지 1/2 Palm Centro Screen Replacement: 7 단계, 이미지 2/2
    • Use a plastic pry tool to separate the bottom of the case to remove the small plastic insert.

  8. Palm Centro Screen Replacement: 8 단계, 이미지 1/2 Palm Centro Screen Replacement: 8 단계, 이미지 2/2
    • Remove the small plastic insert at the bottom of the phone.

  9. Palm Centro Screen Replacement: 9 단계, 이미지 1/2 Palm Centro Screen Replacement: 9 단계, 이미지 2/2
    • Continue with plastic pry tool all the way around the phone to remove the back housing.

  10. Palm Centro Screen Replacement, Logic Board: 10 단계, 이미지 1/1
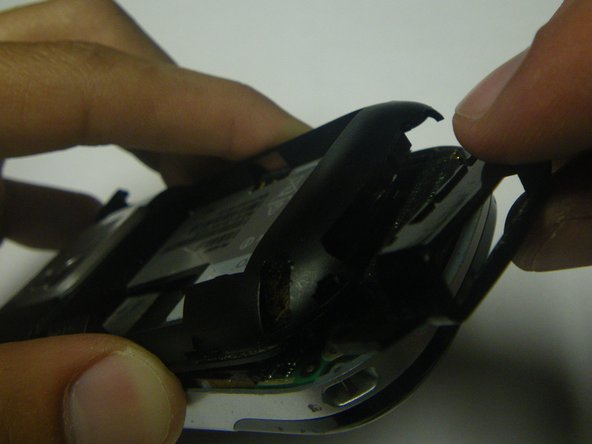
    • Carefully peel back the tape holding the speaker (left) and keyboard (right) connection tabs in place.

  11. Palm Centro Screen Replacement: 11 단계, 이미지 1/1
    • Using the plastic prying tool, lift the tabs and carefully pull the contact connections out on both sides.

    • Be very careful, these electronics are delicate!

  12. Palm Centro Screen Replacement: 12 단계, 이미지 1/1
    • Separate the logic board from the case by lifting and pulling out the bottom.

  13. Palm Centro Screen Replacement, Screen: 13 단계, 이미지 1/1
    • Slowly peel off the protective lining that is on the screen and keyboard.

  14. Palm Centro Screen Replacement: 14 단계, 이미지 1/2 Palm Centro Screen Replacement: 14 단계, 이미지 2/2
    • Lift and slowly remove the screen from the front panel

    • Place the new screen into the front panel

    • Make sure the new screen goes in under the plastic tabs for the additional memory slot door or it may not close properly once the phone is put back together.

결론

To reassemble your device, follow these instructions in reverse order.

다른 3명이 해당 안내서를 완성하였습니다.

Tony

회원 가입일: 04/28/10

10 평판

안내서 1개 작성함

Cal Poly, Team 15-49, Garner Spring 2010 Cal Poly, Team 15-49, Garner Spring 2010 회원

CPSU-GARNER-S10S15G49

5 회원들

안내서 12개 작성하였습니다

댓글 0개

댓글 쓰기

조회 통계:

24 시간 전: 0

7일 전: 0

30일 전: 0

전체 시간: 2,859