주요 콘텐츠로 건너뛰기

이 안내서에는 최근 변경 사항이 더 있습니다. 최신 비검증 버전으로 전환하십시오.

Palm IIIc Button Pad Replacement

필요한 것

  1. Palm IIIc Button Pad Replacement, Removing broken LCD screen: 1 단계, 이미지 1/1
    • Keep track of all pieces removed from the device.

    • Gently pull off the device cover. The cover snaps on and off easily where the cover attaches to the Palm IIIc device

  2. Palm IIIc Button Pad Replacement: 2 단계, 이미지 1/1
    • Using a Phillips head screwdriver, take out the four screws on the back of the device. You may have to pull them out with your hands once they are unscrewed.

    • There will be two long screws and two short screws. The long screws come from the top of the device, and the short screws come from the bottom of the device.

  3. Palm IIIc Button Pad Replacement, Remove the Front Cover: 3 단계, 이미지 1/1
    • Lay Palm IIIc face-up and remove the front cover.

    • Do this firmly but not with too much force so as to not break or disturb anything you're not supposed to.

  4. Palm IIIc Button Pad Replacement, Button Pad: 4 단계, 이미지 1/2 Palm IIIc Button Pad Replacement, Button Pad: 4 단계, 이미지 2/2
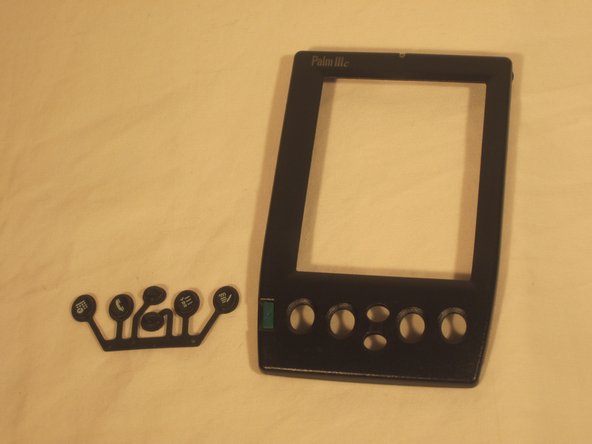
    • Using a prying tool, carefully pop button pad out of the cover.

  5. Palm IIIc Button Pad Replacement: 5 단계, 이미지 1/1
    • Insert the new button pad where the old one used to be.

결론

To reassemble your device, follow these instructions in reverse order.

Paulina Trujillo

회원 가입일: 04/07/11

265 평판

안내서 8개 작성하였습니다

Cal Poly, Team 20-69, Walters Spring 2011 Cal Poly, Team 20-69, Walters Spring 2011 회원

CPSU-WALTERS-S11S20G69

5 회원들

안내서 8개 작성하였습니다

댓글 0개

댓글 쓰기

조회 통계:

24 시간 전: 0

7일 전: 0

30일 전: 0

전체 시간: 1,348