이 버전에는 잘못된 편집 사항이 있을 수 있습니다. 최신 확인된 스냅샷으로 전환하십시오.
필요한 것
-
이 단계는 번역되지 않았습니다. 번역을 도와주십시오
-
Using a Phillips #00 screwdriver, remove the four screws that hold the back cover in place.
-
-
-
이 단계는 번역되지 않았습니다. 번역을 도와주십시오
-
Hold the device on its side, positioning your hands as shown.
-
Remove the back cover by pushing in with your thumbs and pulling outward with the rest of your fingers.
-
-
이 단계는 번역되지 않았습니다. 번역을 도와주십시오
-
Hold the screen and front cover on its side, facing the screen inward as shown.
-
Position your hands so that you can push the screen outward with your thumbs.
-
Remove the screen by pushing outward with your thumbs. Use your index fingers to hold the front cover in place.
-
-
이 단계는 번역되지 않았습니다. 번역을 도와주십시오
-
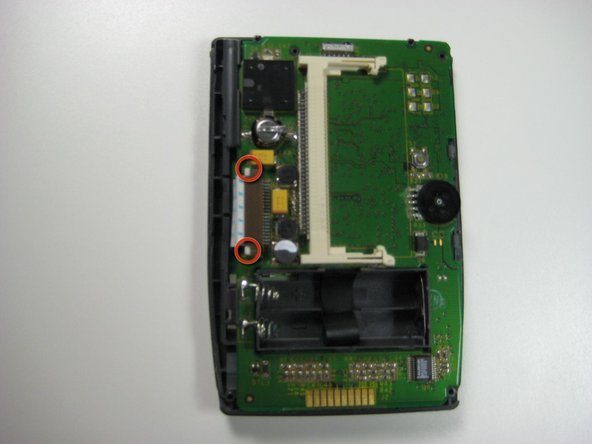
Position the device with the screen facing down.
-
Locate the white ribbon wire on the left hand side of the device.
-
On either side of the ribbon wire are two white clasps. Gently push the two clasps away from the board (to the left).
-
-
이 단계는 번역되지 않았습니다. 번역을 도와주십시오
-
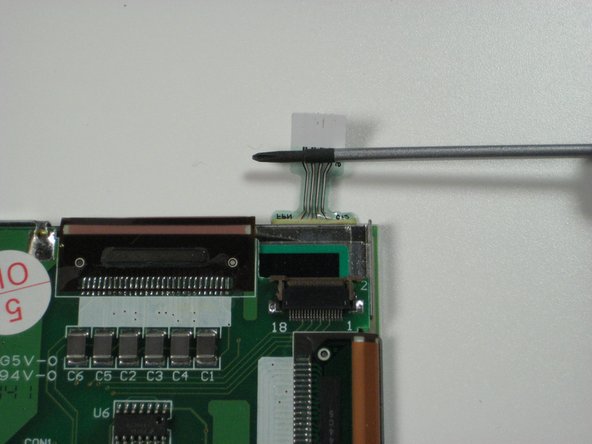
On the back of the screen near the top right corner is a plastic filament:
-
Gently lift up on the two brown clasps on either side of the filament connector as shown.
-
Using a thin, blunt object (a toothpick works well), slide it under the plastic filament and lift up to detach the filament from its connector.
-
-
이 단계는 번역되지 않았습니다. 번역을 도와주십시오
-
Insert a spudger tool between the metal backing and the glass cover piece, as shown.
-
Run the spudger along the edge of the screen until the screen is lifted and can be removed.
-
Replace or clean as needed.
-


다른 한 분이 해당 안내서를 완성하였습니다.
팀

Cal Poly, Team 14-43, Regan Winter 2010 Cal Poly, Team 14-43, Regan Winter 2010 회원
CPSU-REGAN-W10S14G43
4 회원들
안내서 4개 작성하였습니다