주요 콘텐츠로 건너뛰기

이 버전에는 잘못된 편집 사항이 있을 수 있습니다. 최신 확인된 스냅샷으로 전환하십시오.

필요한 것

  1. 이 단계는 번역되지 않았습니다. 번역을 도와주십시오

    : 1 단계, 이미지 1/1
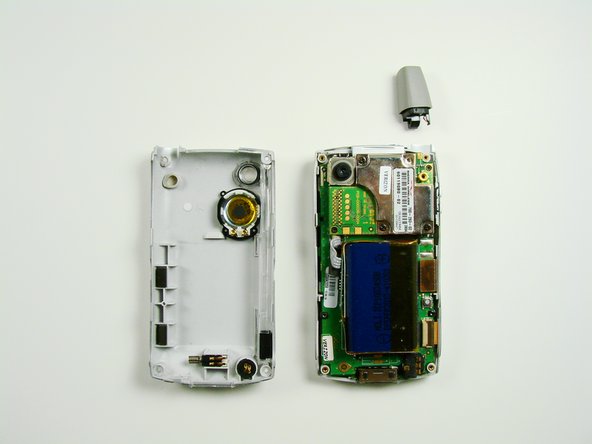
    • On the back of the device, locate the 3 rubber plugs, and use a plastic spudger to remove them.

  2. 이 단계는 번역되지 않았습니다. 번역을 도와주십시오

    : 2 단계, 이미지 1/2 : 2 단계, 이미지 2/2
    • Use the T6 Torx Screwdriver to remove all 4 screws.

    • You have to first remove the Stylus to access the 4th screw.

  3. 이 단계는 번역되지 않았습니다. 번역을 도와주십시오

    : 3 단계, 이미지 1/2 : 3 단계, 이미지 2/2
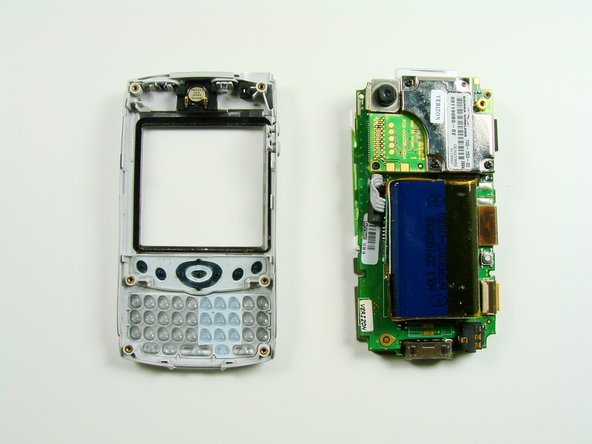
    • Using a plastic opening tool, carefully separate the front and back cases.

    • Note: The antenna will detach from the phone.

  4. 이 단계는 번역되지 않았습니다. 번역을 도와주십시오

    : 4 단계, 이미지 1/2 : 4 단계, 이미지 2/2
    • Using a T6 Torx Screwdriver, remove the two screws.

    • The motherboard will now be loose from the front case.

  5. 이 단계는 번역되지 않았습니다. 번역을 도와주십시오

    : 5 단계, 이미지 1/1
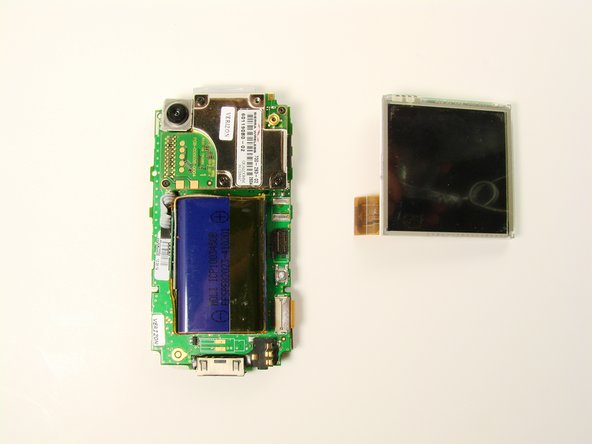
    • The screen is connected to the phone with an orange data cable.

    • Slide the spudger as close to the connection as possible.

    • Gently pull the spudger up and the cable should come out of the socket.

  6. 이 단계는 번역되지 않았습니다. 번역을 도와주십시오

    : 6 단계, 이미지 1/2 : 6 단계, 이미지 2/2
    • Once the cable is unplugged, you can remove the screen from the body.

결승점

Clement Poisson

회원 가입일: 01/26/10

24 평판

안내서 7개 작성하였습니다

Cal Poly, Team 13-23, Maness Winter 2010 Cal Poly, Team 13-23, Maness Winter 2010 회원

CPSU-MANESS-W10S13G23

4 회원들

안내서 16개 작성하였습니다

댓글 0개

댓글 쓰기

조회 통계:

24 시간 전: 2

7일 전: 5

30일 전: 6

전체 시간: 2,184