이 버전에는 잘못된 편집 사항이 있을 수 있습니다. 최신 확인된 스냅샷으로 전환하십시오.
필요한 것
-
이 단계는 번역되지 않았습니다. 번역을 도와주십시오
-
Heat the left and top edges with hairdryer for one minute.
-
Move hairdryer back and forth to evenly heat up surface.
-
-
이 단계는 번역되지 않았습니다. 번역을 도와주십시오
-
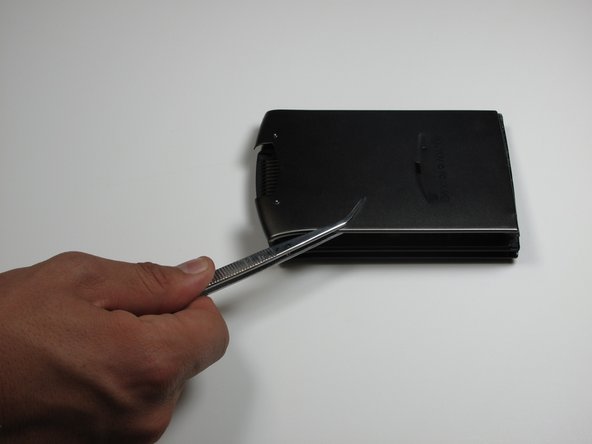
Use tweezers to hold Palm right side down on it's side.
-
Use a plastic opening tool to pry open front and back casing.
-
-
-
이 단계는 번역되지 않았습니다. 번역을 도와주십시오
-
Leave plastic opening tools in between front and back casing.
-
Rotate Palm and repeat steps 2 and 3 for right and back edges.
-
-
이 단계는 번역되지 않았습니다. 번역을 도와주십시오
-
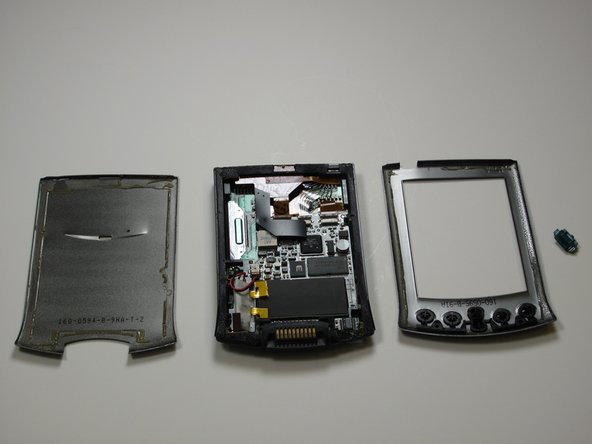
Now pry open front and back casing with plastic opening tools.
-
Separate front and back casing completely.
-
-
이 단계는 번역되지 않았습니다. 번역을 도와주십시오
-
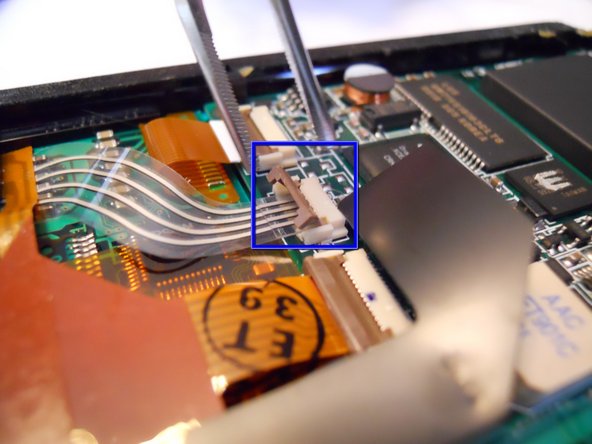
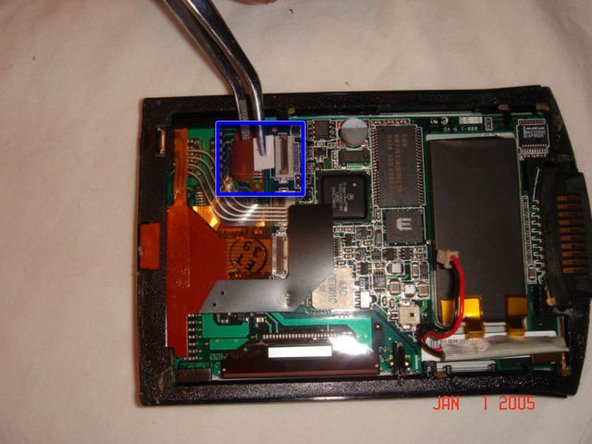
In order to seperate the screen from the motherboard you must disconnect the ribbon attached to the screen.
-
To do this, using tweezers, flip up the cable clamp that is connecting the ribbon to the screen.
-
Once the clamp is up you can use the tweezers to gently detach the ribbon.
-
-
이 단계는 번역되지 않았습니다. 번역을 도와주십시오
-
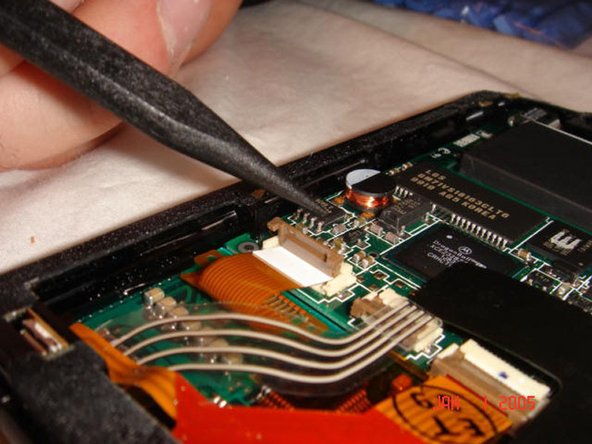
Now you must flip up the adjacent clamp as well, using tweezers like before.
-
After the clamp is flipped you can gently remove the second ribbon with tweezers.
-
-
이 단계는 번역되지 않았습니다. 번역을 도와주십시오
-
Before removing the screen you must detach one more wire, the battery connector.
-
Using the tweezers, squeeze the connector attached to the wire and genlty pull.
-
-
이 단계는 번역되지 않았습니다. 번역을 도와주십시오
-
Now that both ribbons and the wire are disconeccted, you can apply a downward pressure to the battery. You will have to carefully rotate the frame so that the battery can go through.
-


다른 한 분이 해당 안내서를 완성하였습니다.
팀

Cal Poly, Team 13-25, Maness Winter 2010 Cal Poly, Team 13-25, Maness Winter 2010 회원
CPSU-MANESS-W10S13G25
4 회원들
안내서 4개 작성하였습니다
댓글 한 개
Can the electroluminescent backlight panel be separated from the LCD? Then clip out the wires related to the LCD? Is that possible or are they fused?