이 버전에는 잘못된 편집 사항이 있을 수 있습니다. 최신 확인된 스냅샷으로 전환하십시오.
필요한 것
-
이 단계는 번역되지 않았습니다. 번역을 도와주십시오
-
Using a T5 Torx screwdriver, unscrew the two 5mm screws located at the bottom of the device.
-
-
이 단계는 번역되지 않았습니다. 번역을 도와주십시오
-
Peel back the adhesive label below the camera on the rear to reveal a hidden screw, circled in the picture to the left.
-
Alternate Procedure: Underneath the camera, feel for a depression and cut the sticker directly above the depression to reveal the hidden screw.
-
-
이 단계는 번역되지 않았습니다. 번역을 도와주십시오
-
Use either side of the spudger to carefully pry off the camera lens mesh cover.
-
-
이 단계는 번역되지 않았습니다. 번역을 도와주십시오
-
Using the #00 Phillips screwdriver, remove the two 9mm screws on the top corners of the device.
-
-
-
이 단계는 번역되지 않았습니다. 번역을 도와주십시오
-
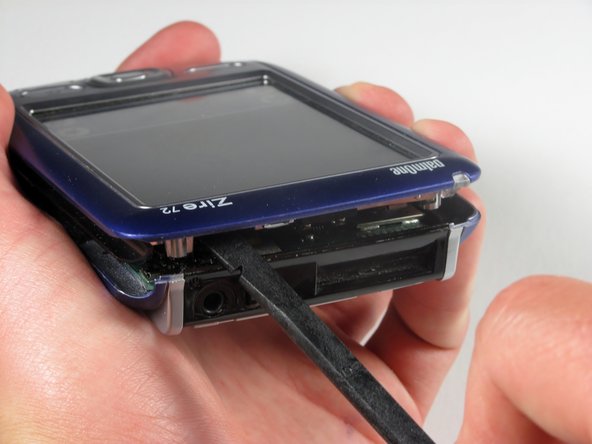
Spin the phone around so that the headphone jack is facing you. Run the flat end of the spudger around the entire edge of the device to gently pry the case off.
-
-
이 단계는 번역되지 않았습니다. 번역을 도와주십시오
-
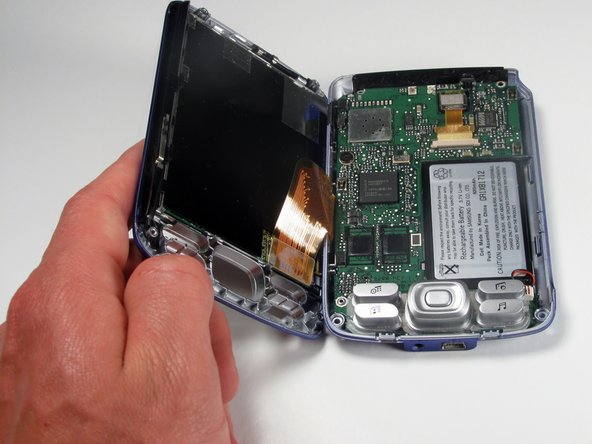
Remove the cover by lifting it from right to left.
-
This should be similar to the action of the opening of a book.
-
-
이 단계는 번역되지 않았습니다. 번역을 도와주십시오
-
Wedge the flat end of the spudger underneath the battery and gently pry it out.
-
-
이 단계는 번역되지 않았습니다. 번역을 도와주십시오
-
Gently disconnect the white component connecting the battery to the motherboard.
-
-
이 단계는 번역되지 않았습니다. 번역을 도와주십시오
-
Unscrew the single 3.5mm screw attaching the motherboard to the case with a #00 Phillips screwdriver.
-
-
이 단계는 번역되지 않았습니다. 번역을 도와주십시오
-
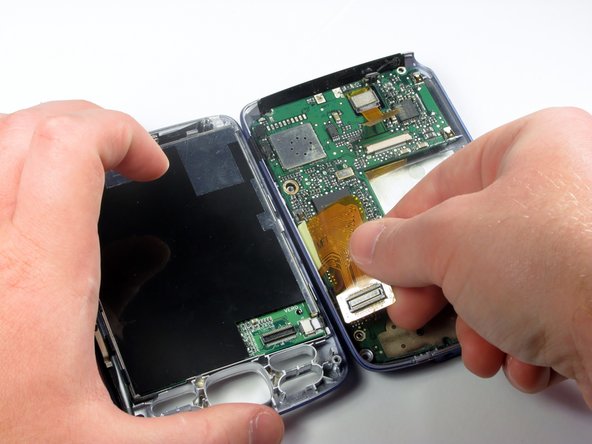
Disconnect the orange video connector leading from the lower case to the upper case with the pointed end of the spudger.
-
-
이 단계는 번역되지 않았습니다. 번역을 도와주십시오
-
Use the spudger to unclip the screen in the lower left corner and gently pry it from its clips.
-
-
이 단계는 번역되지 않았습니다. 번역을 도와주십시오
-
Grabbing the left and right edges of the front panel, flex the front panel outward until the screen pops out.
-


팀

Cal Poly, Team 6-49, Amido Spring 2012 Cal Poly, Team 6-49, Amido Spring 2012 회원
CPSU-AMIDO-S12S6G49
4 회원들
안내서 11개 작성하였습니다