주요 콘텐츠로 건너뛰기

Panasonic Lumix DMC-F7 Replacing LCD Screen Replacement

필요한 것

  1. Panasonic Lumix DMC-F7 Replacing LCD Screen Replacement, Battery: 1 단계, 이미지 1/1
    • Slide the lock switch to the right so that it is in the unlocked position.

    • Use your finger to slide the battery hatch in the direction of the downward arrow so that the hatch is open.

    • Both battery and memory card should now be visible.

  2. Panasonic Lumix DMC-F7 Replacing LCD Screen Replacement: 2 단계, 이미지 1/1
    • Open the battery hatch and then the black cover to expose the battery compartment.

    • The camera used to create these repair guides did not have a battery and memory card.

    • Remove the battery.

    • When installing the new battery, ensure it is in the same orientation as before.

  3. Panasonic Lumix DMC-F7 Replacing LCD Screen Replacement, Back Case: 3 단계, 이미지 1/1
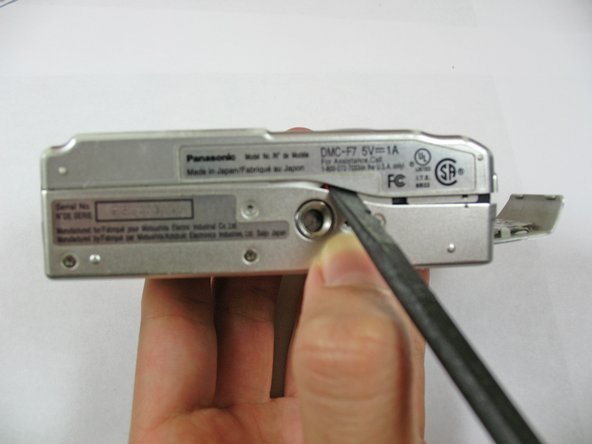
    • Using the Phillips #00 screwdriver, remove the two 2.8 mm screws located under the hatch.

  4. Panasonic Lumix DMC-F7 Replacing LCD Screen Replacement: 4 단계, 이미지 1/1
    • Use the Phillips #00 screwdriver to remove the three 2.8 mm screws on the bottom of the camera.

  5. Panasonic Lumix DMC-F7 Replacing LCD Screen Replacement: 5 단계, 이미지 1/1
    • Use the Phillips #00 screwdriver to remove the two 2.8 mm screws on the side of the camera.

  6. Panasonic Lumix DMC-F7 Replacing LCD Screen Replacement: 6 단계, 이미지 1/2 Panasonic Lumix DMC-F7 Replacing LCD Screen Replacement: 6 단계, 이미지 2/2
    • Use a spudger to pry open the case at all sides.

  7. Panasonic Lumix DMC-F7 Replacing LCD Screen Replacement: 7 단계, 이미지 1/2 Panasonic Lumix DMC-F7 Replacing LCD Screen Replacement: 7 단계, 이미지 2/2
    • Be careful not to damage the ribbon cable when opening. Ensure it is still attached.

    • Use your fingers to carefully remove the back casing from the front of the camera.

  8. Panasonic Lumix DMC-F7 Replacing LCD Screen Replacement: 8 단계, 이미지 1/1
    • Place the camera on a flat surface with the front side facing down.

    • Use the spudger to flip up the retaining flap and slide the ribbon cable out of the connector.

    • Hold down on the camera's metal casing with one hand. Using your other hand, remove the back case from the rest of the camera.

  9. Panasonic Lumix DMC-F7 Replacing LCD Screen Replacement, Replacing LCD Screen: 9 단계, 이미지 1/2 Panasonic Lumix DMC-F7 Replacing LCD Screen Replacement, Replacing LCD Screen: 9 단계, 이미지 2/2
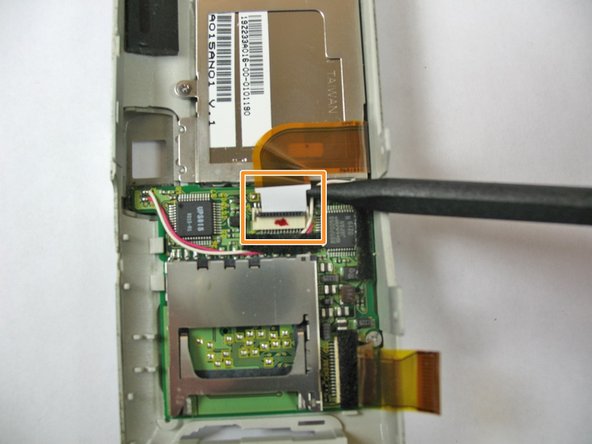
    • Use a spudger to lift the screen ZIF connector tab.

    • Use the back of the spudger to push the ribbon cable free.

  10. Panasonic Lumix DMC-F7 Replacing LCD Screen Replacement: 10 단계, 이미지 1/3 Panasonic Lumix DMC-F7 Replacing LCD Screen Replacement: 10 단계, 이미지 2/3 Panasonic Lumix DMC-F7 Replacing LCD Screen Replacement: 10 단계, 이미지 3/3
    • Use the screwdriver to remove the four 2.4 mm Phillips screws.

    • Lift up the LCD screen from the front case.

    • Potential for device damage: The wire is still connected to the board in the other side.

  11. Panasonic Lumix DMC-F7 Replacing LCD Screen Replacement: 11 단계, 이미지 1/1
    • Remove the LCD screen from its case.

  12. Panasonic Lumix DMC-F7 Replacing LCD Screen Replacement: 12 단계, 이미지 1/1
    • Locate the wire connecting the LCD screen to the motherboard.

    • Use the soldering iron to desolder the wire.

    • Use the soldering iron to solder wires from new LCD screen to the circuit board.

결론

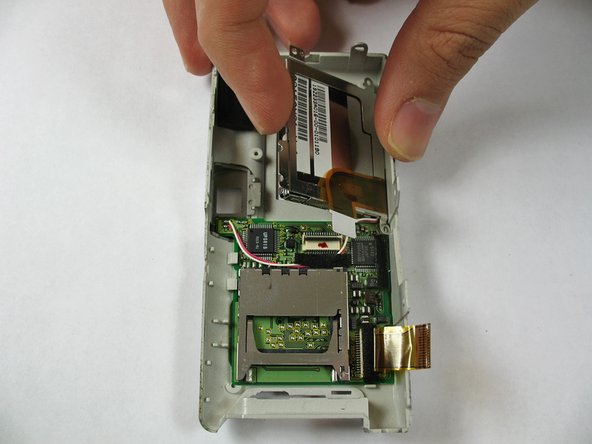
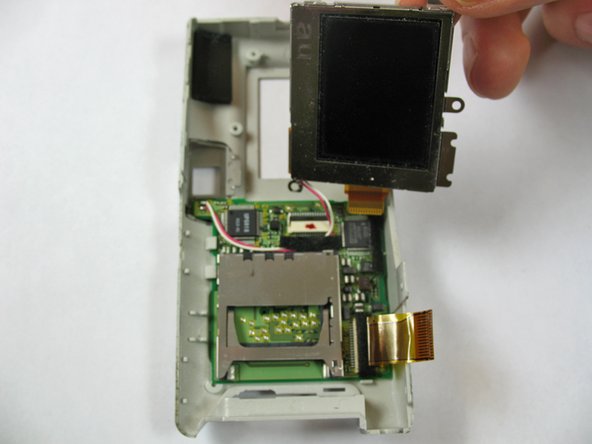
To reassemble your device, follow these instructions in reverse order.

다른 한 분이 해당 안내서를 완성하였습니다.

Alex Penman

회원 가입일: 01/28/11

463 평판

안내서 4개 작성하였습니다

Cal Poly, Team 7-35, Regan Winter 2011 Cal Poly, Team 7-35, Regan Winter 2011 회원

CPSU-REGAN-W11S7G35

4 회원들

안내서 10개 작성하였습니다

댓글 0개

댓글 쓰기

조회 통계:

24 시간 전: 0

7일 전: 0

30일 전: 6

전체 시간: 3,002