소개
If your lens stops working or you wish to use an alternative one, you will need to replace it. In this guide you will first remove the battery to avoid damaging the camera while working on it. Then you will remove the back panel, motherboard, viewfinder, and aperture motor before replacing your lens. In the process you will unscrew various screws and detach a number of electronic ZIF connector ribbons. Be extra cautious when moving any electronic ribbons, since they tear very easily. See this technique on disconnecting ZIF connectors to better learn how to detach a ZIF connector ribbon.
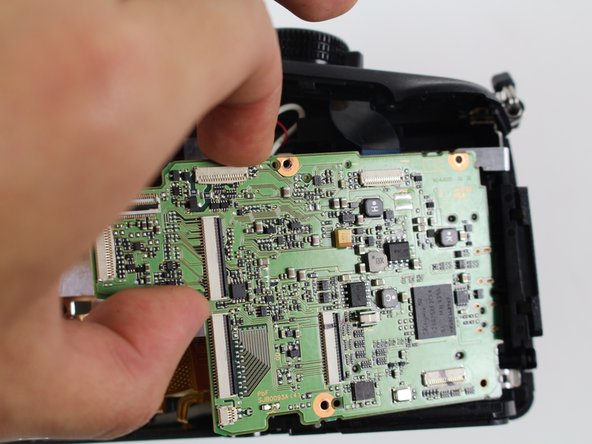
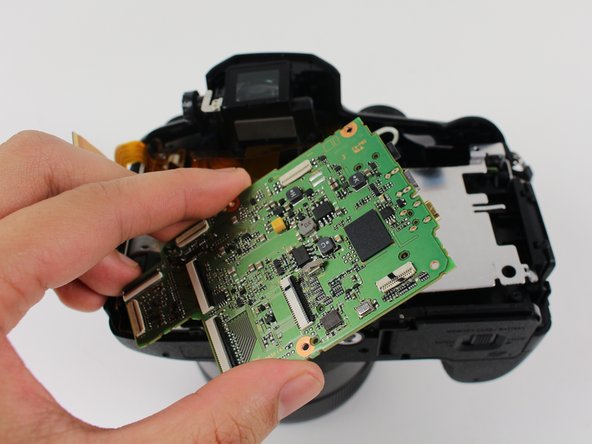
In several steps of this guide, the state of the camera in the accompanying visual or visuals will not correspond to the state of your camera. The visuals differ from your camera in the following ways:
- Electronic ribbons will appear torn and taped. Your camera's electronic ribbons should not be torn.
- Black tape will appear crinkled due to prior removal. Your camera's black tape should not appear to have been previously removed.
필요한 것
-
-
Slide the switch on the bottom of your camera from the right (LOCK) to the left (OPEN).
-
-
-
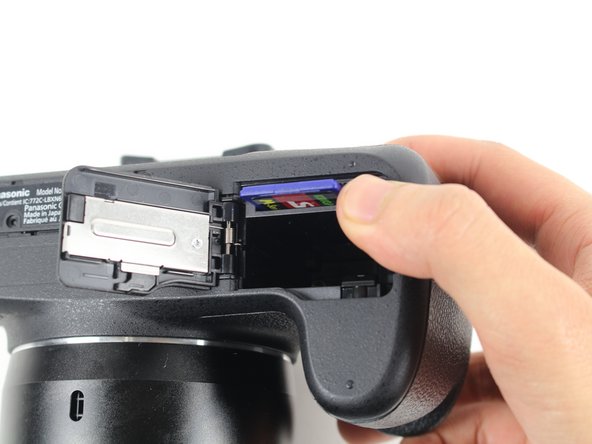
Push in on the SD card inside the battery housing.
-
Pull out the SD card.
-
Close the battery housing door.
-
-
-
Remove the two 5.2 mm Phillips #00 screws that are 1) below the label and 2) above the tripod mount hole on the bottom of the camera.
-
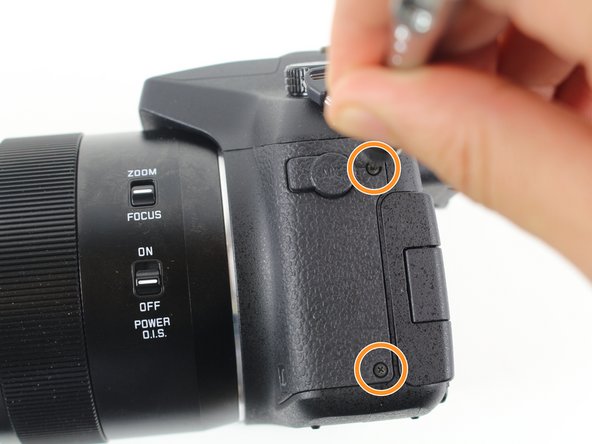
Remove the two 5.5 mm Phillips #00 screws on the side of the camera with the MIC jack.
-
Remove the two 7.0 mm Phillips #00 screws that are 1) above and 2) below the HDMI panel.
-
-
-
-
Remove the two 7.0 mm Phillips #00 screws on the underside of the viewfinder.
-
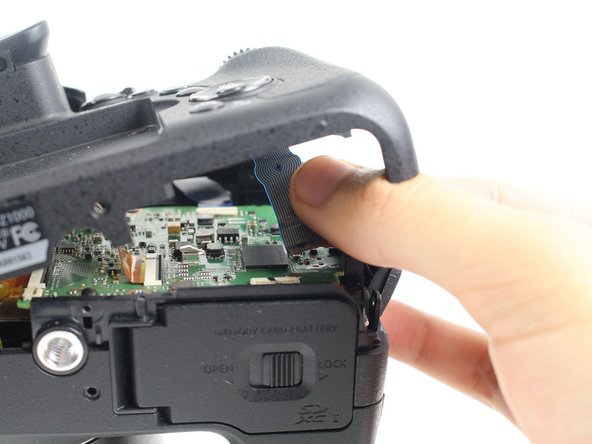
Pull out the viewfinder.
-
-
-
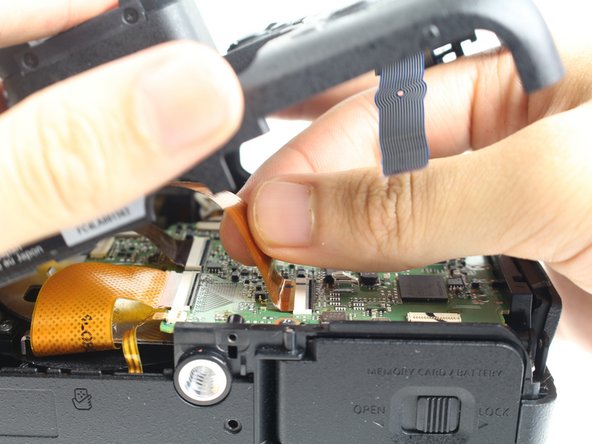
Carefully unhook the aperture motor from its two pegs and slowly move it towards the opposite side of the lens.
-
You may need to remove the Phillips screw that holds a trapezoid-shaped piece of the electronic ribbon.
-
While holding on to the aperture motor, very carefully use tweezers to unclip the electronic ribbon on the side of the lens.
-


To reassemble your device, follow these instructions in reverse order.
To reassemble your device, follow these instructions in reverse order.
다른 4명이 해당 안내서를 완성하였습니다.

팀

Cal Poly, Team 70-5, Forte Winter 2016 Cal Poly, Team 70-5, Forte Winter 2016 회원
CPSU-FORTE-W16S70G5
4 회원들
안내서 15개 작성하였습니다
댓글 2개
Where do I get a Lense Unit ? I need exactly that…for the FZ 1000
Hallo eine kurze Frage Bild /Schritt 15 ist um den Motor des Objektivantriebes ein Flachkabel unterbrochen. Muss das so oder ist es defekt? Es ist bei meiner Kamera genauso unterbrochen
STEVE GUTT - 답글