주요 콘텐츠로 건너뛰기

Panasonic Lumix DMC-G7 Mainboard Replacement

필요한 것

  1. Panasonic Lumix DMC-G7 Mainboard Replacement, Mainboard: 1 단계, 이미지 1/2 Panasonic Lumix DMC-G7 Mainboard Replacement, Mainboard: 1 단계, 이미지 2/2
    • Unlock and open the battery compartment on the bottom of the camera.

    • Remove both the battery and SD card.

  2. Panasonic Lumix DMC-G7 Mainboard Replacement: 2 단계, 이미지 1/3 Panasonic Lumix DMC-G7 Mainboard Replacement: 2 단계, 이미지 2/3 Panasonic Lumix DMC-G7 Mainboard Replacement: 2 단계, 이미지 3/3
    • Remove the four indicated 3.0mm long black screws from the bottom of the camera and the viewfinder housing using a PH0 Phillips screwdriver.

    • There are four screws on the bottom of the camera. Only remove the two nearest to the screen.

  3. Panasonic Lumix DMC-G7 Mainboard Replacement: 3 단계, 이미지 1/3 Panasonic Lumix DMC-G7 Mainboard Replacement: 3 단계, 이미지 2/3 Panasonic Lumix DMC-G7 Mainboard Replacement: 3 단계, 이미지 3/3
    • Remove the four indicated 6.0mm long black screws using a PH0 Phillips screwdriver.

    • Three of the screws are located on the sides of the chassis and one is directly underneath the battery compartment lid.

  4. Panasonic Lumix DMC-G7 Mainboard Replacement: 4 단계, 이미지 1/3 Panasonic Lumix DMC-G7 Mainboard Replacement: 4 단계, 이미지 2/3 Panasonic Lumix DMC-G7 Mainboard Replacement: 4 단계, 이미지 3/3
    • Remove the viewfinder eye cup by pulling up and out from the bottom to separate the locking clips from the camera.

    • Do not flex the eye cup too aggressively as it may lose its shape.

    • Remove the two indicated silver 3.5mm long screws adjacent to the viewfinder screen using a PH0 Phillips screwdriver.

  5. Panasonic Lumix DMC-G7 Mainboard Replacement: 5 단계, 이미지 1/2 Panasonic Lumix DMC-G7 Mainboard Replacement: 5 단계, 이미지 2/2
    • Use an iFixit opening tool (or similarly long and thin object) to insert into the gap between the two camera halves and pry the camera apart from the top.

  6. Panasonic Lumix DMC-G7 Mainboard Replacement: 6 단계, 이미지 1/3 Panasonic Lumix DMC-G7 Mainboard Replacement: 6 단계, 이미지 2/3 Panasonic Lumix DMC-G7 Mainboard Replacement: 6 단계, 이미지 3/3
    • Remove the two indicated ribbon cables before separating the two halves of the camera.

    • Using a flat object, pry open the black tabs above the ribbon cable connectors by gently pulling away from the motherboard.

    • An opening pick is recommended, but any equally small and flat object will work.

    • Ribbon cables are fragile, so put as little stress on them as possible.

  7. Panasonic Lumix DMC-G7 Mainboard Replacement: 7 단계, 이미지 1/2 Panasonic Lumix DMC-G7 Mainboard Replacement: 7 단계, 이미지 2/2
    • Remove the 4 indicated flex cables from top of mainboard

    • Remove the indicated small flex cable from top of mainboard.

    • The small flex cable does not have a lock: simply pull to disconnect it.

  8. Panasonic Lumix DMC-G7 Mainboard Replacement: 8 단계, 이미지 1/2 Panasonic Lumix DMC-G7 Mainboard Replacement: 8 단계, 이미지 2/2
    • Remove the 3 indicated flex cables from the bottom of the mainboard.

  9. Panasonic Lumix DMC-G7 Mainboard Replacement: 9 단계, 이미지 1/3 Panasonic Lumix DMC-G7 Mainboard Replacement: 9 단계, 이미지 2/3 Panasonic Lumix DMC-G7 Mainboard Replacement: 9 단계, 이미지 3/3
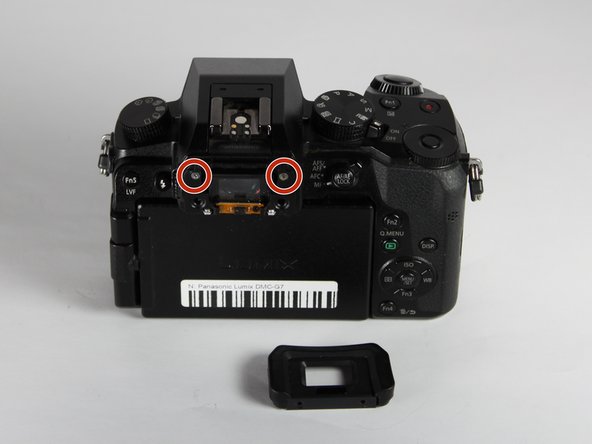
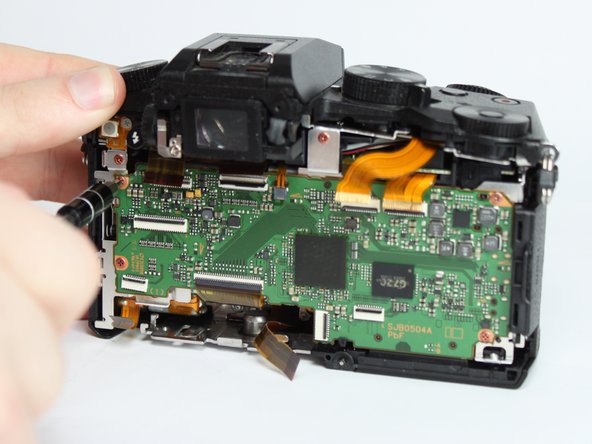
    • Remove the 4 indicated red 3.0mm long screws from the corners of mainboard using a Phillips PH0 screwdriver.

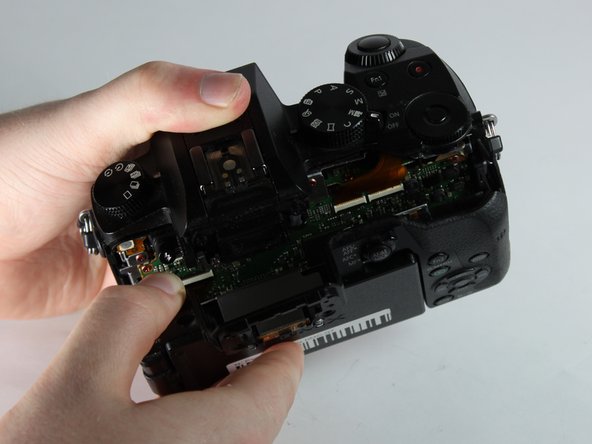
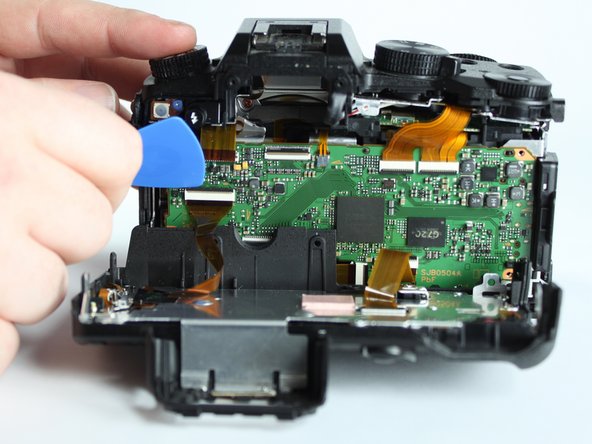
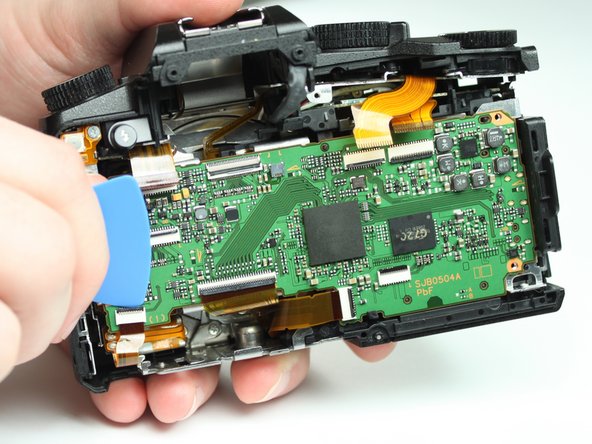
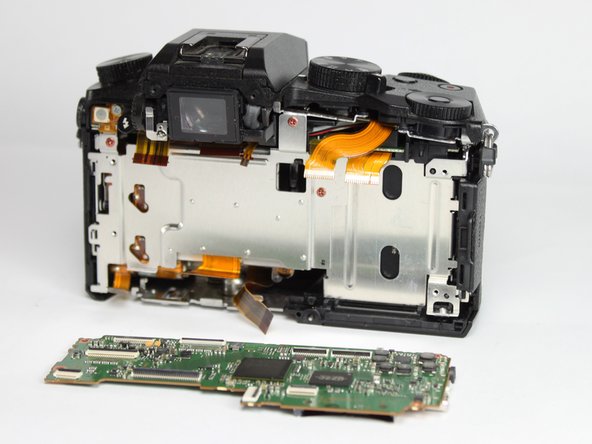
    • With the eyepiece facing away from you, pull up on the main PCB from the left side and then pull it away from the chassis.

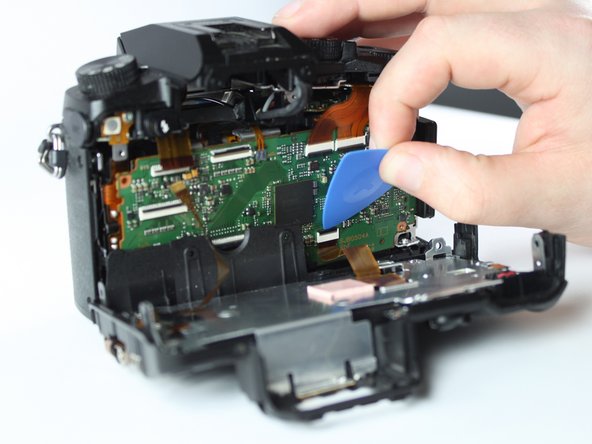
    • There is a plastic locking tab on the bottom of the camera that holds the mainboard PCB.

    • A replacement mainboard can be purchased from AliExpress here

결론

To reassemble your device, follow these instructions in reverse order.

다른 한 분이 해당 안내서를 완성하였습니다.

Jared Lynn

회원 가입일: 04/03/19

448 평판

안내서 2개 작성하였습니다

댓글 2개

Hi I had an issue with my camera’s SD card slot and I disassembled to look why it wasn’t reading SD cards and found an issue and I think I fixed it, but when I assembled it it won’t turn on now. Do you have any advice on figuring out what is causing it to not turn on? I checked all flex cables and they seem to be connected. Any help is appreciated!

Pavel Boiko - 답글

Im having the same issue. Did you fix it?

William granada -

댓글 쓰기

조회 통계:

24 시간 전: 0

7일 전: 12

30일 전: 60

전체 시간: 3,314